2-4. Loop processing with group data
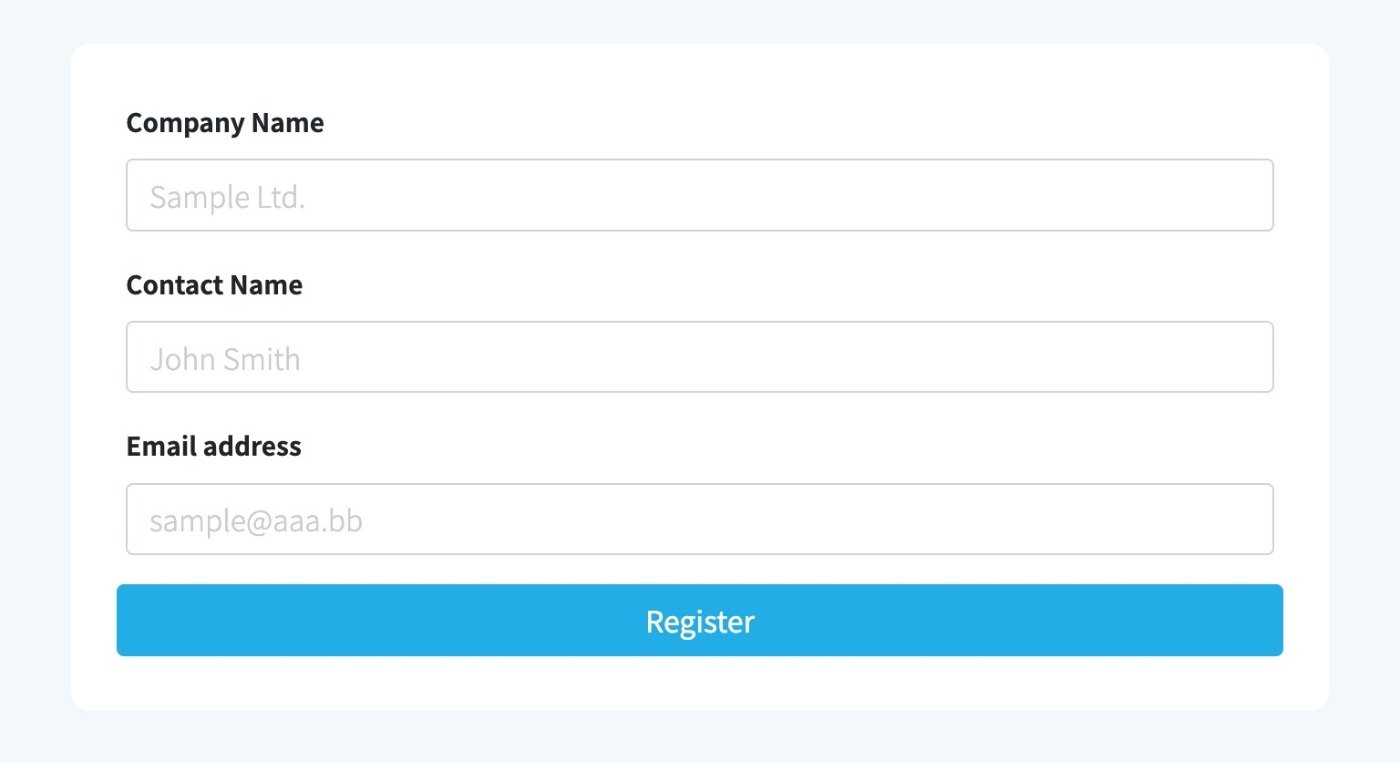
Sample pages for this tutorial
This section explains how to perform repetitive(loop) processing using the created group data.
*For basic operations of Cloud BOT, please refer to Basics - Chapter 1-1. Acquiring data from web pages (including an explanation of basic operations).
Create a BOT
1. Open the BOT editor and create group data
Open the BOT editor from the "Create BOT" button and create the following group data.
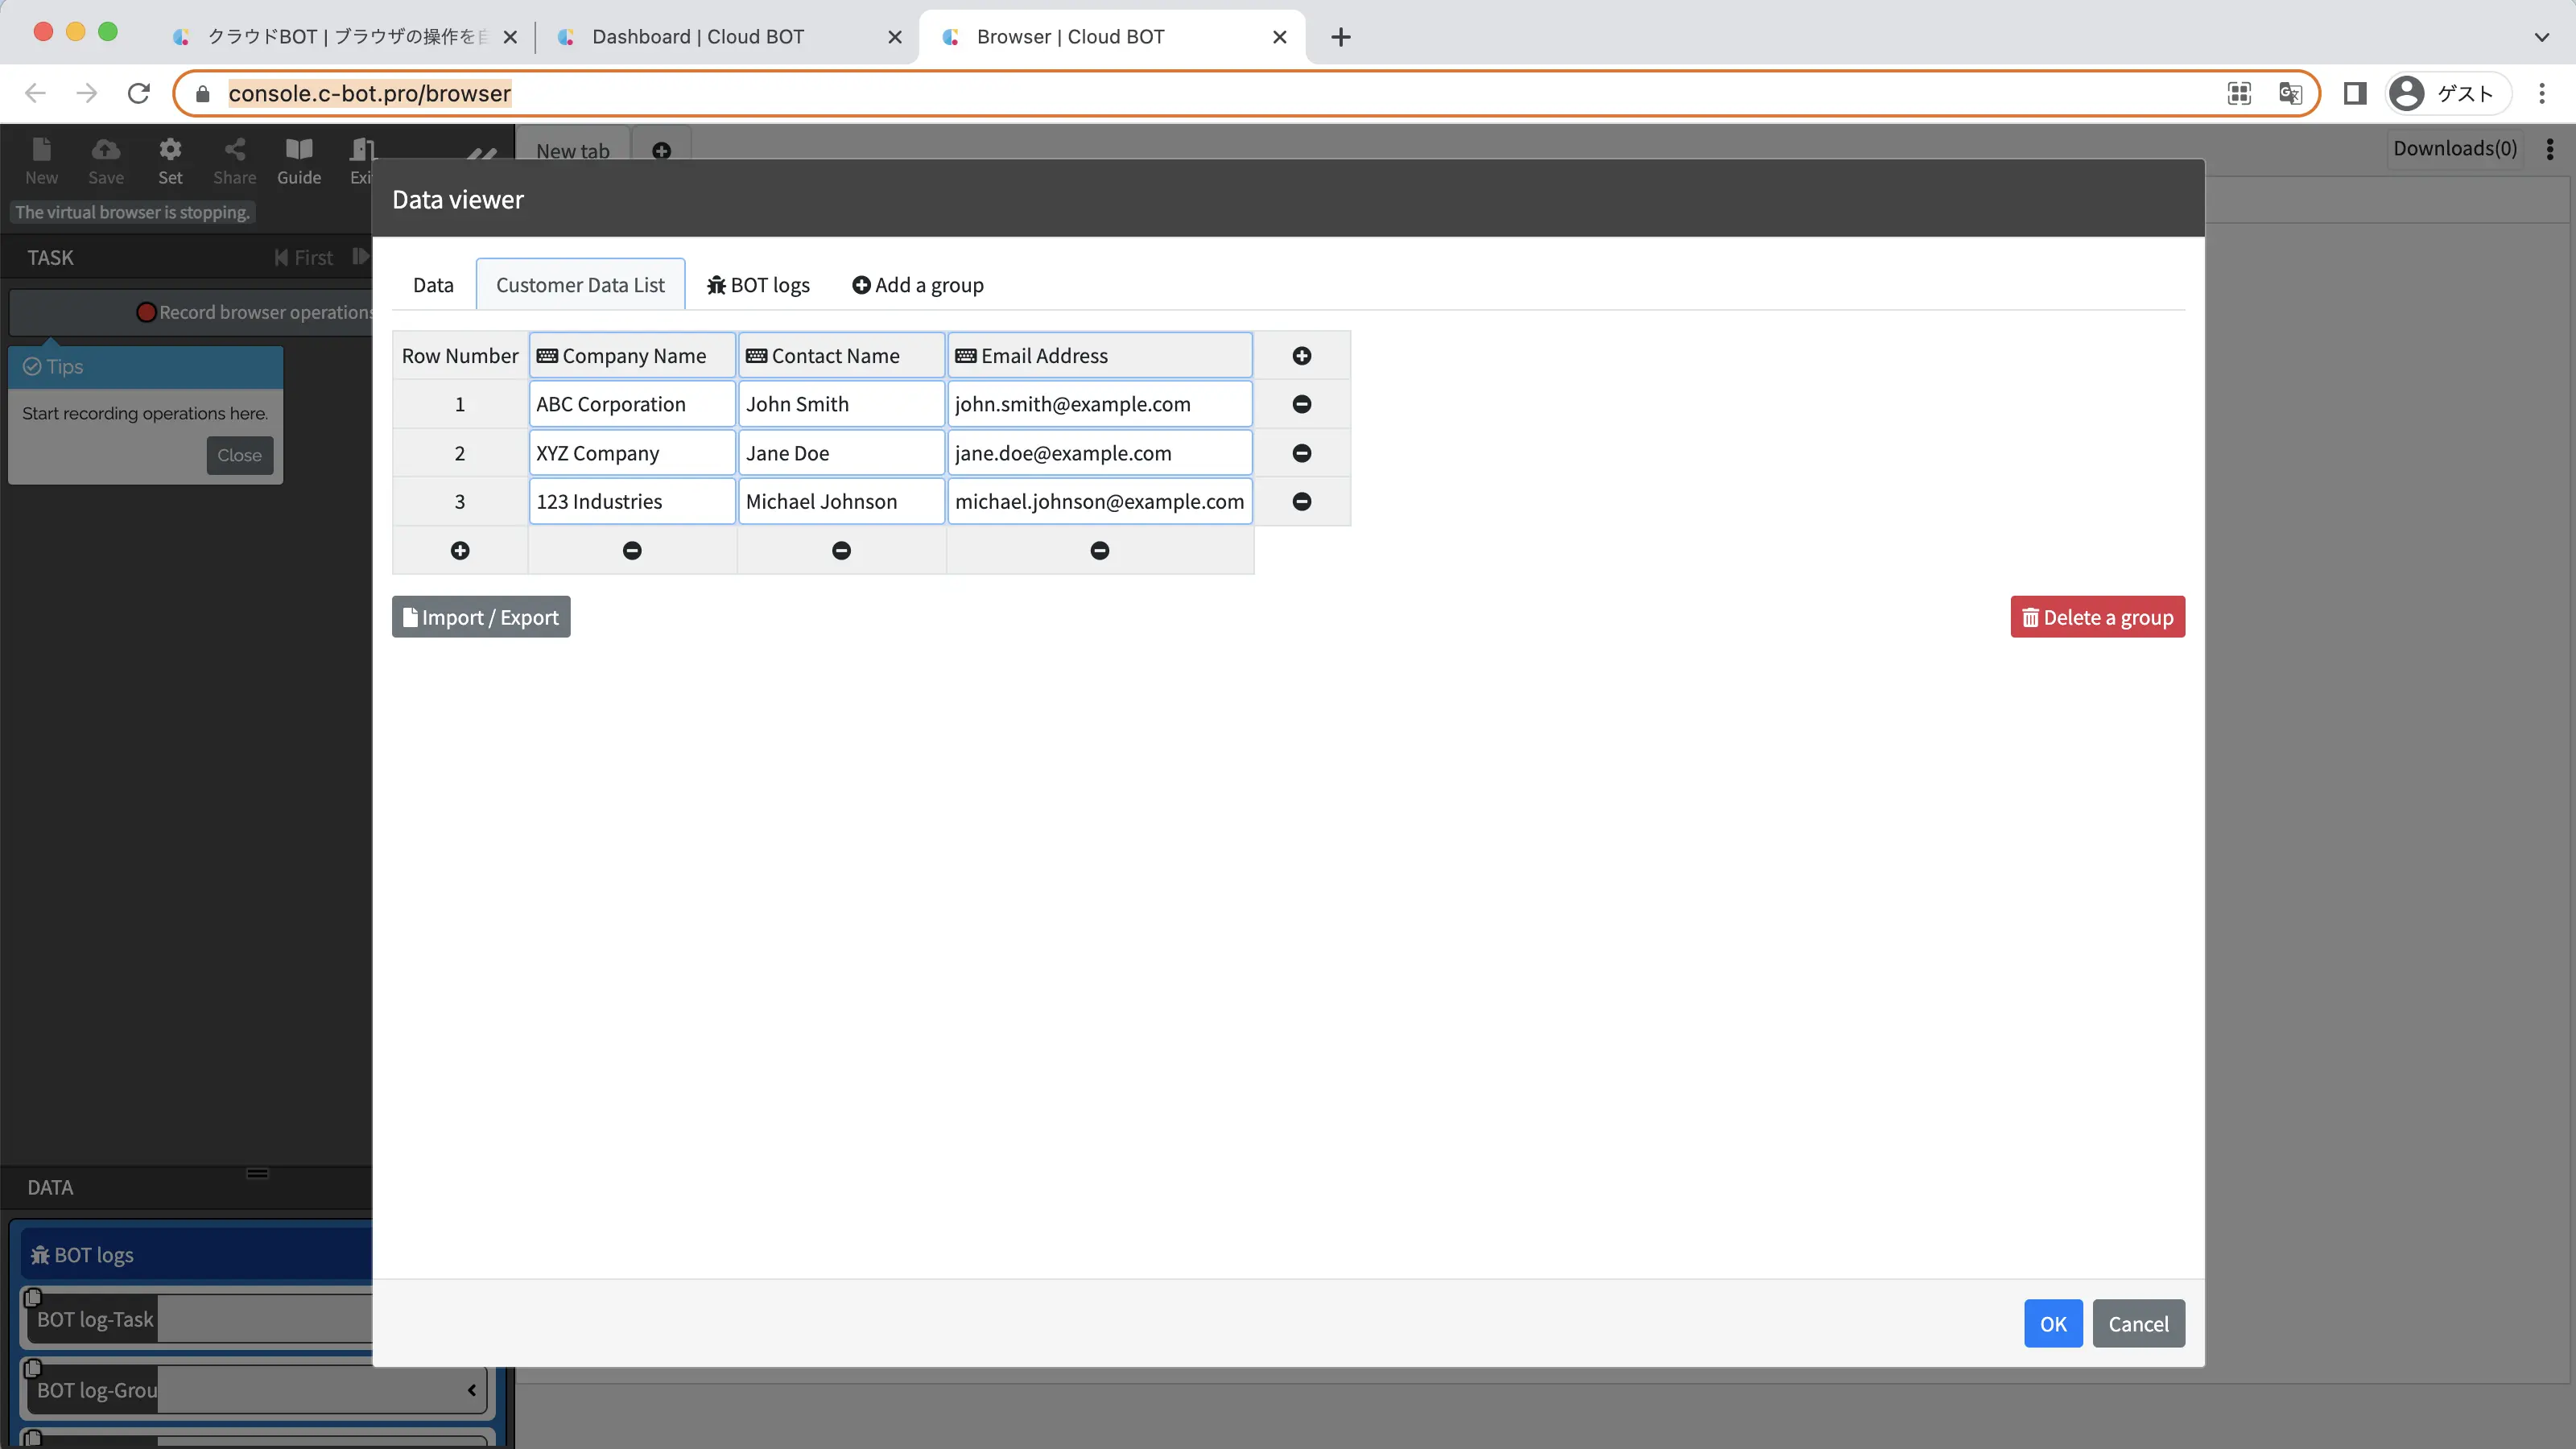
Group name:Customer Data List
Columns:
Data type: Text Data name: Company Name
Data type: Text Data name: Contact Name
Data type: Text Data Name: Email Address
Data:
Company Name:ABC Corporation
Contact Name:John Smith
Email address:john.smith@example.com
Company Name:XYZ Company
Contact Name:Jane Doe
Email address:jane.doe@example.com
Company Name:123 Industries
Contact Name:Michael Johnson
Email address:michael.johnson@example.com
Refer to "2-1. Creating group data from data viewer" for how to create group data.
2. Insert a group into the tasks
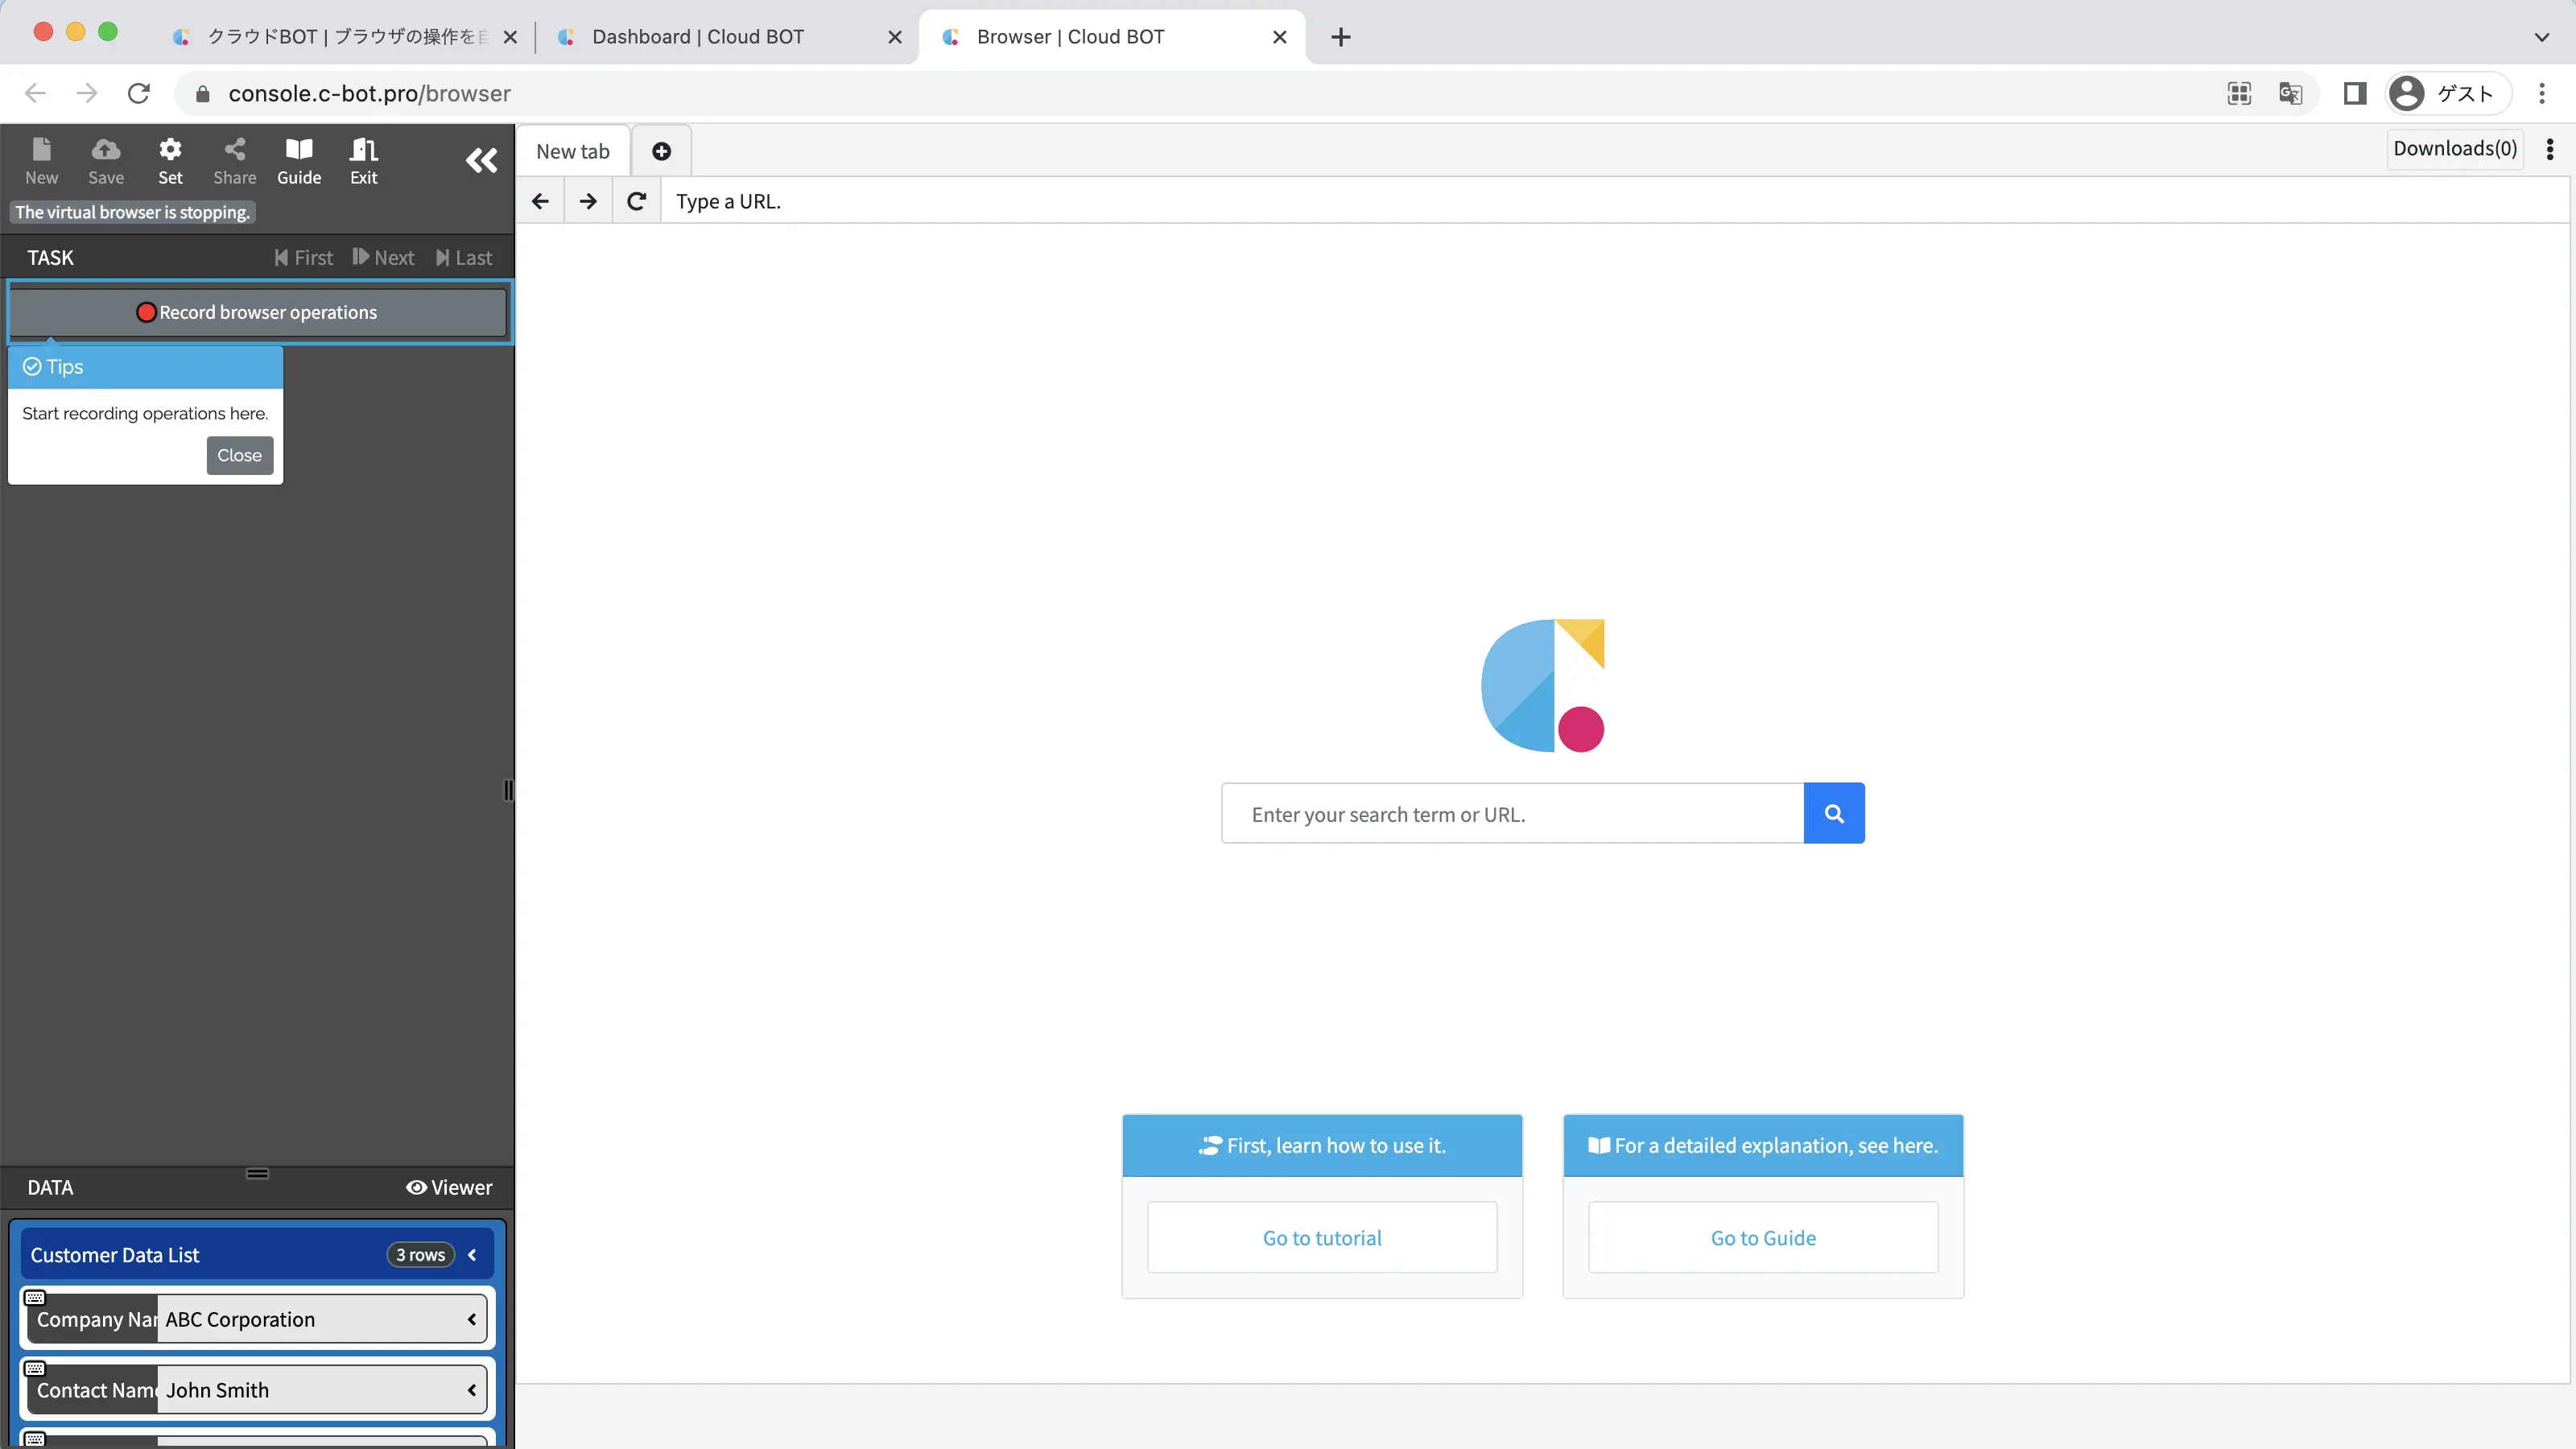
Click the "Record browser operations" button.
Click on "Customer Data List" in the "Data" menu at the bottom left of the screen.
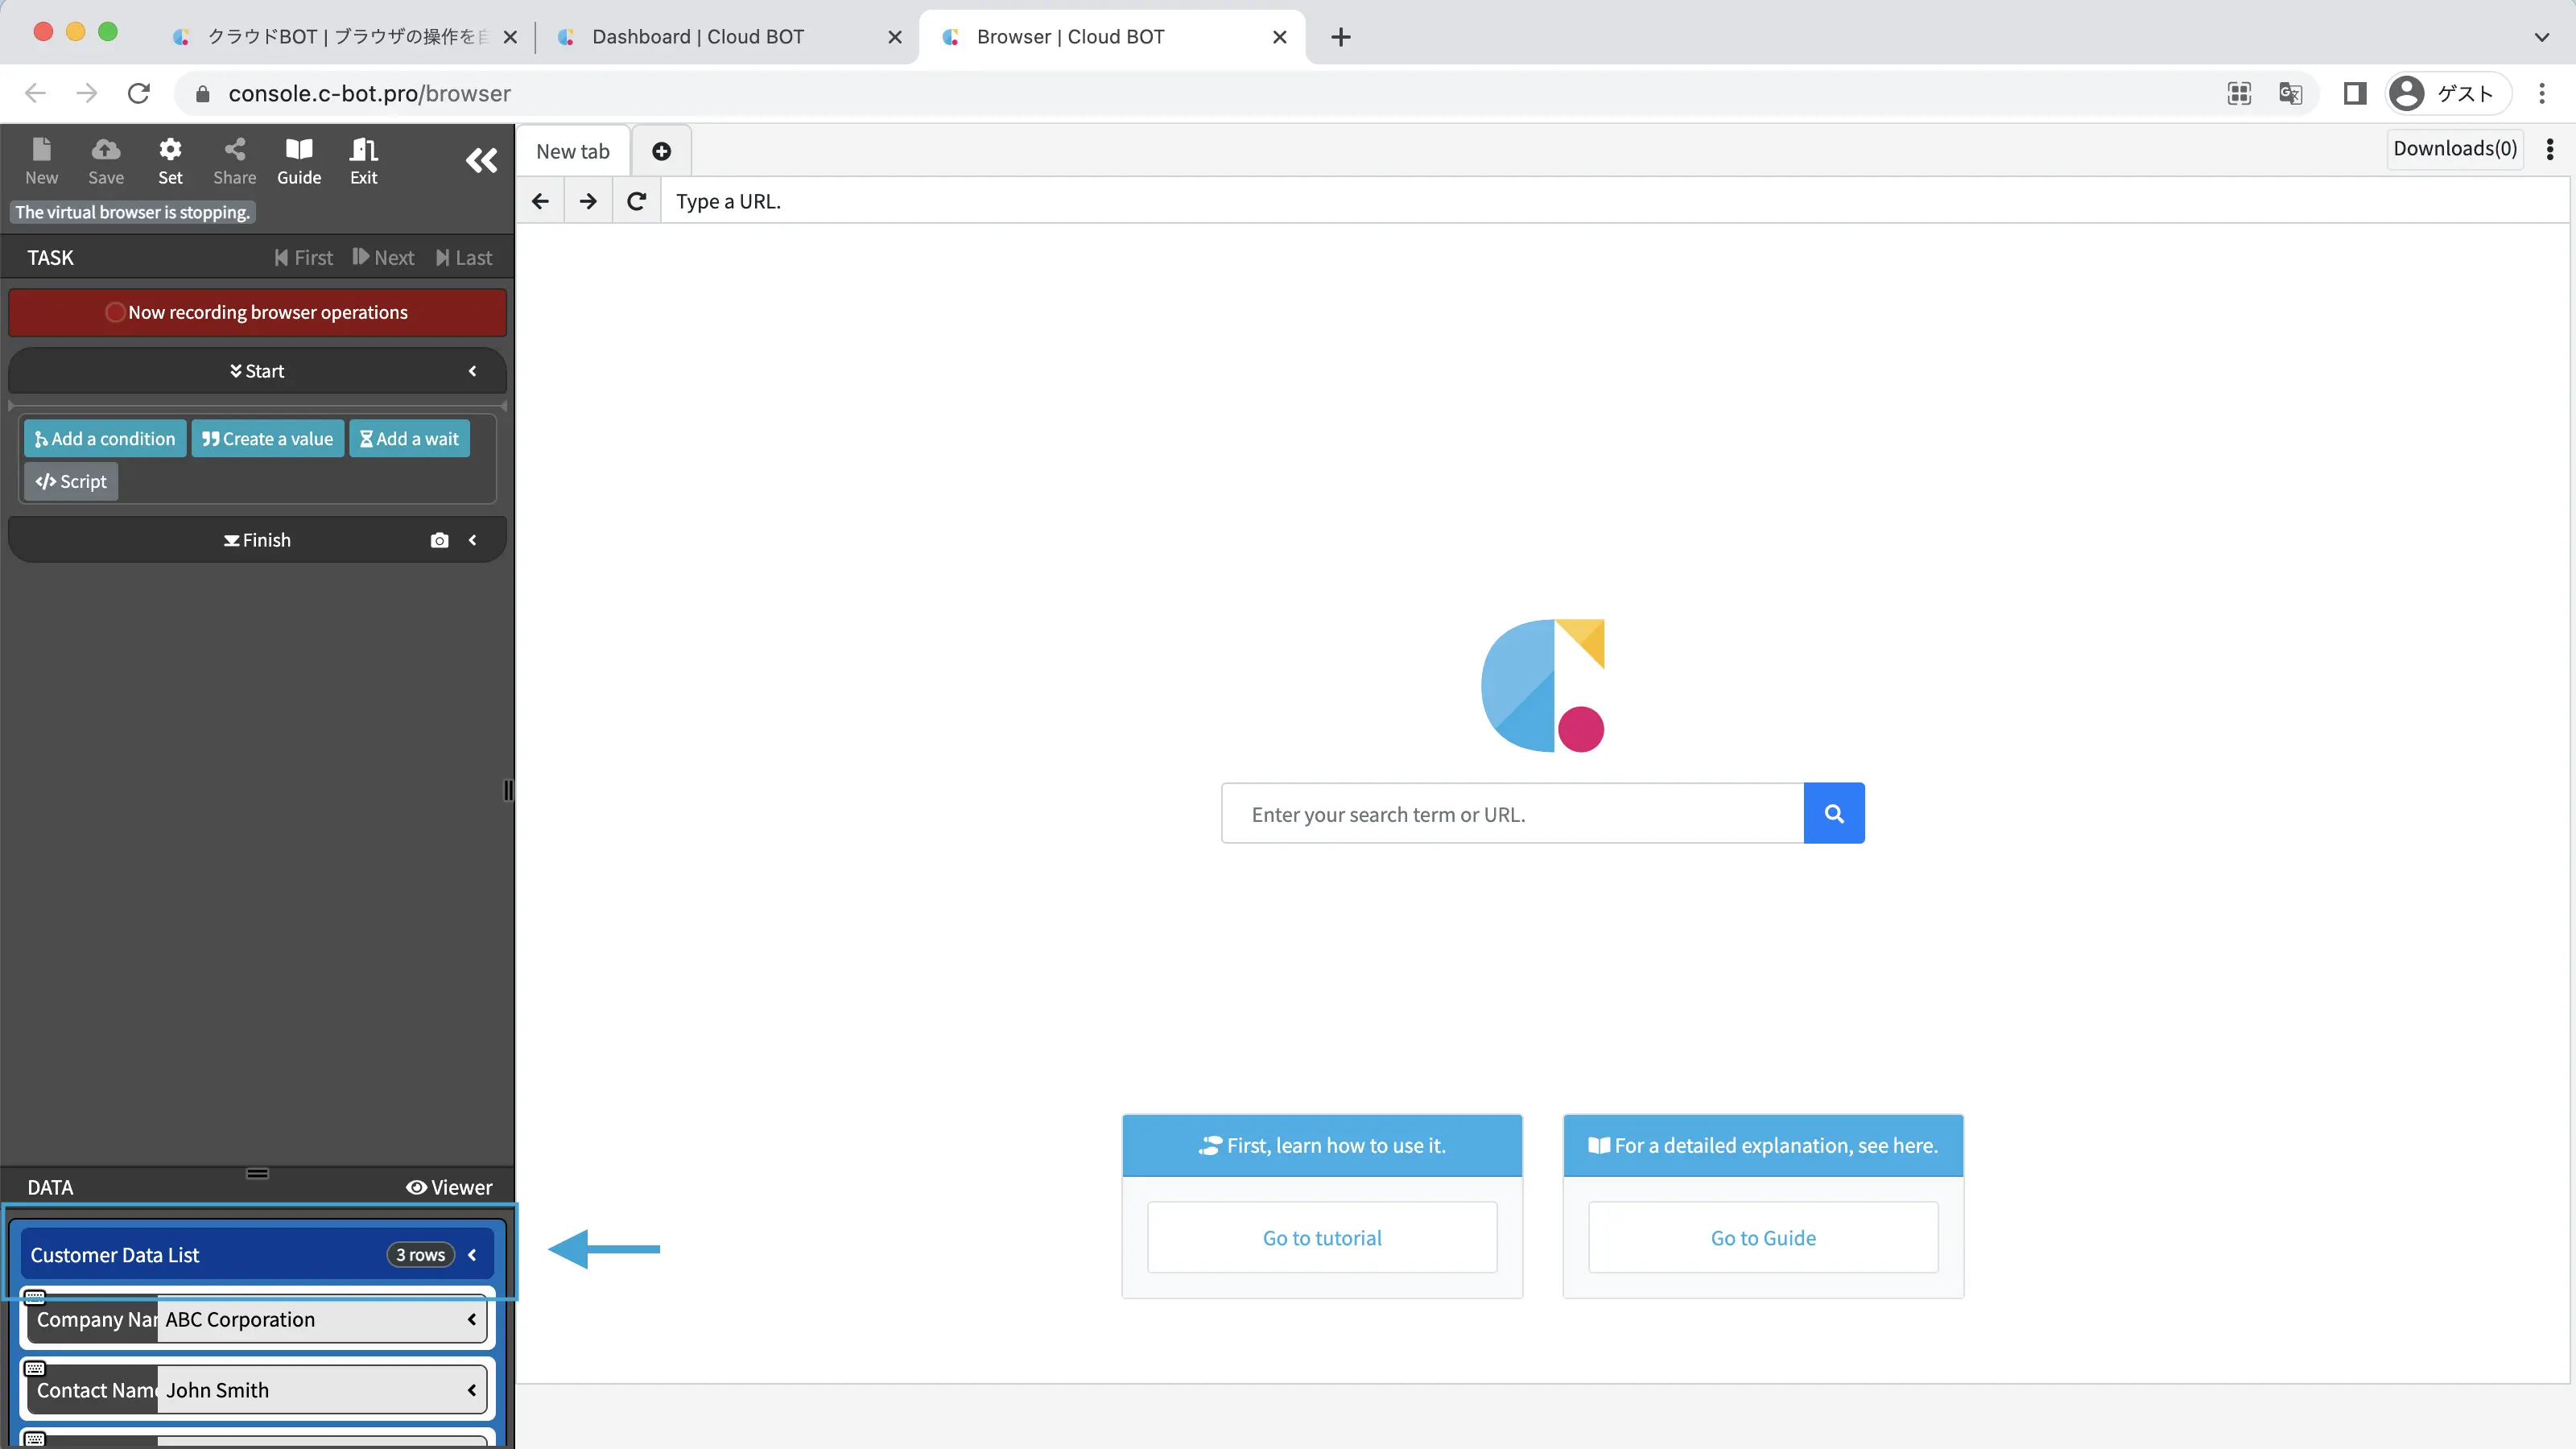
Click on the "Use a group" button.
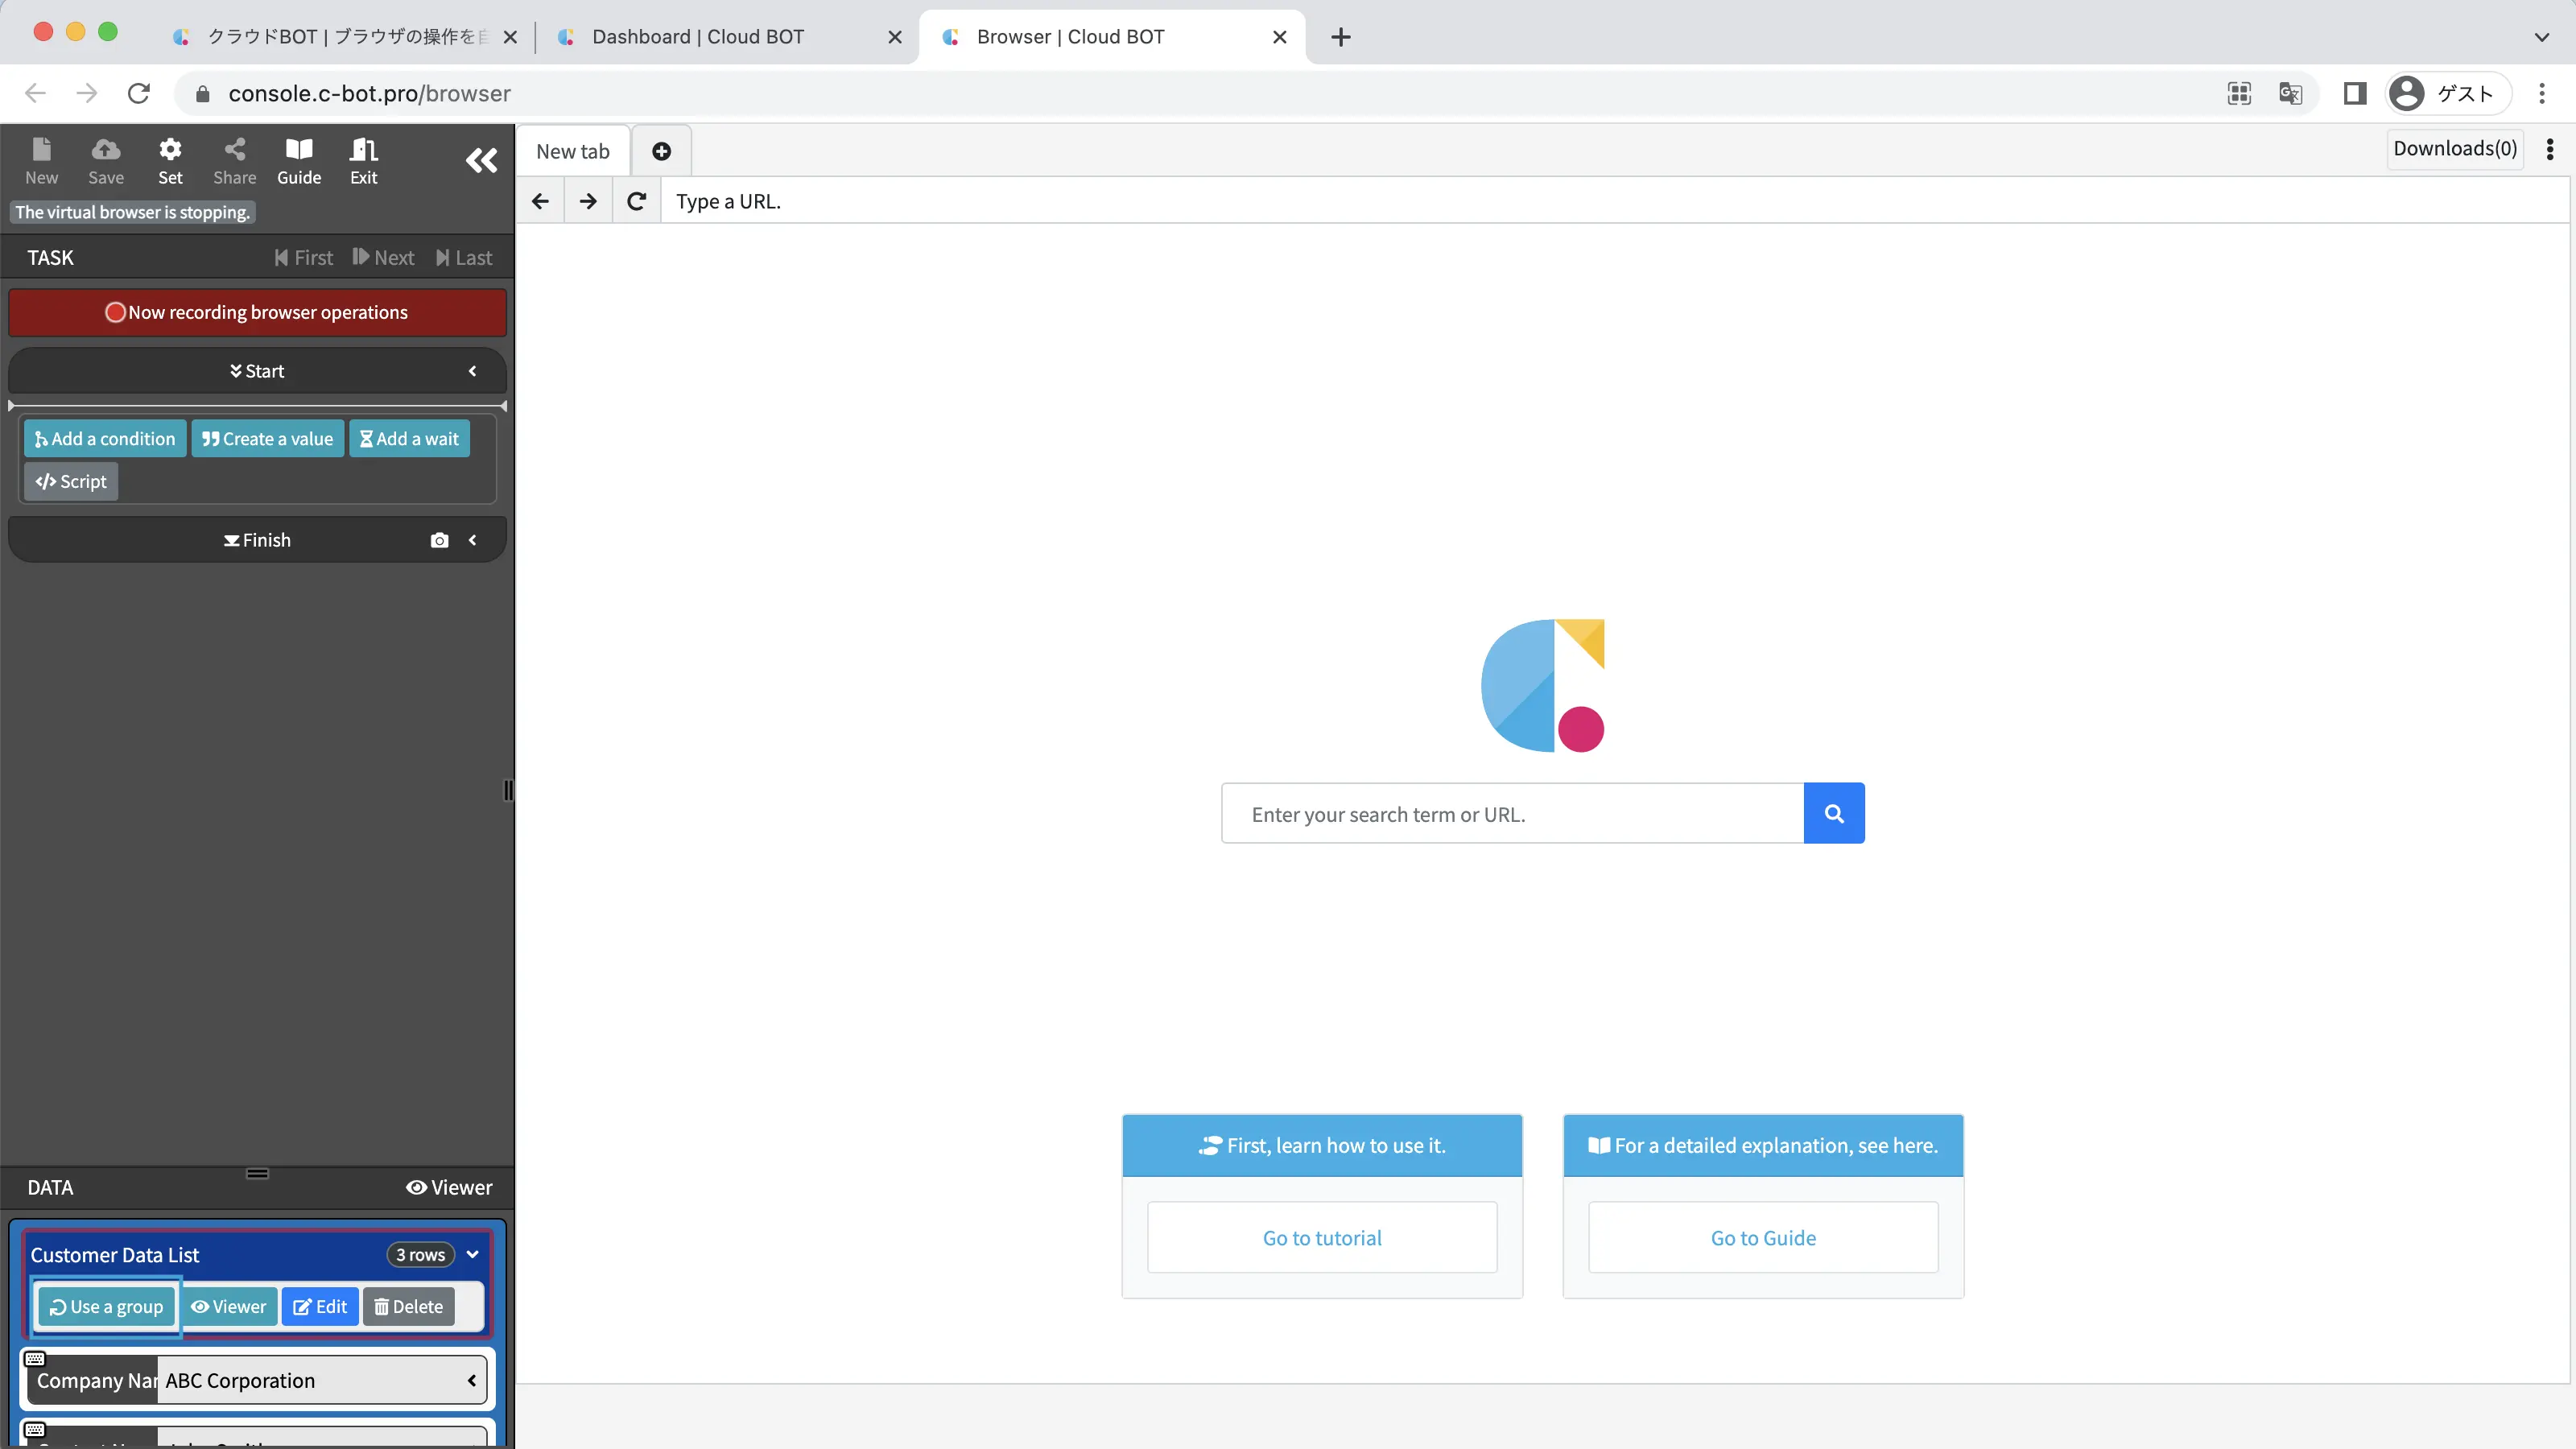
The "Customer Data List" is inserted into the task.
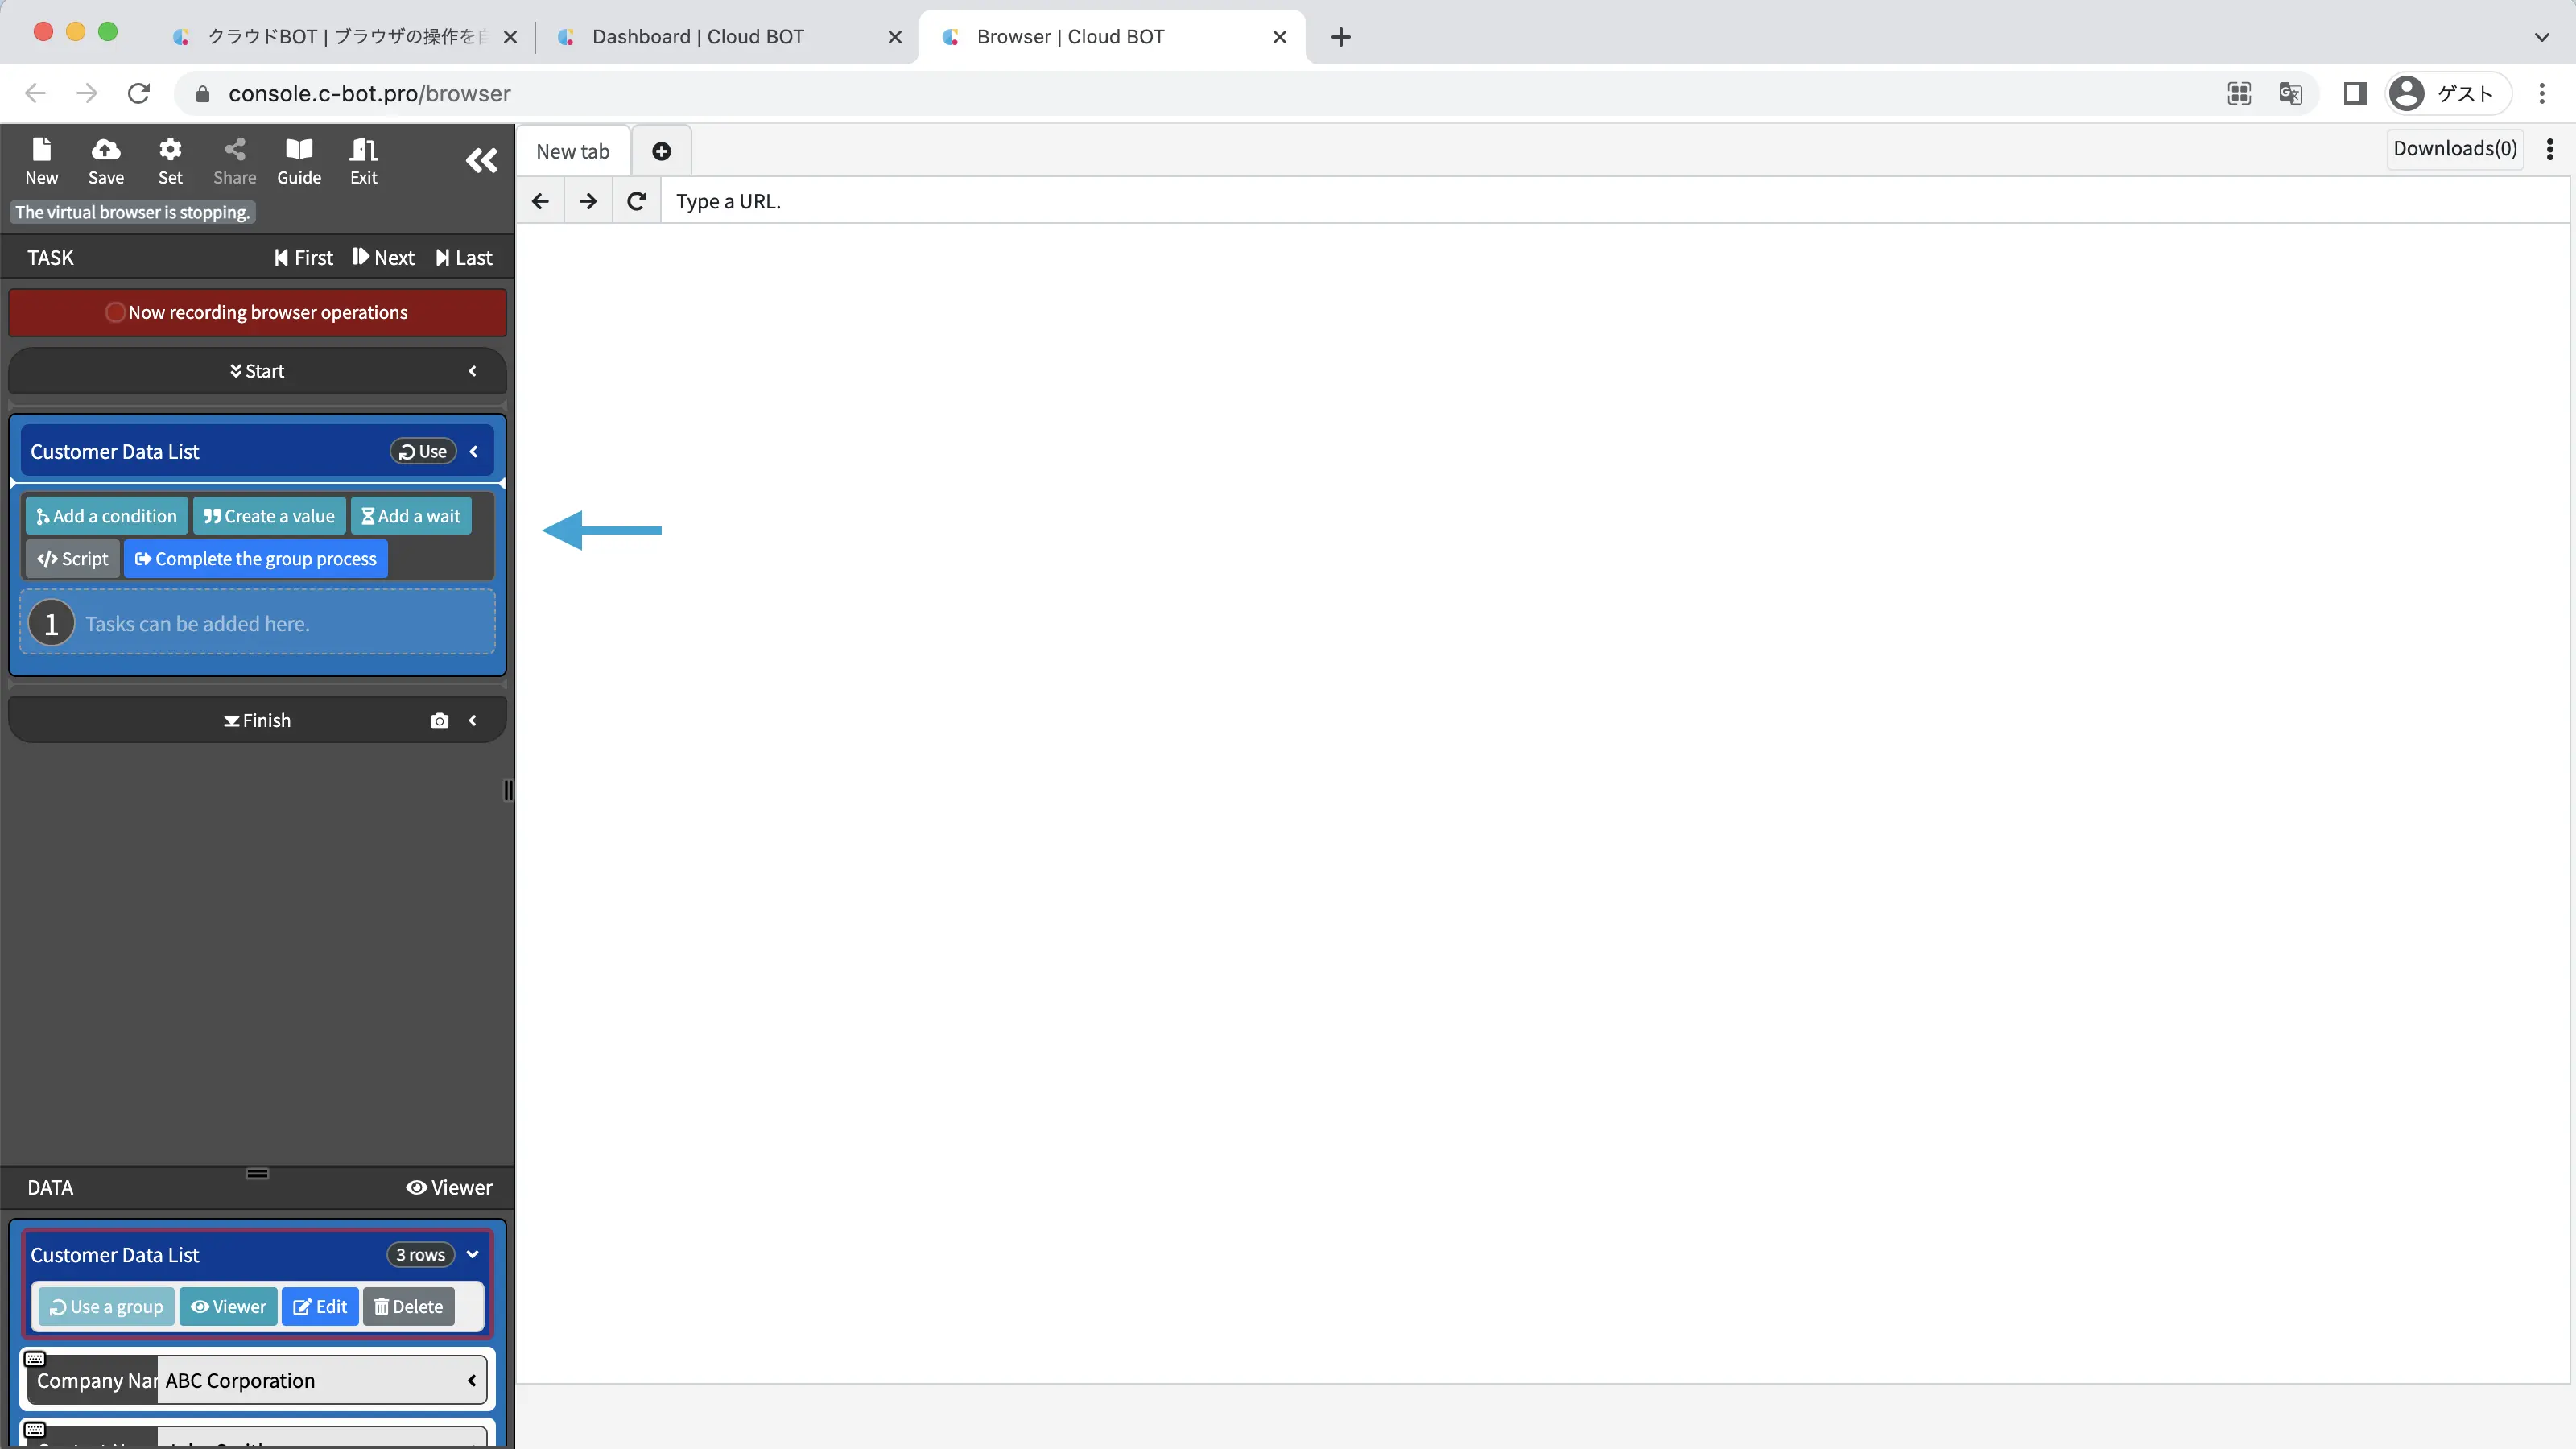
3. Record the operation to register data.
Click on the URL of the virtual browser and select "Input".

Enter the URL https://www.c-bot.pro/sample-en/basic/basic-2-04.html of the sample page-2 and click the blue check button.
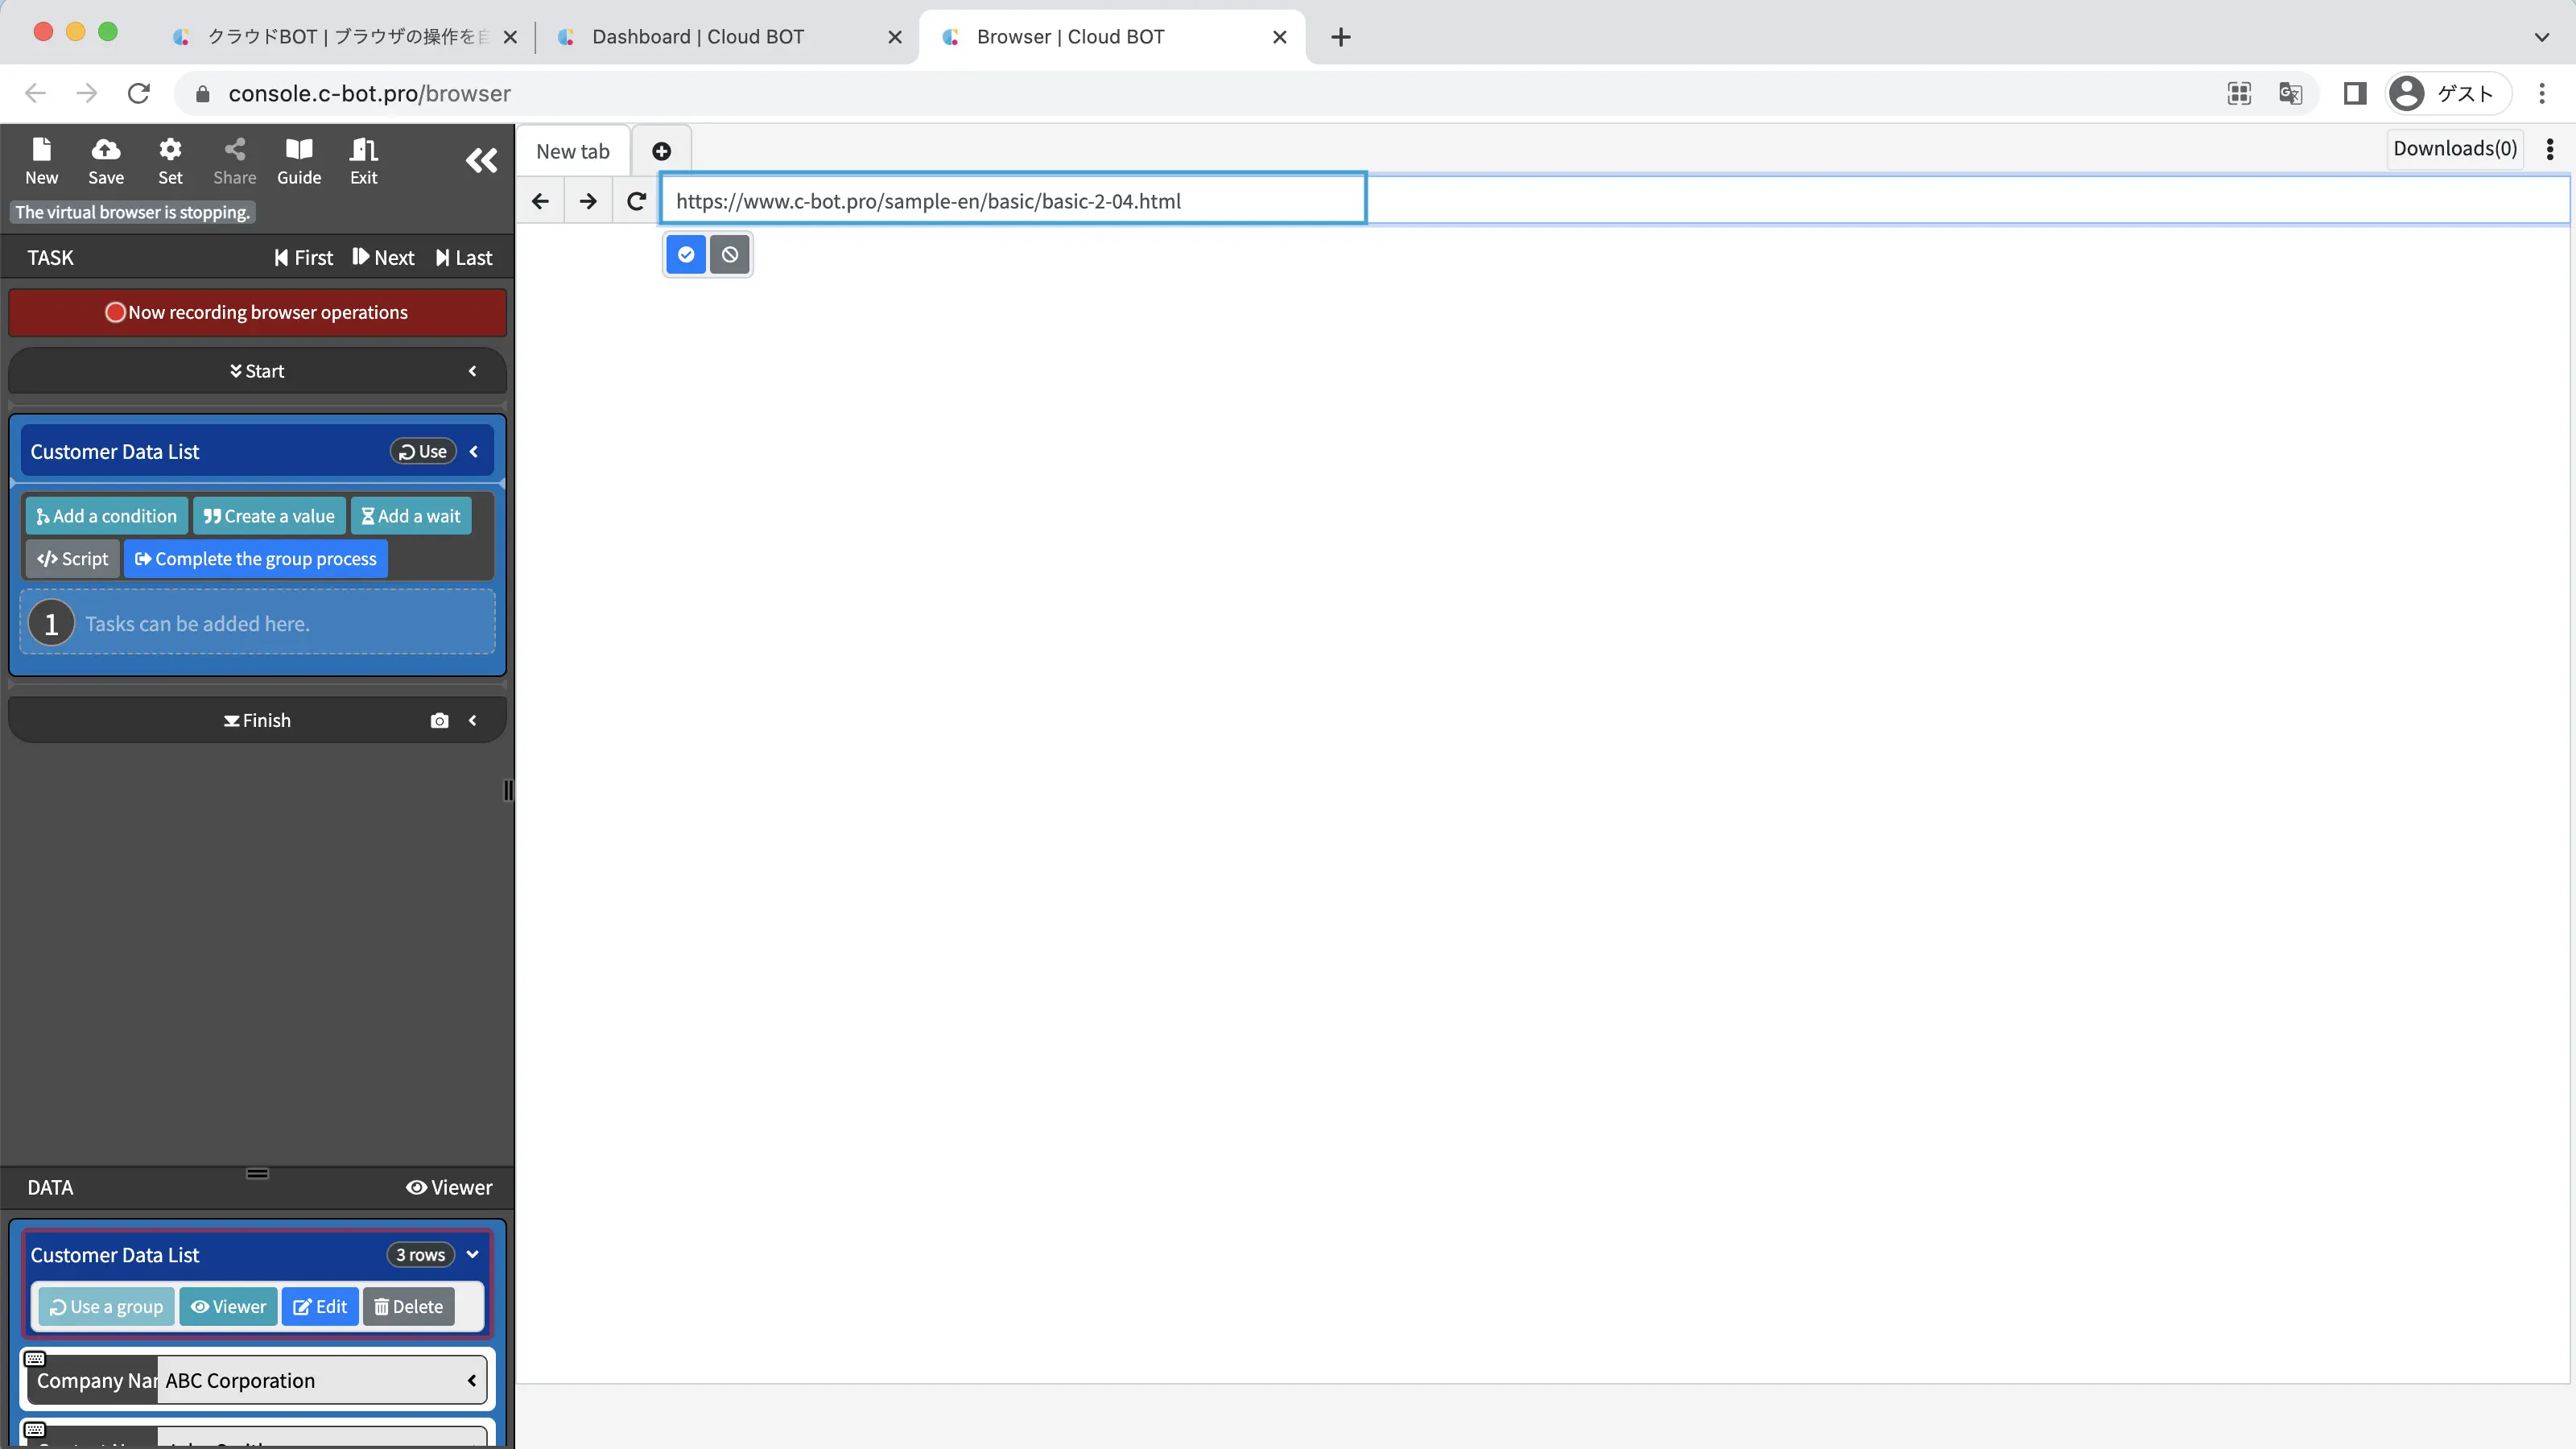
A task to access the URL is inserted in the "Customer Data List".
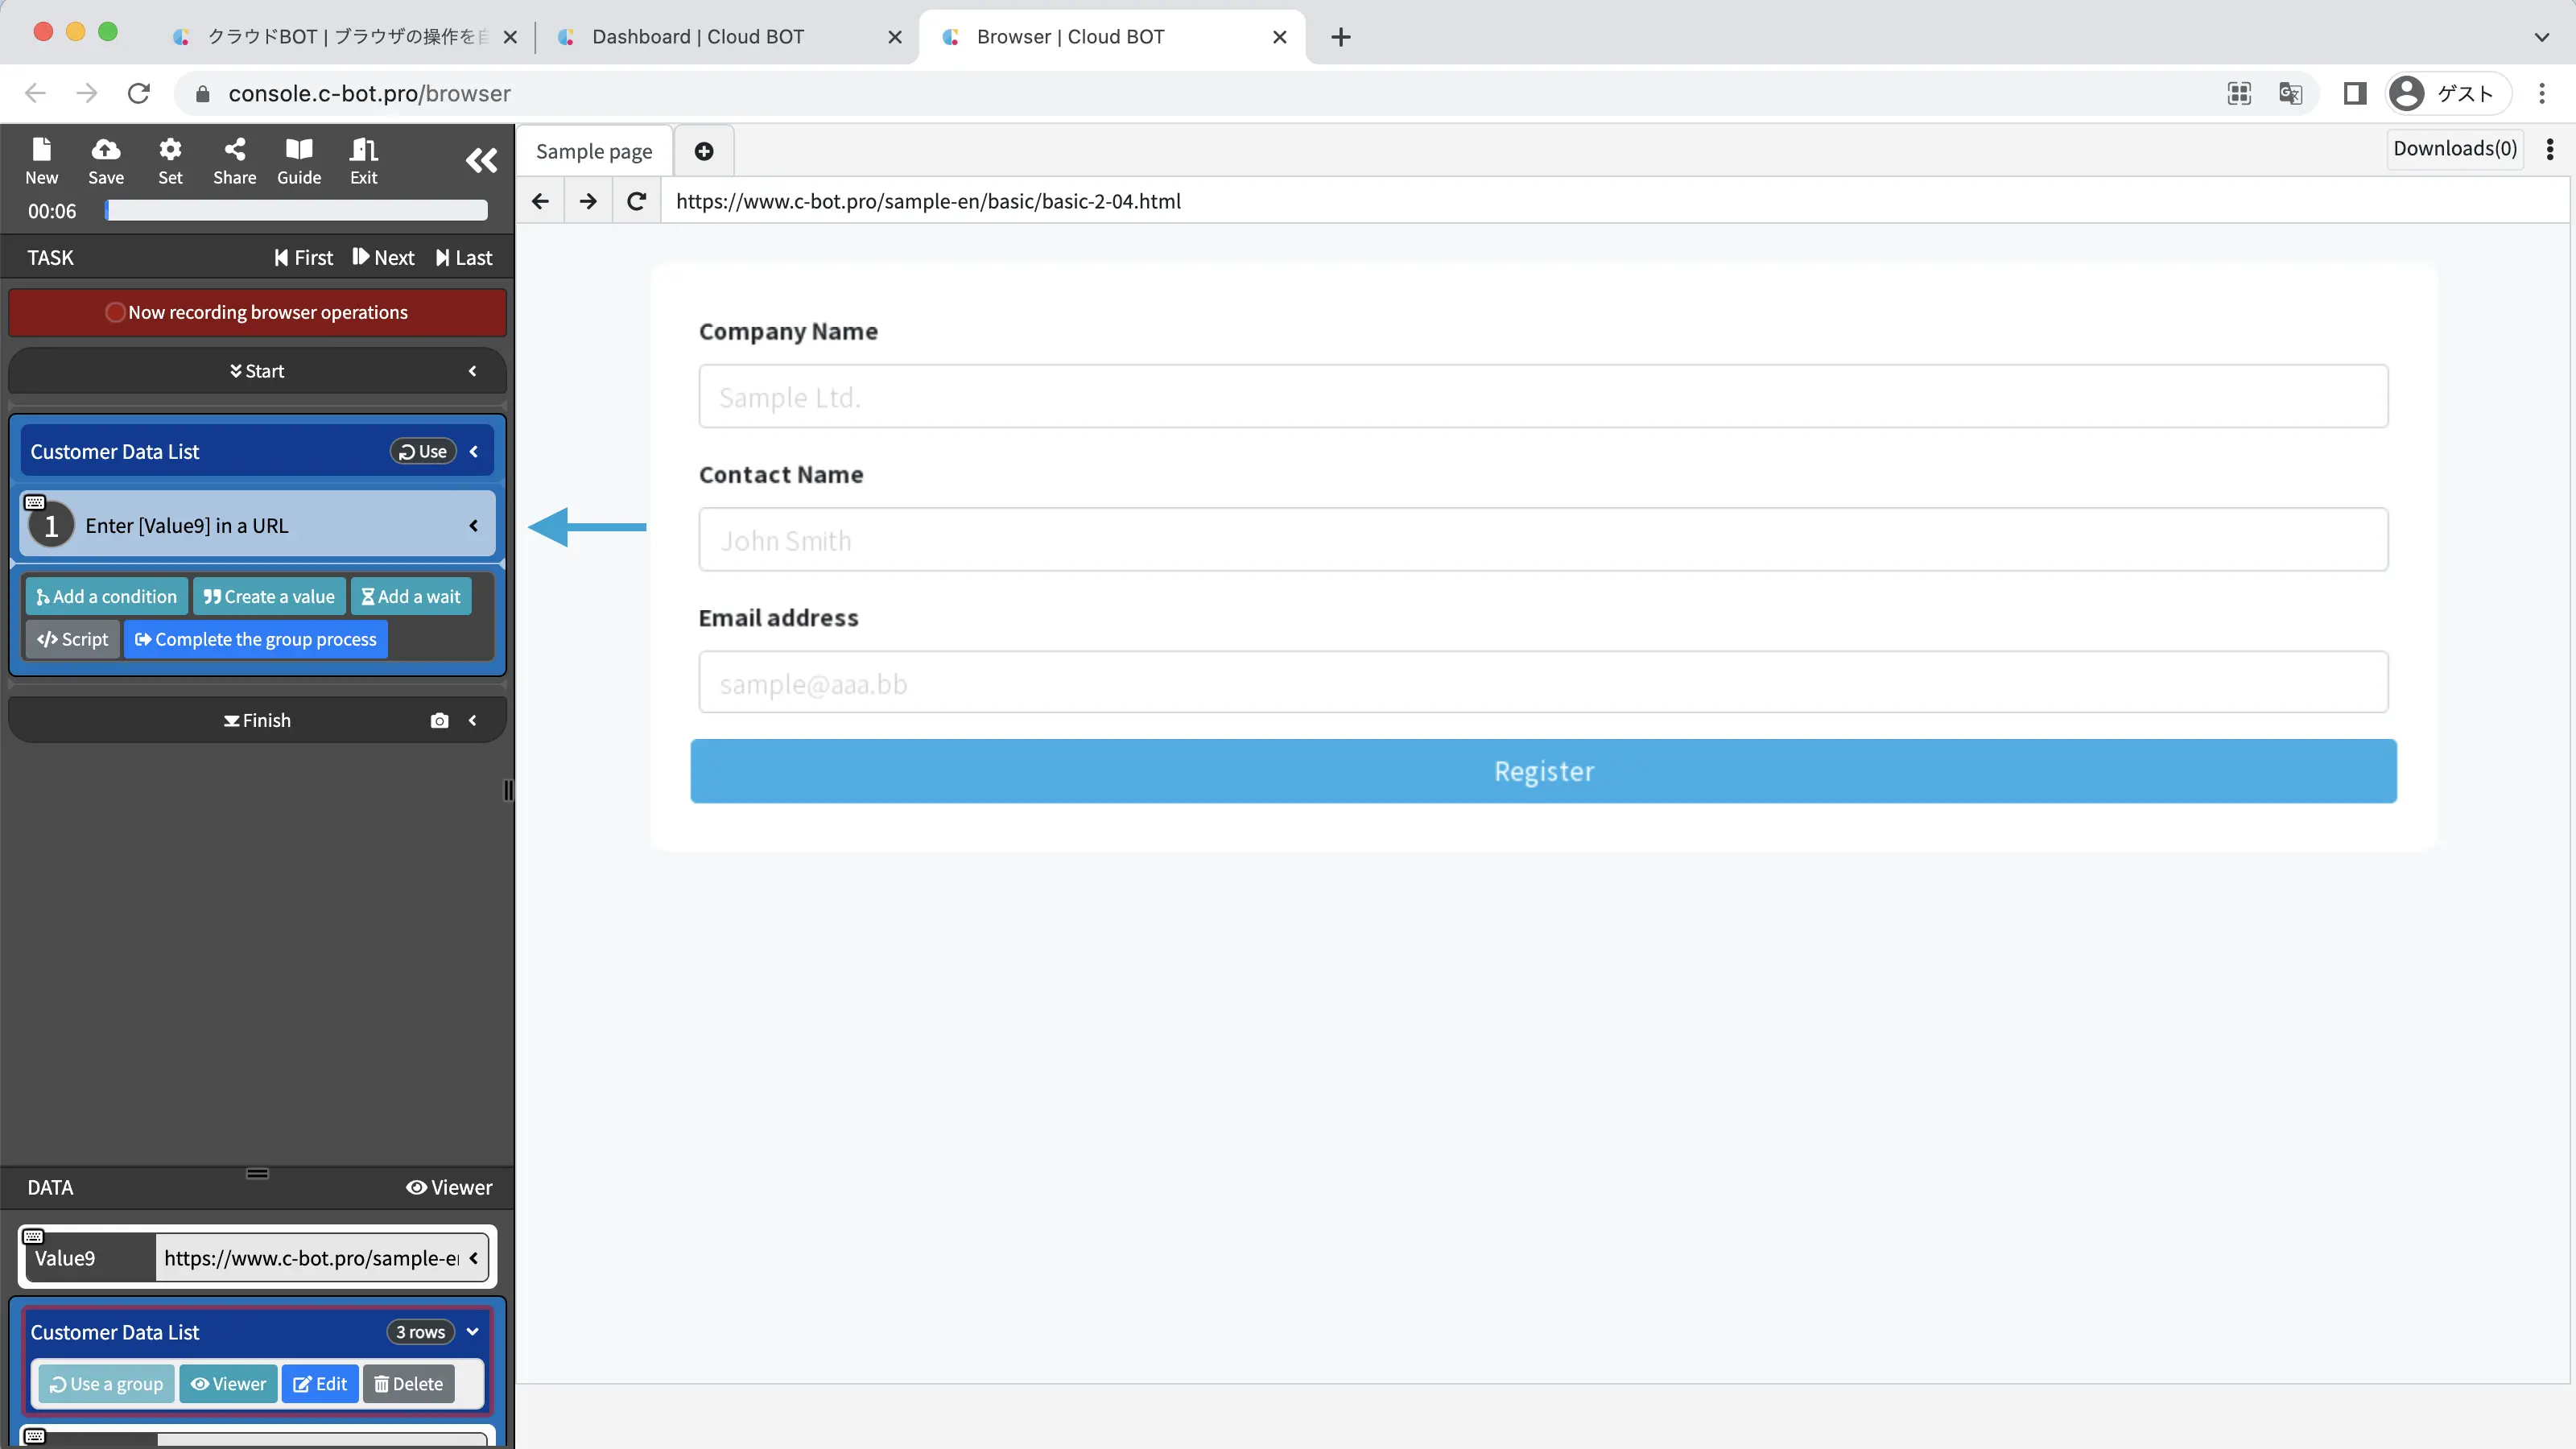
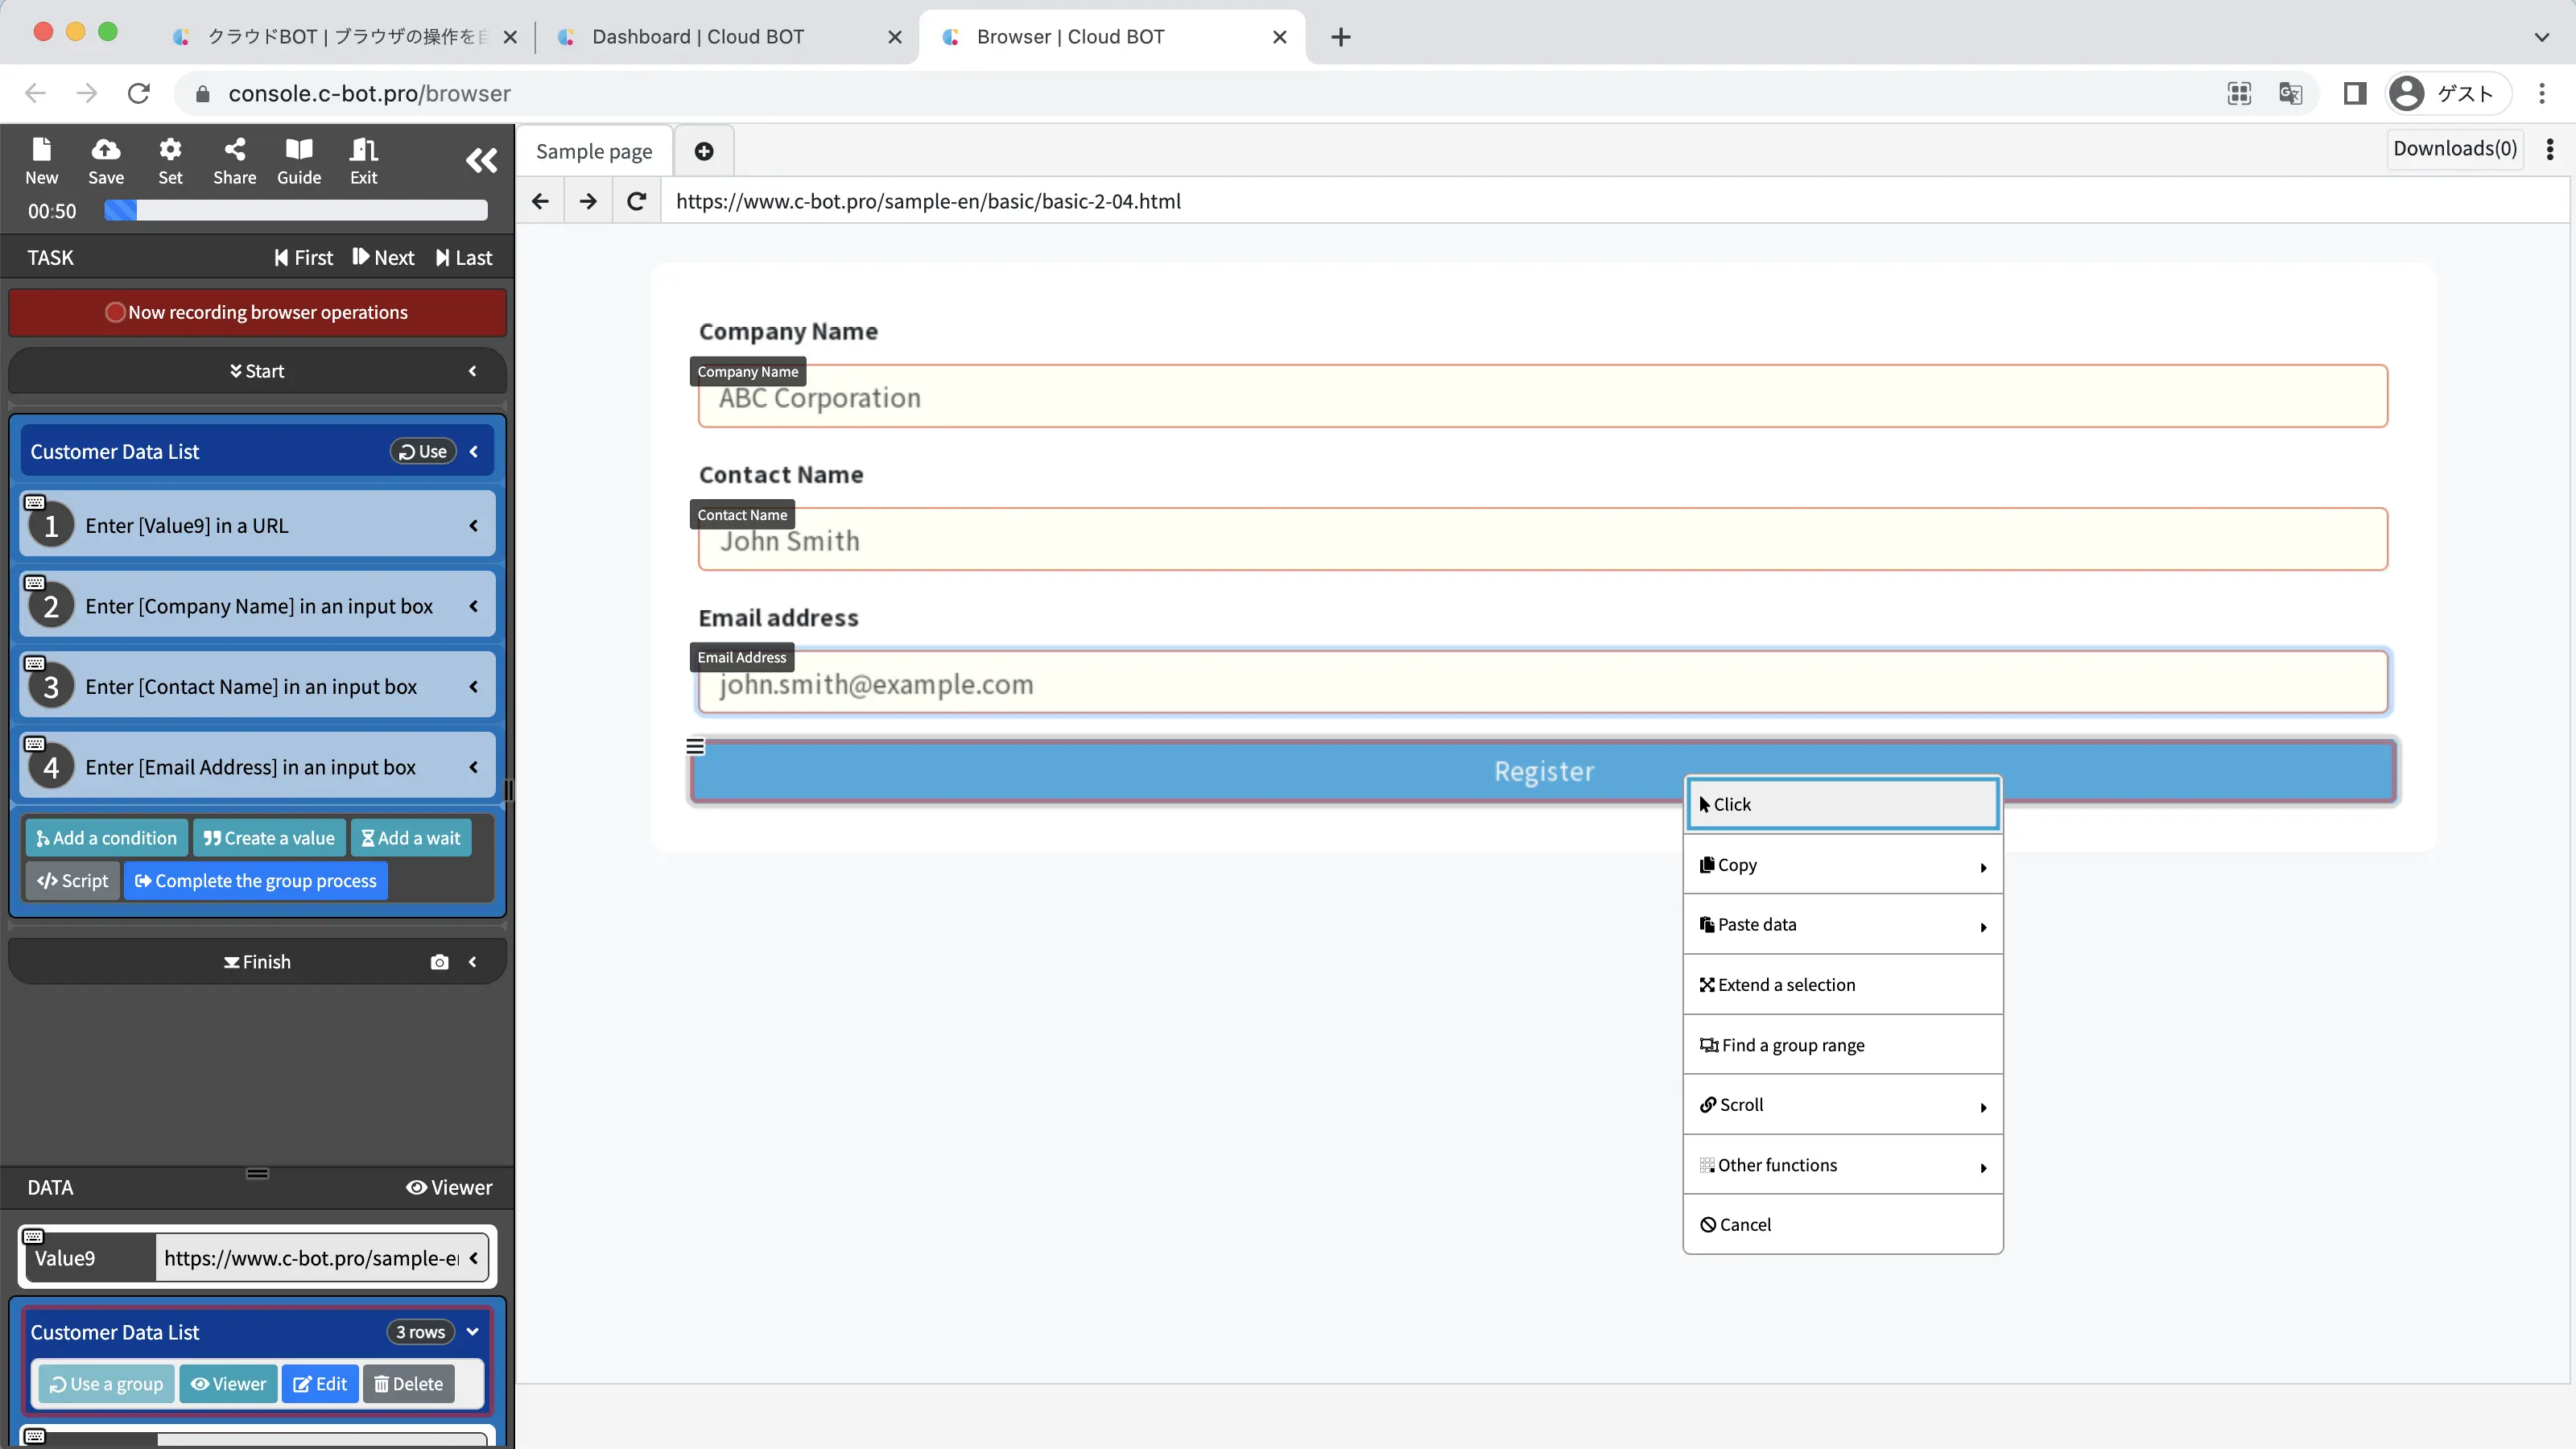
Click on the input form below the "Company Name" on the page, then click "Paste Data" > "Customer Data List" > "Company Name" from the operation menu.
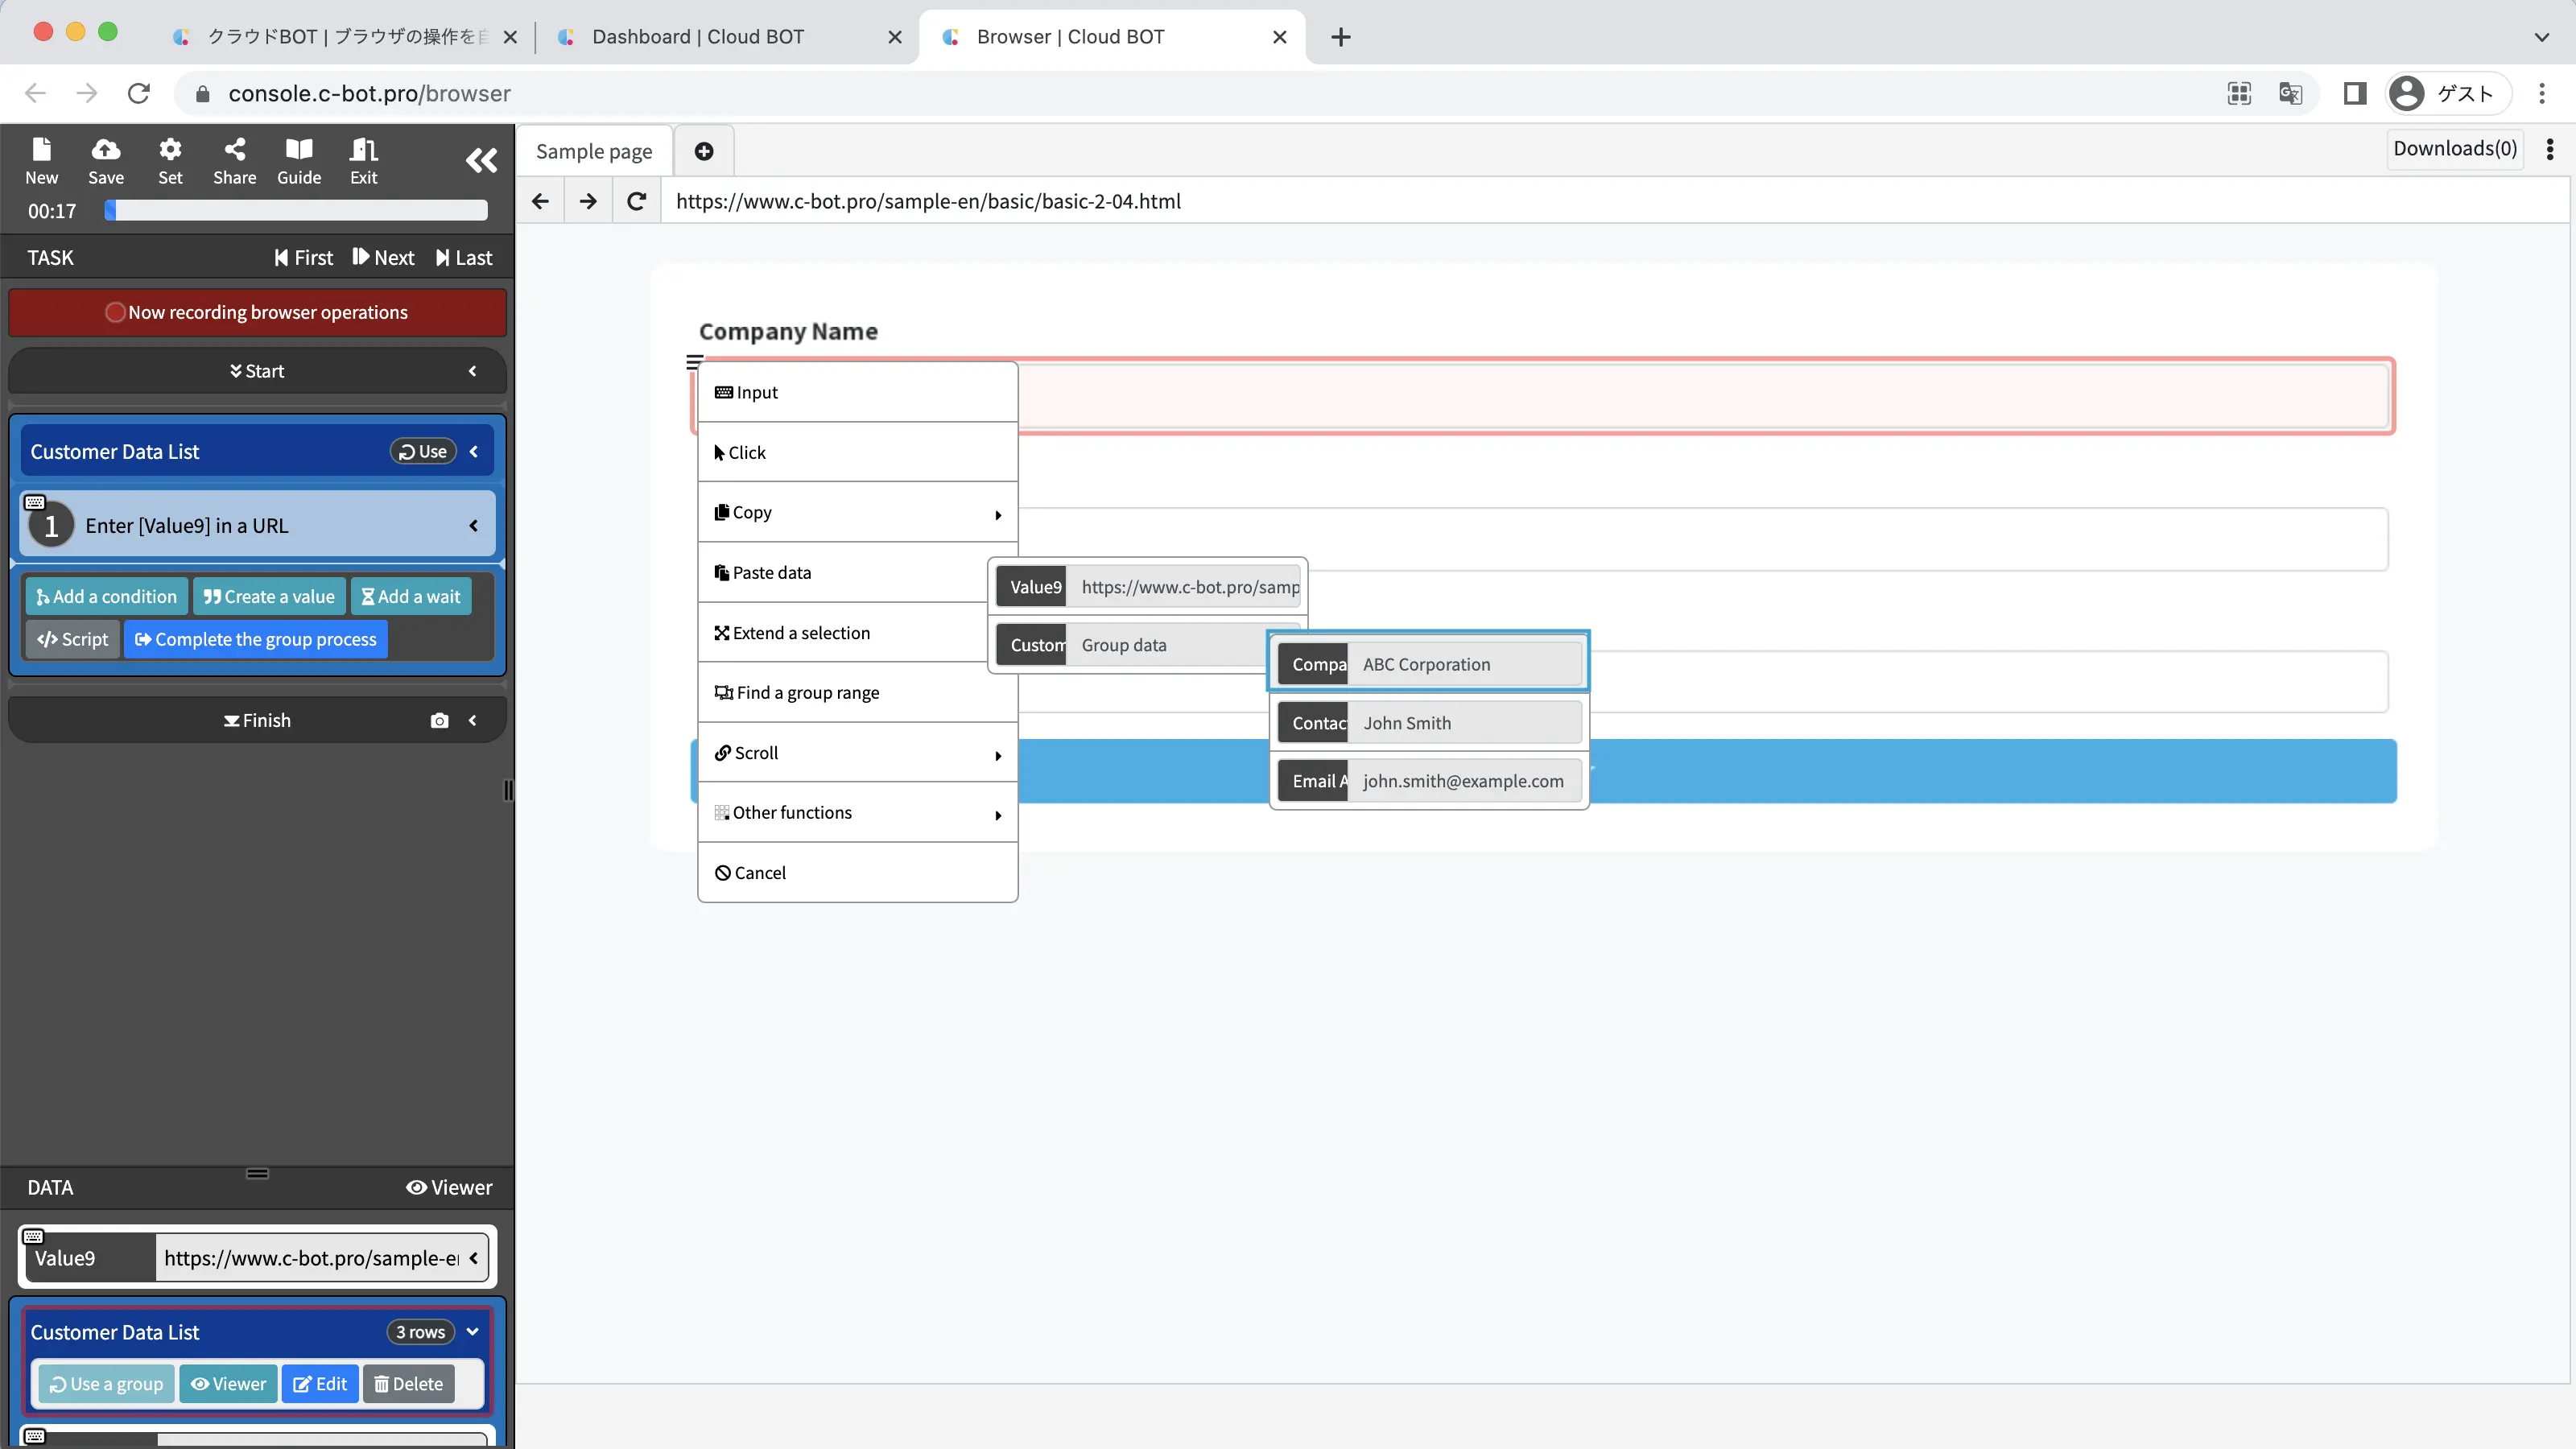
In the same way, paste the "Contact Name" and "Email Address" into the form.

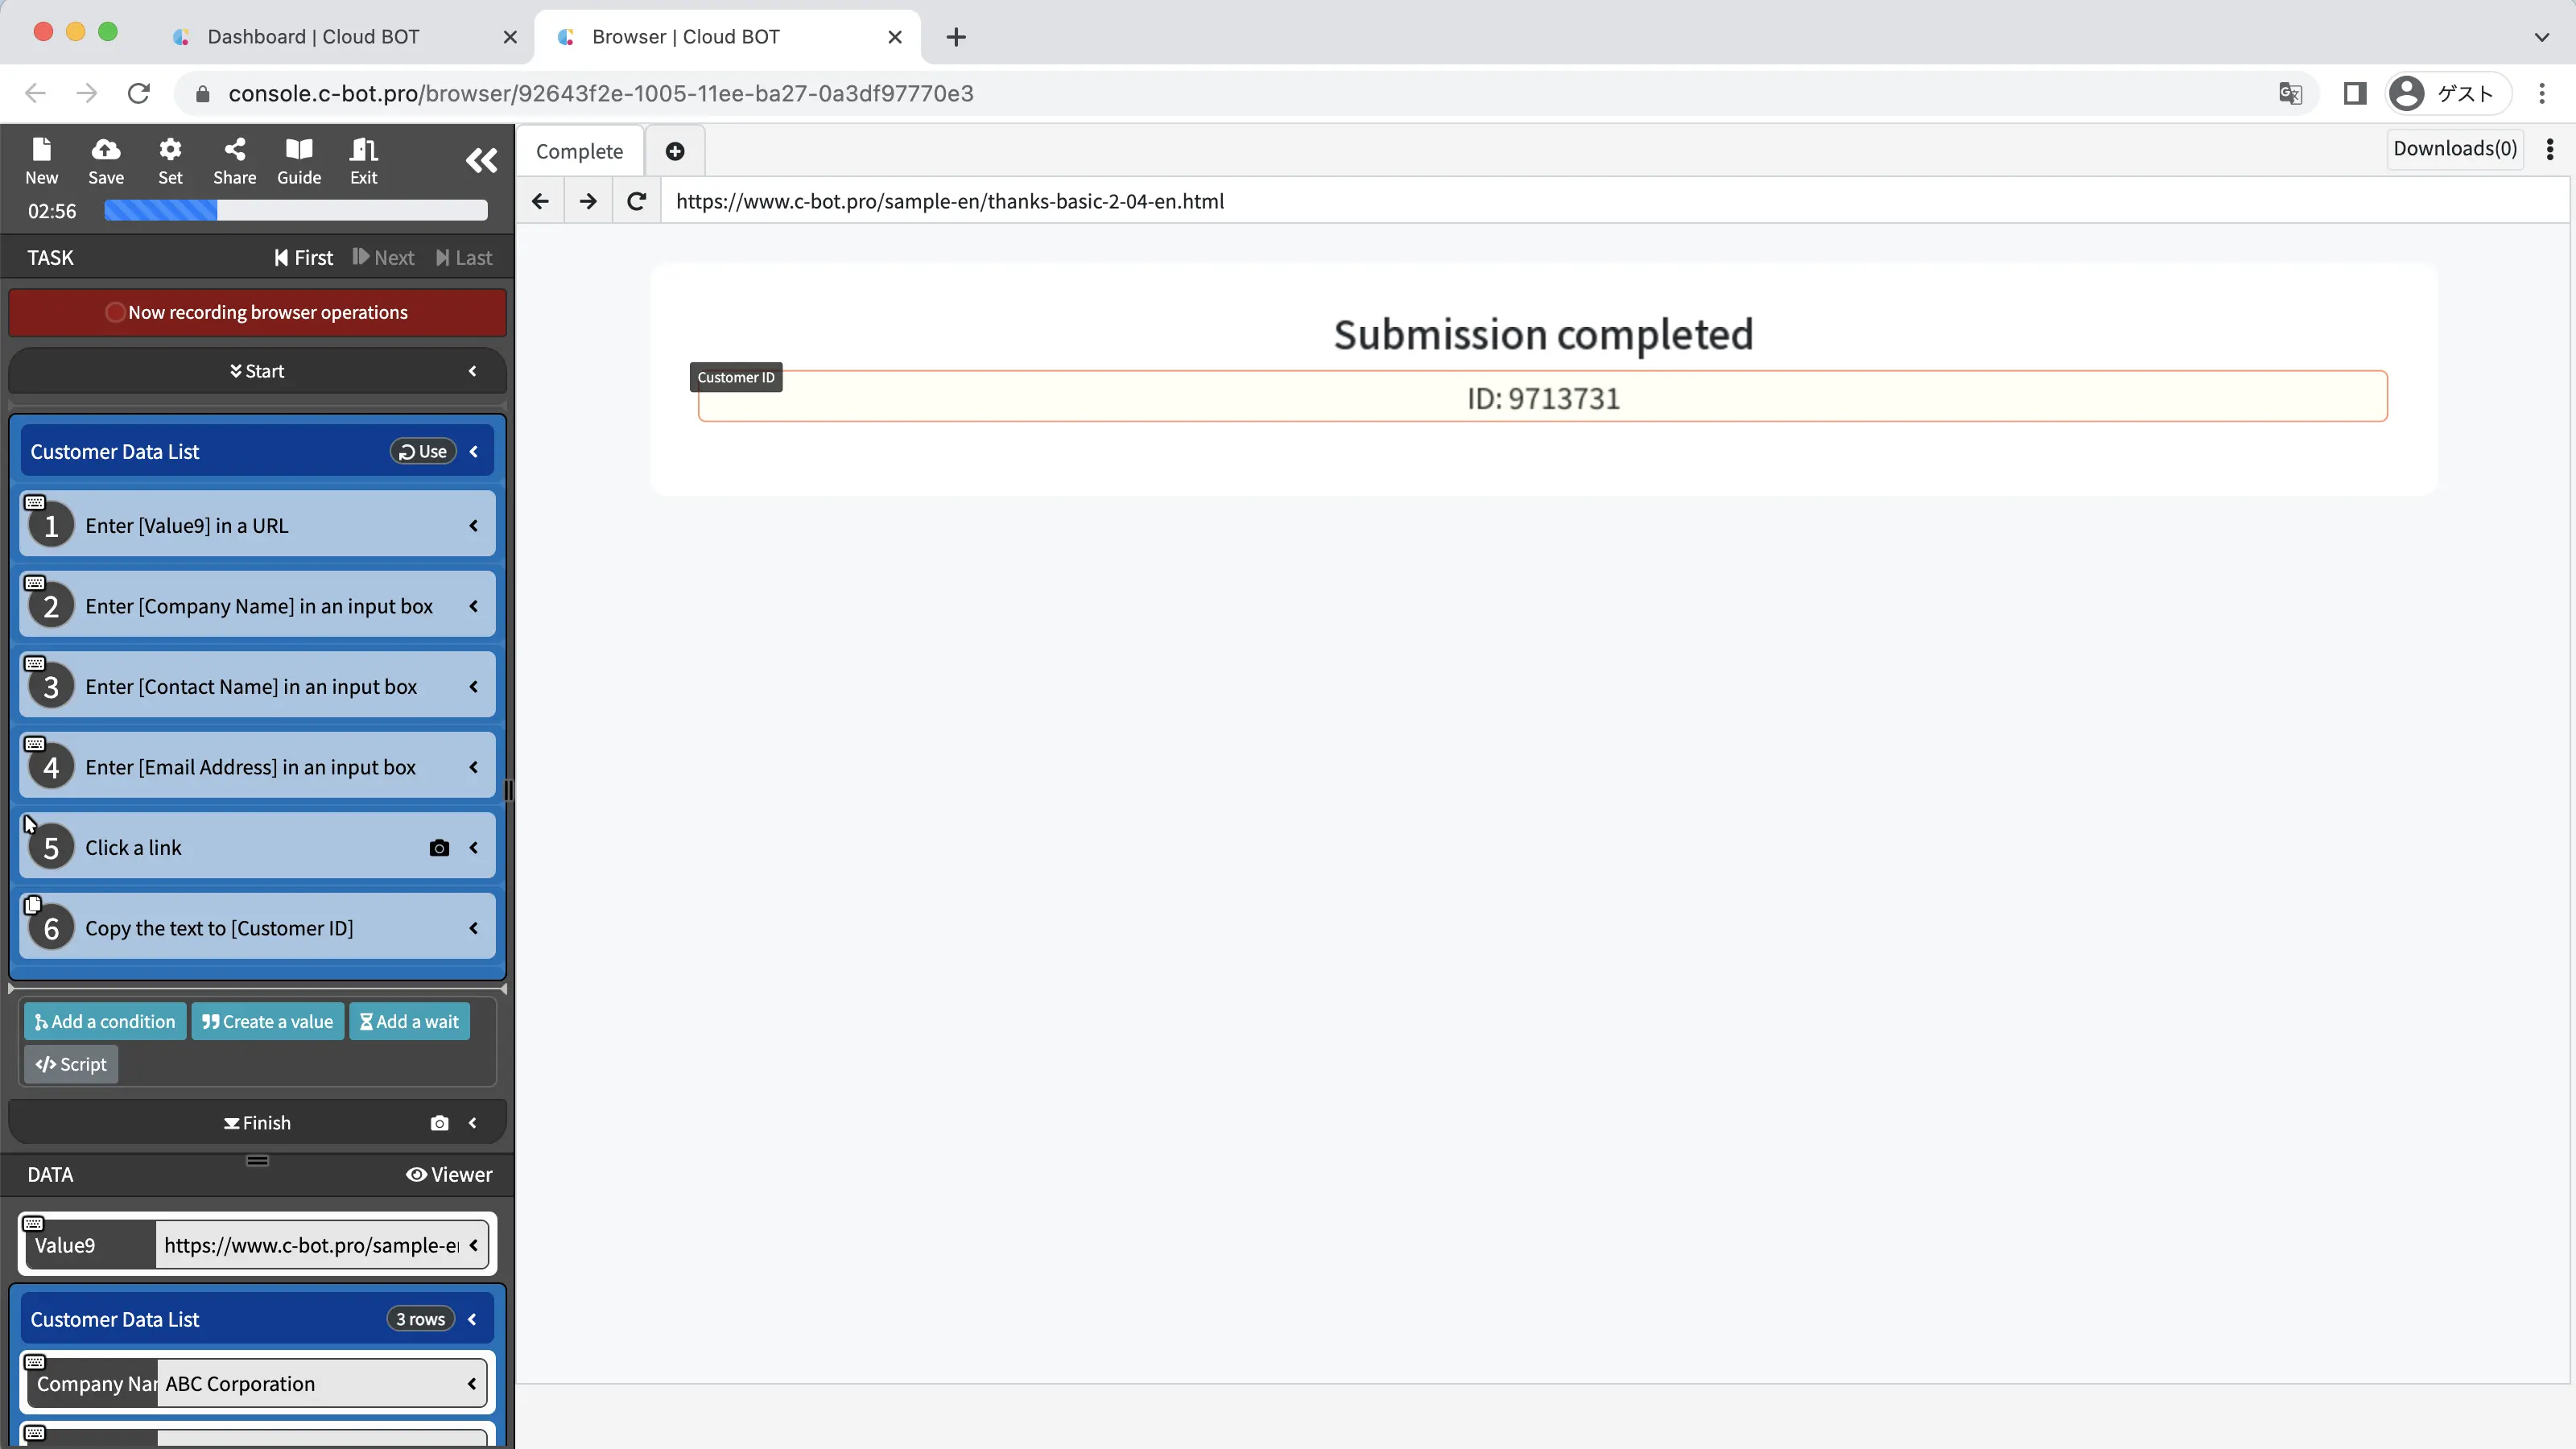
Record the operation of clicking the "Register" button on the page.
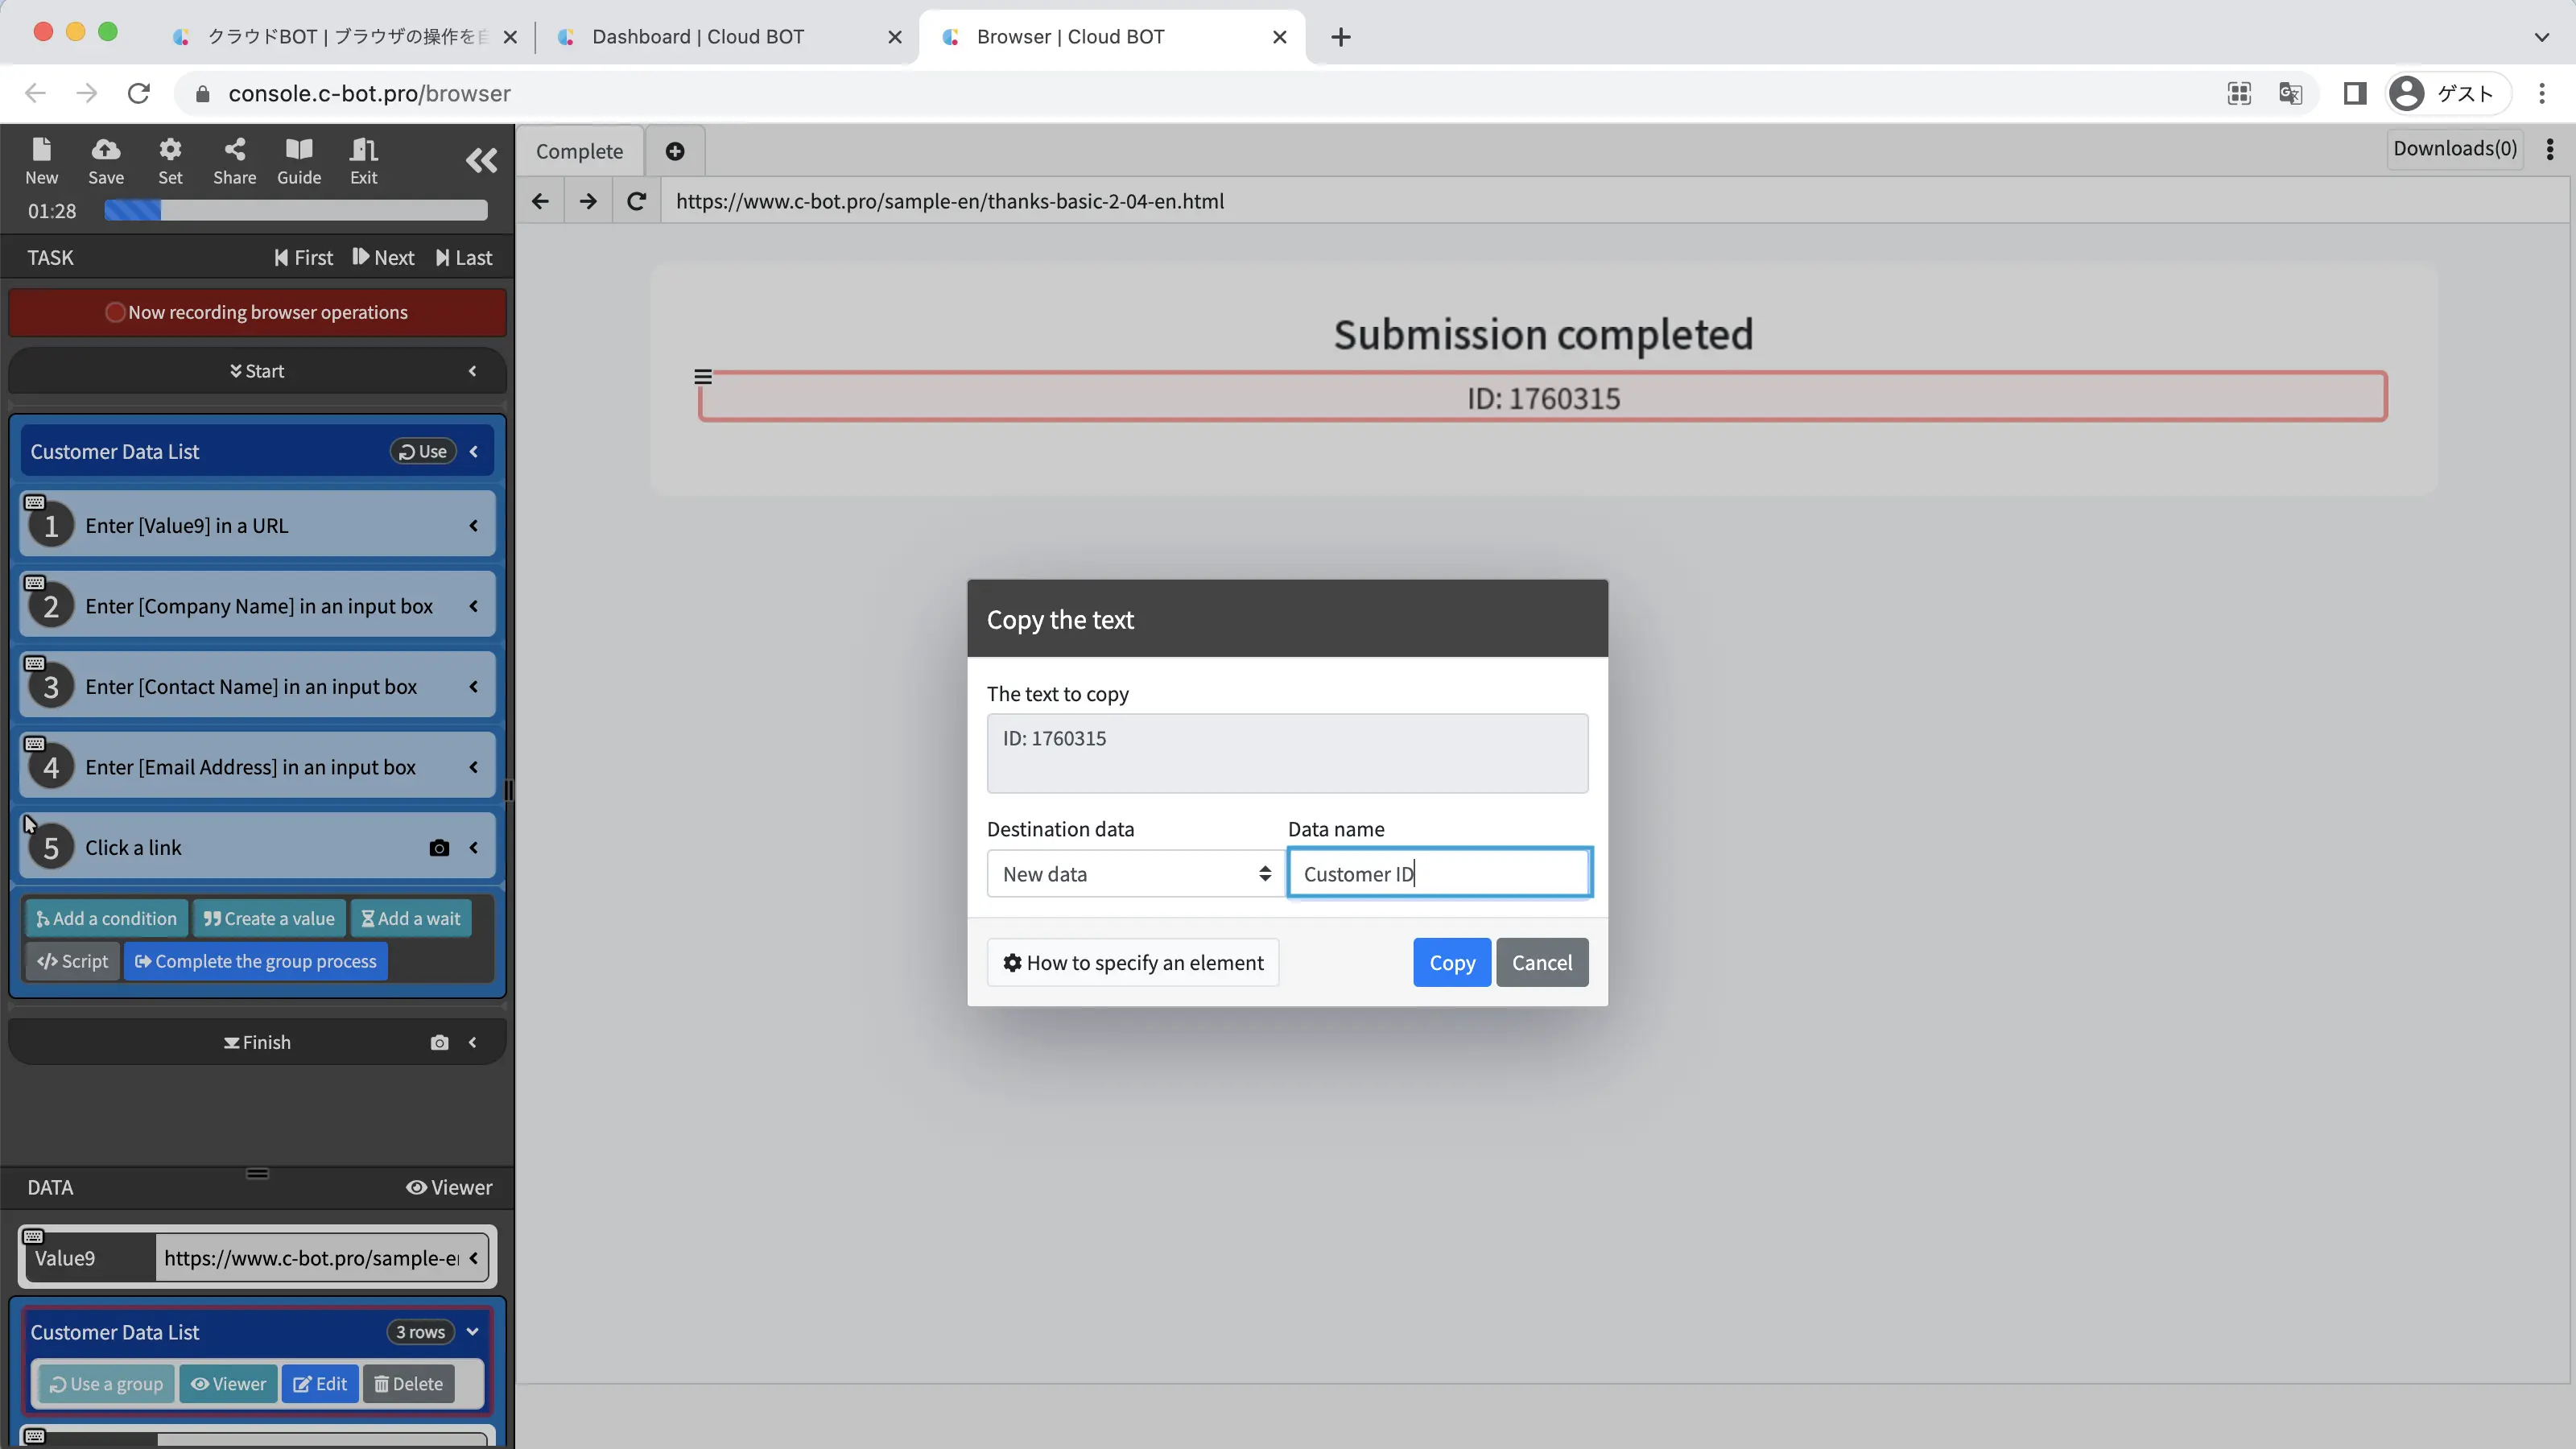
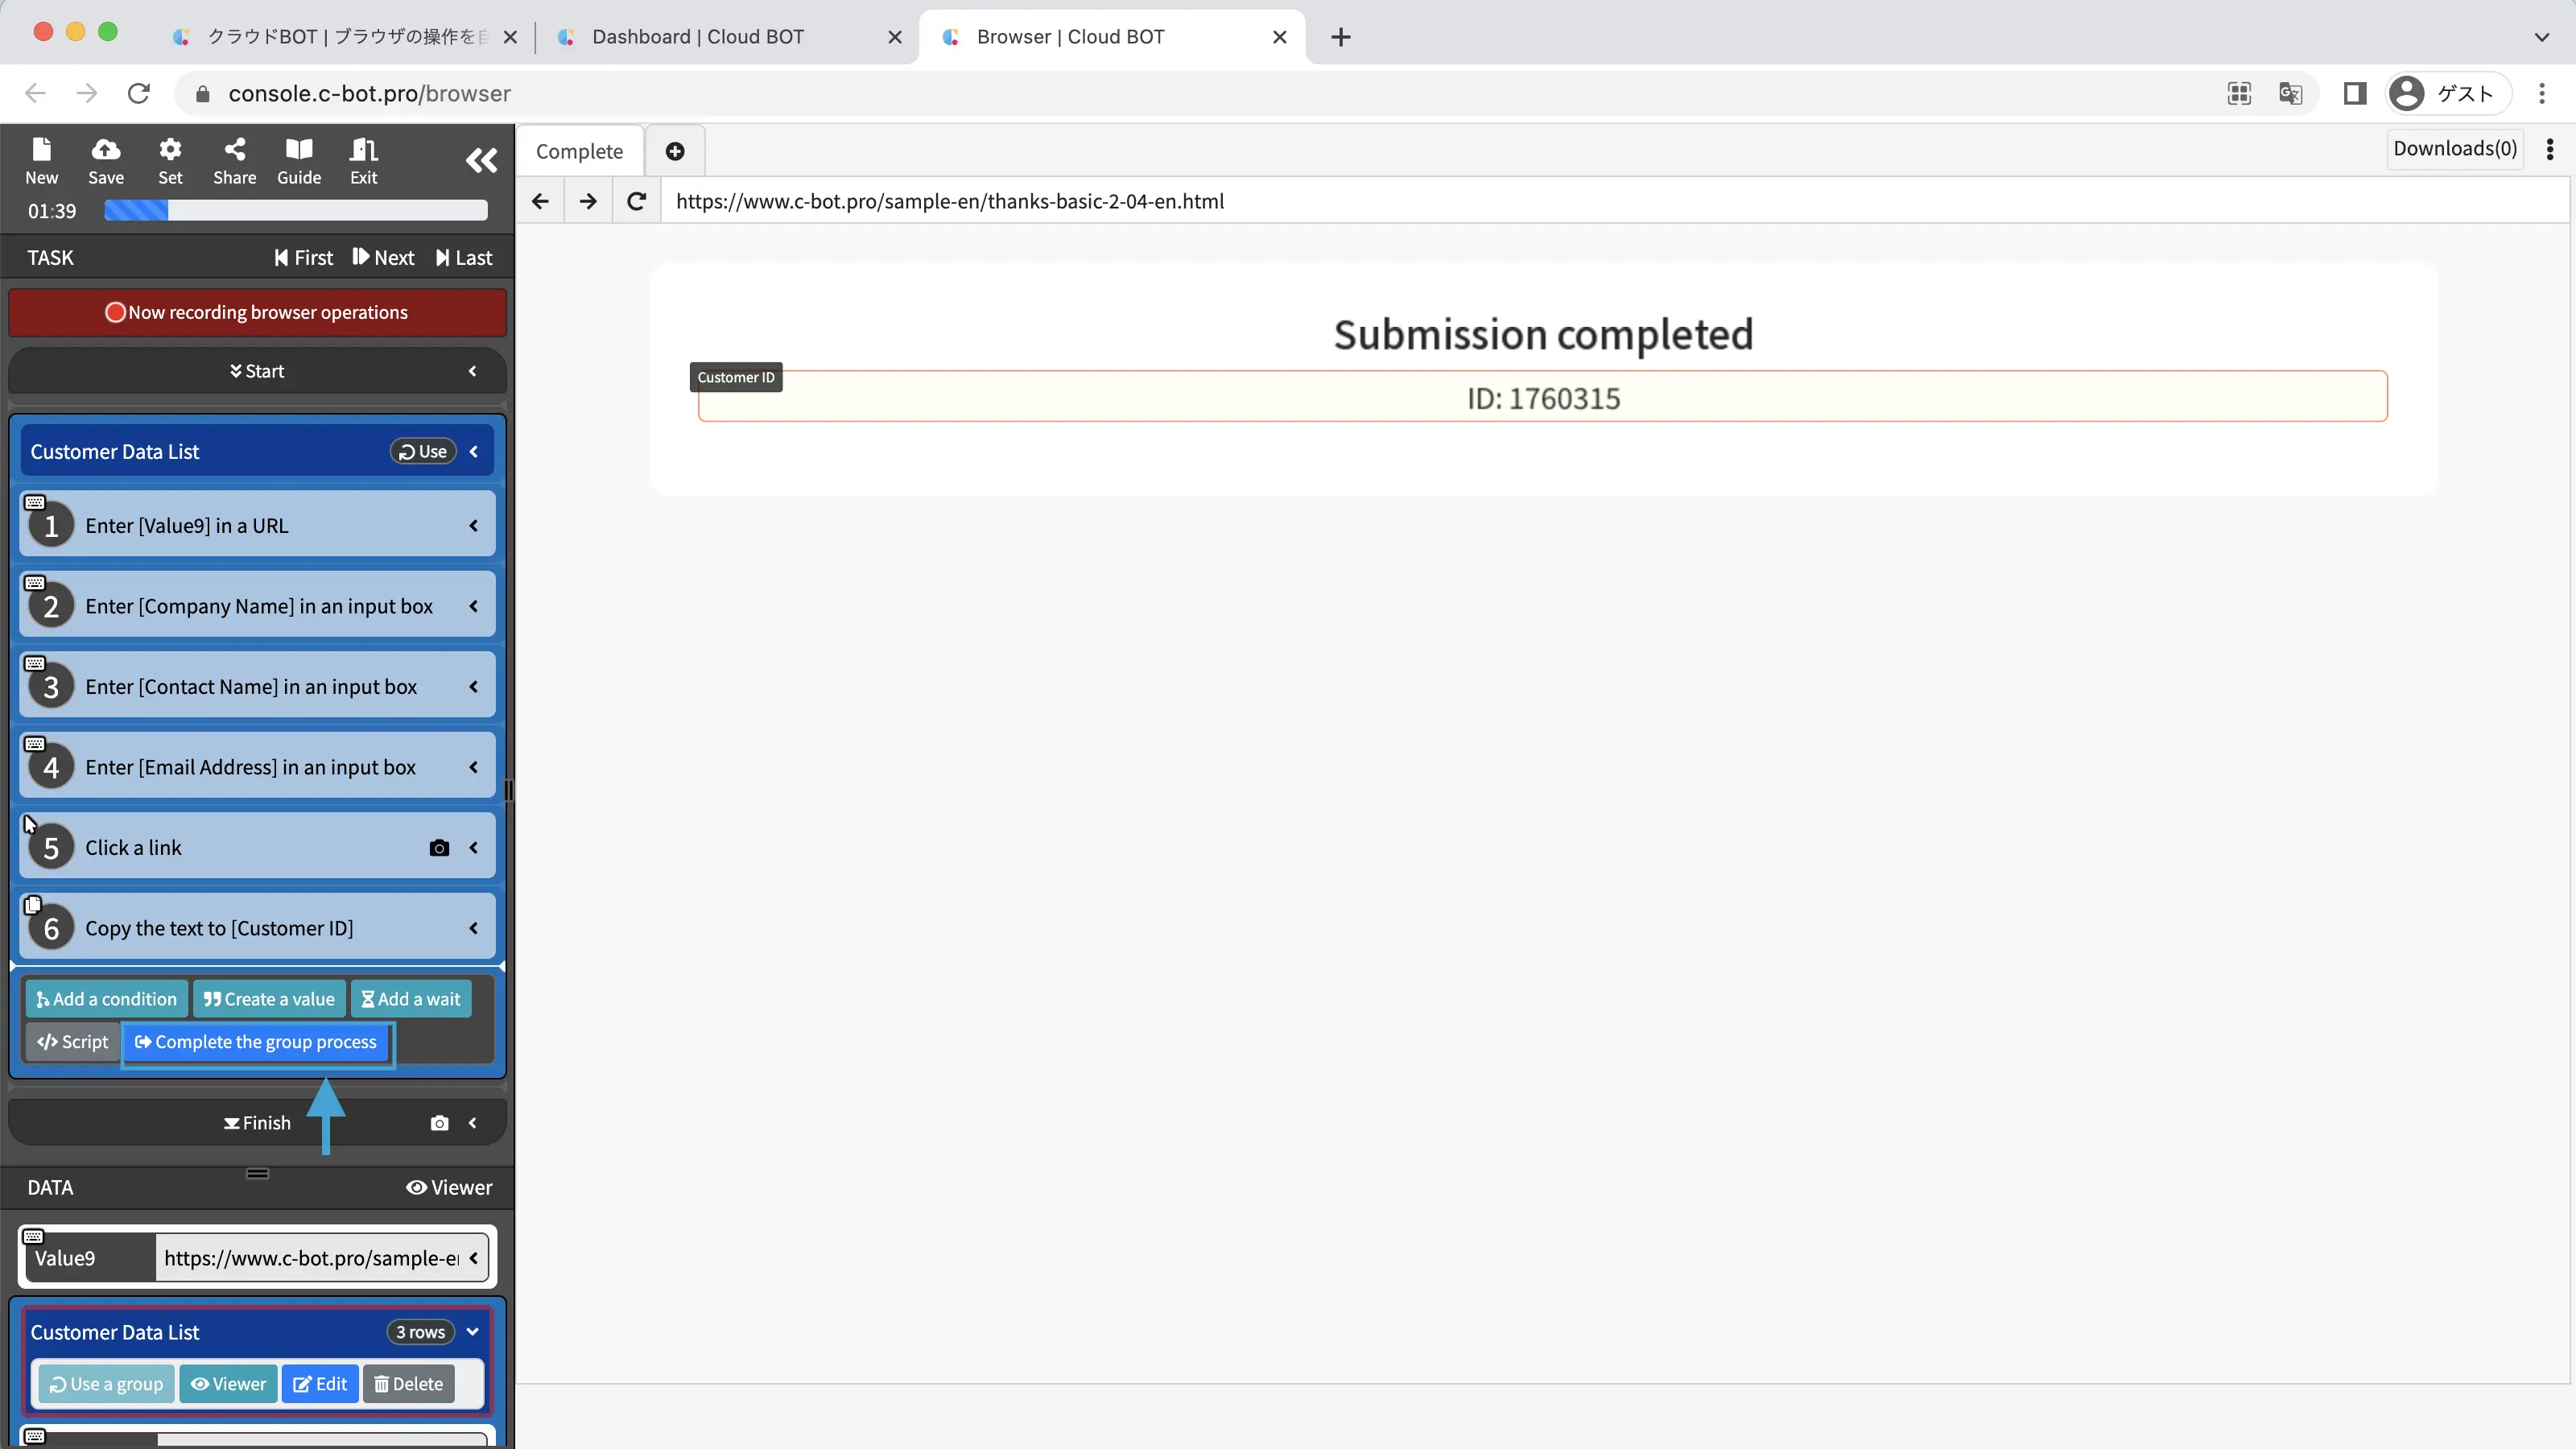
Record the operation to copy the displayed ID as the Customer ID.
Click the "Complete the group process" button.
A confirmation alert will appear, click the "OK" button.
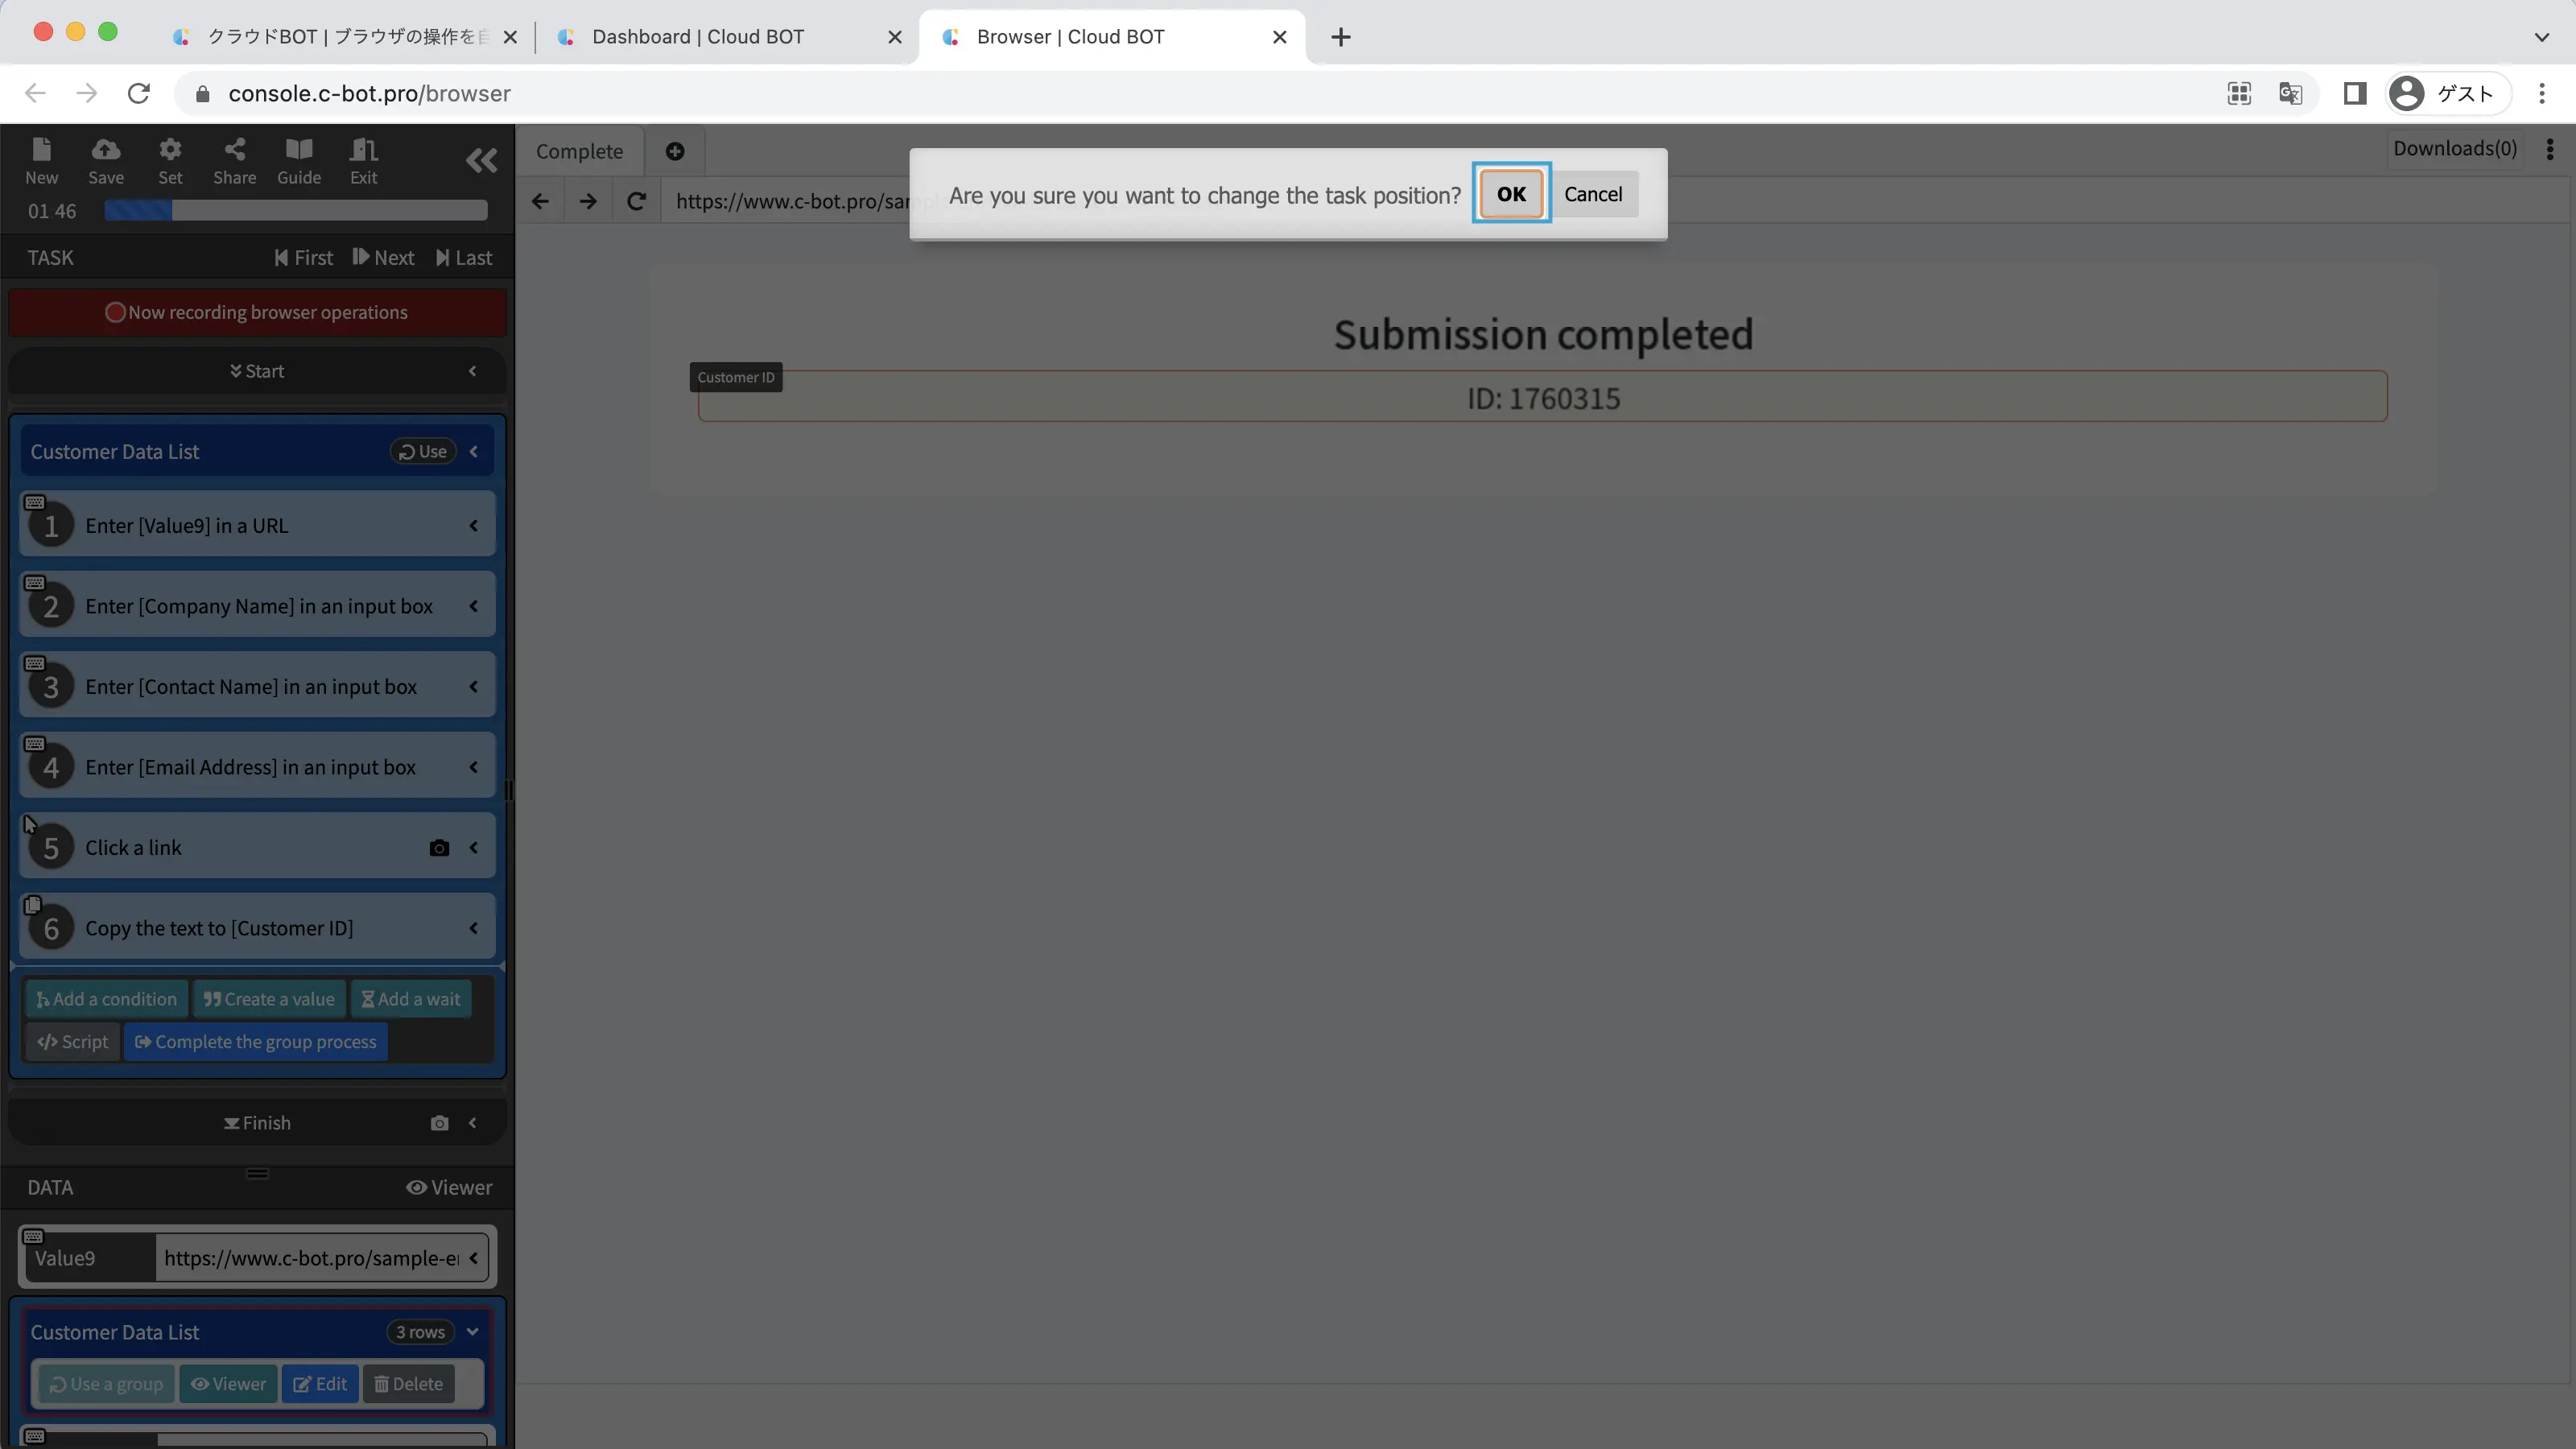
The task processing is repeated for the number of rows set as the group range.
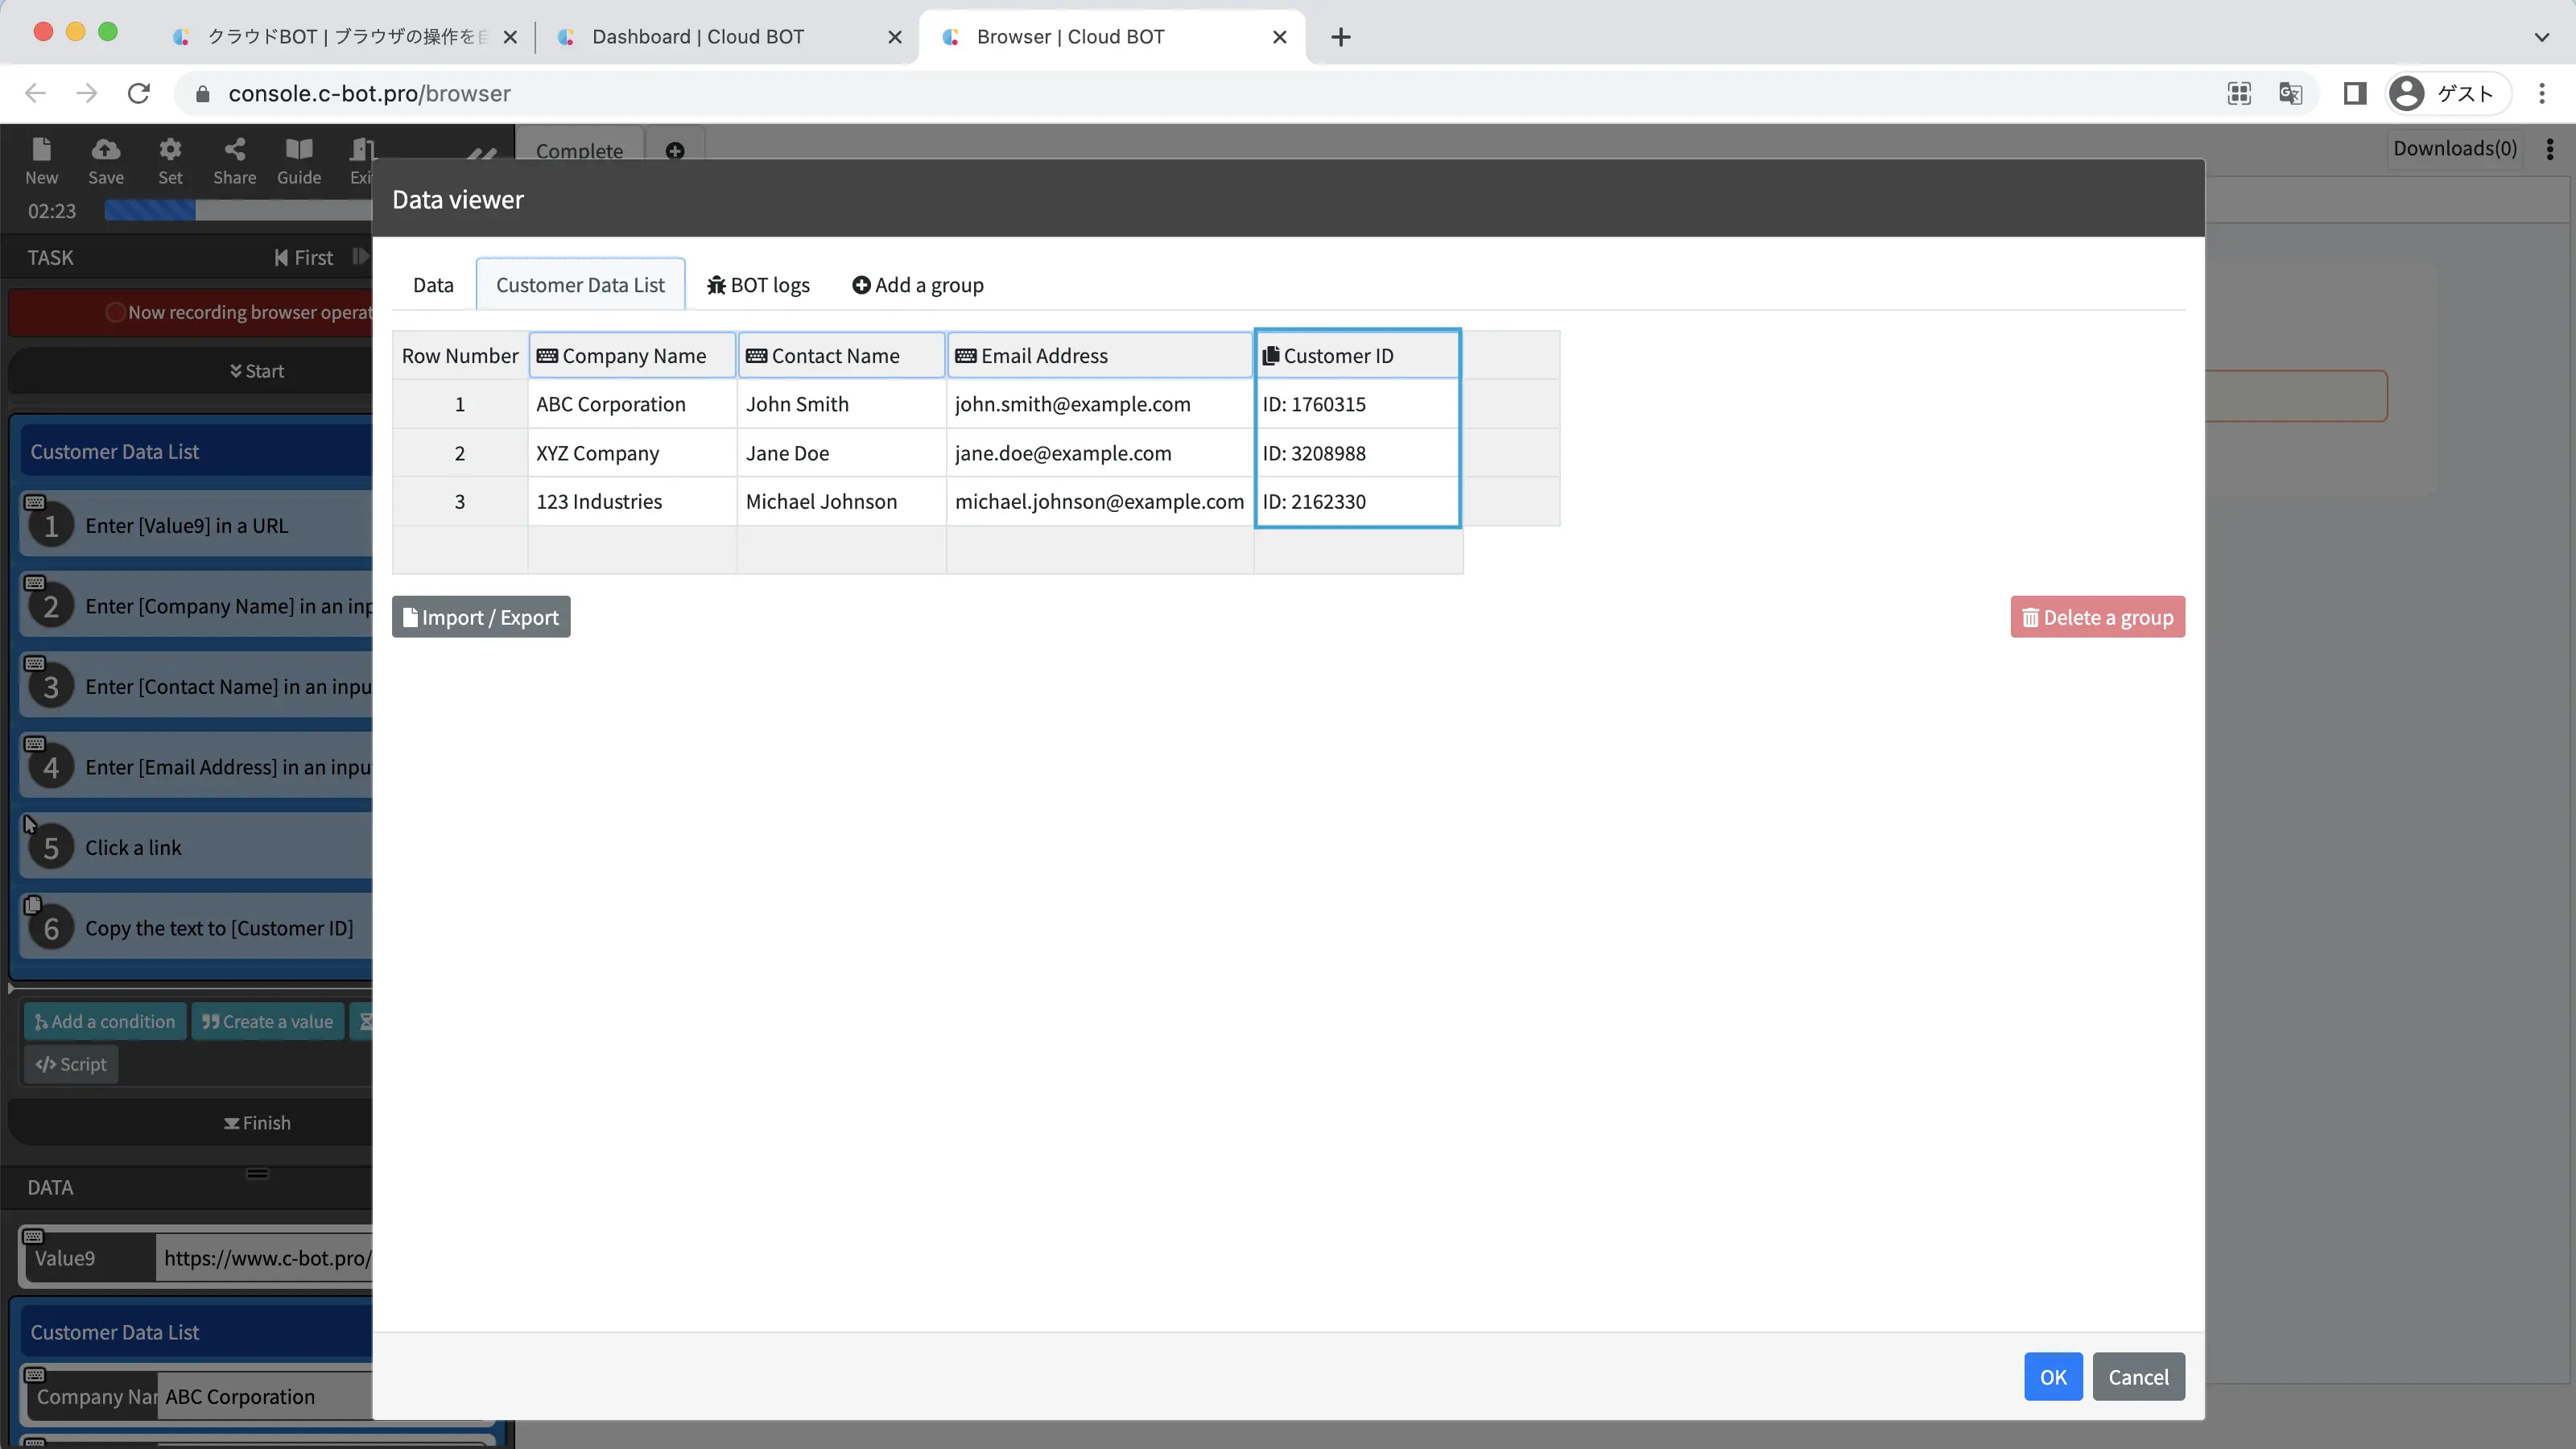
4. Confirm the data viewer
Open the data viewer and go to the "Customer Data List" tab.
You can confirm that the "customer ID" obtained in the repeated process has been added.
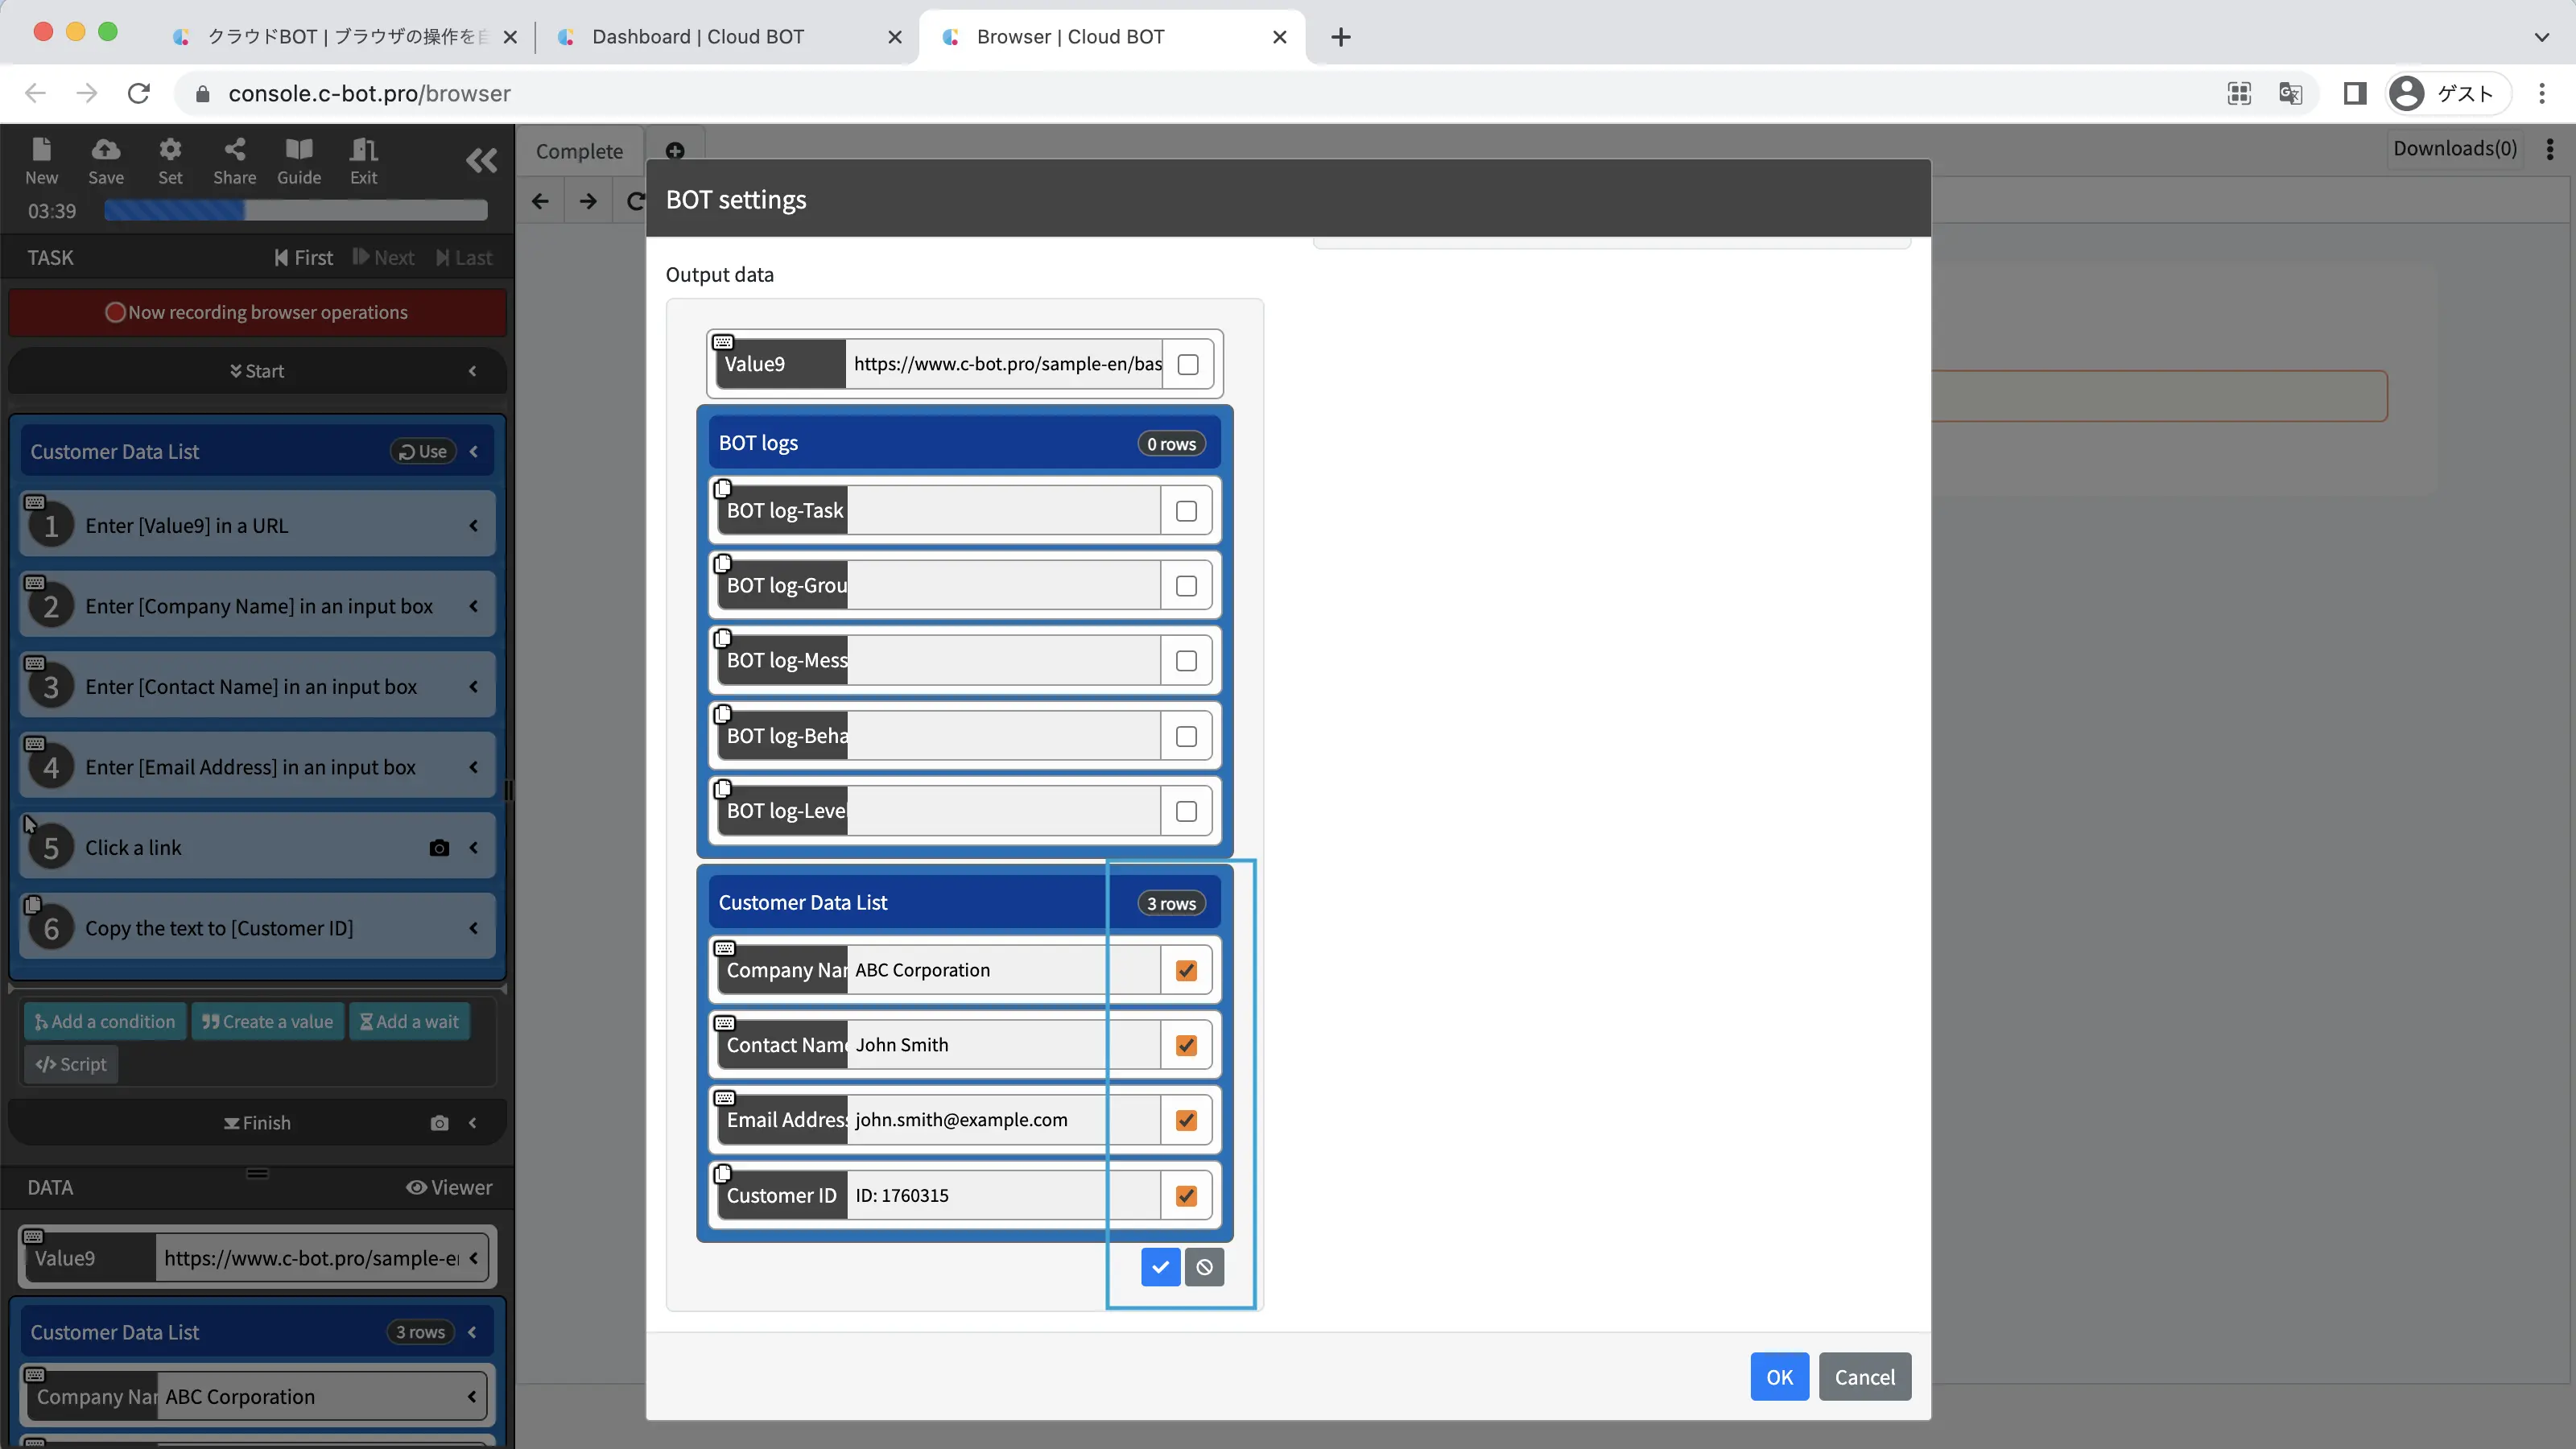
5. Change BOT settings
Open the BOT settings and set the "Company Name", "Contact Name", and "Email address" as input data.
Refer to "1-9. Change input and output data settings" for details on changing input data settings.
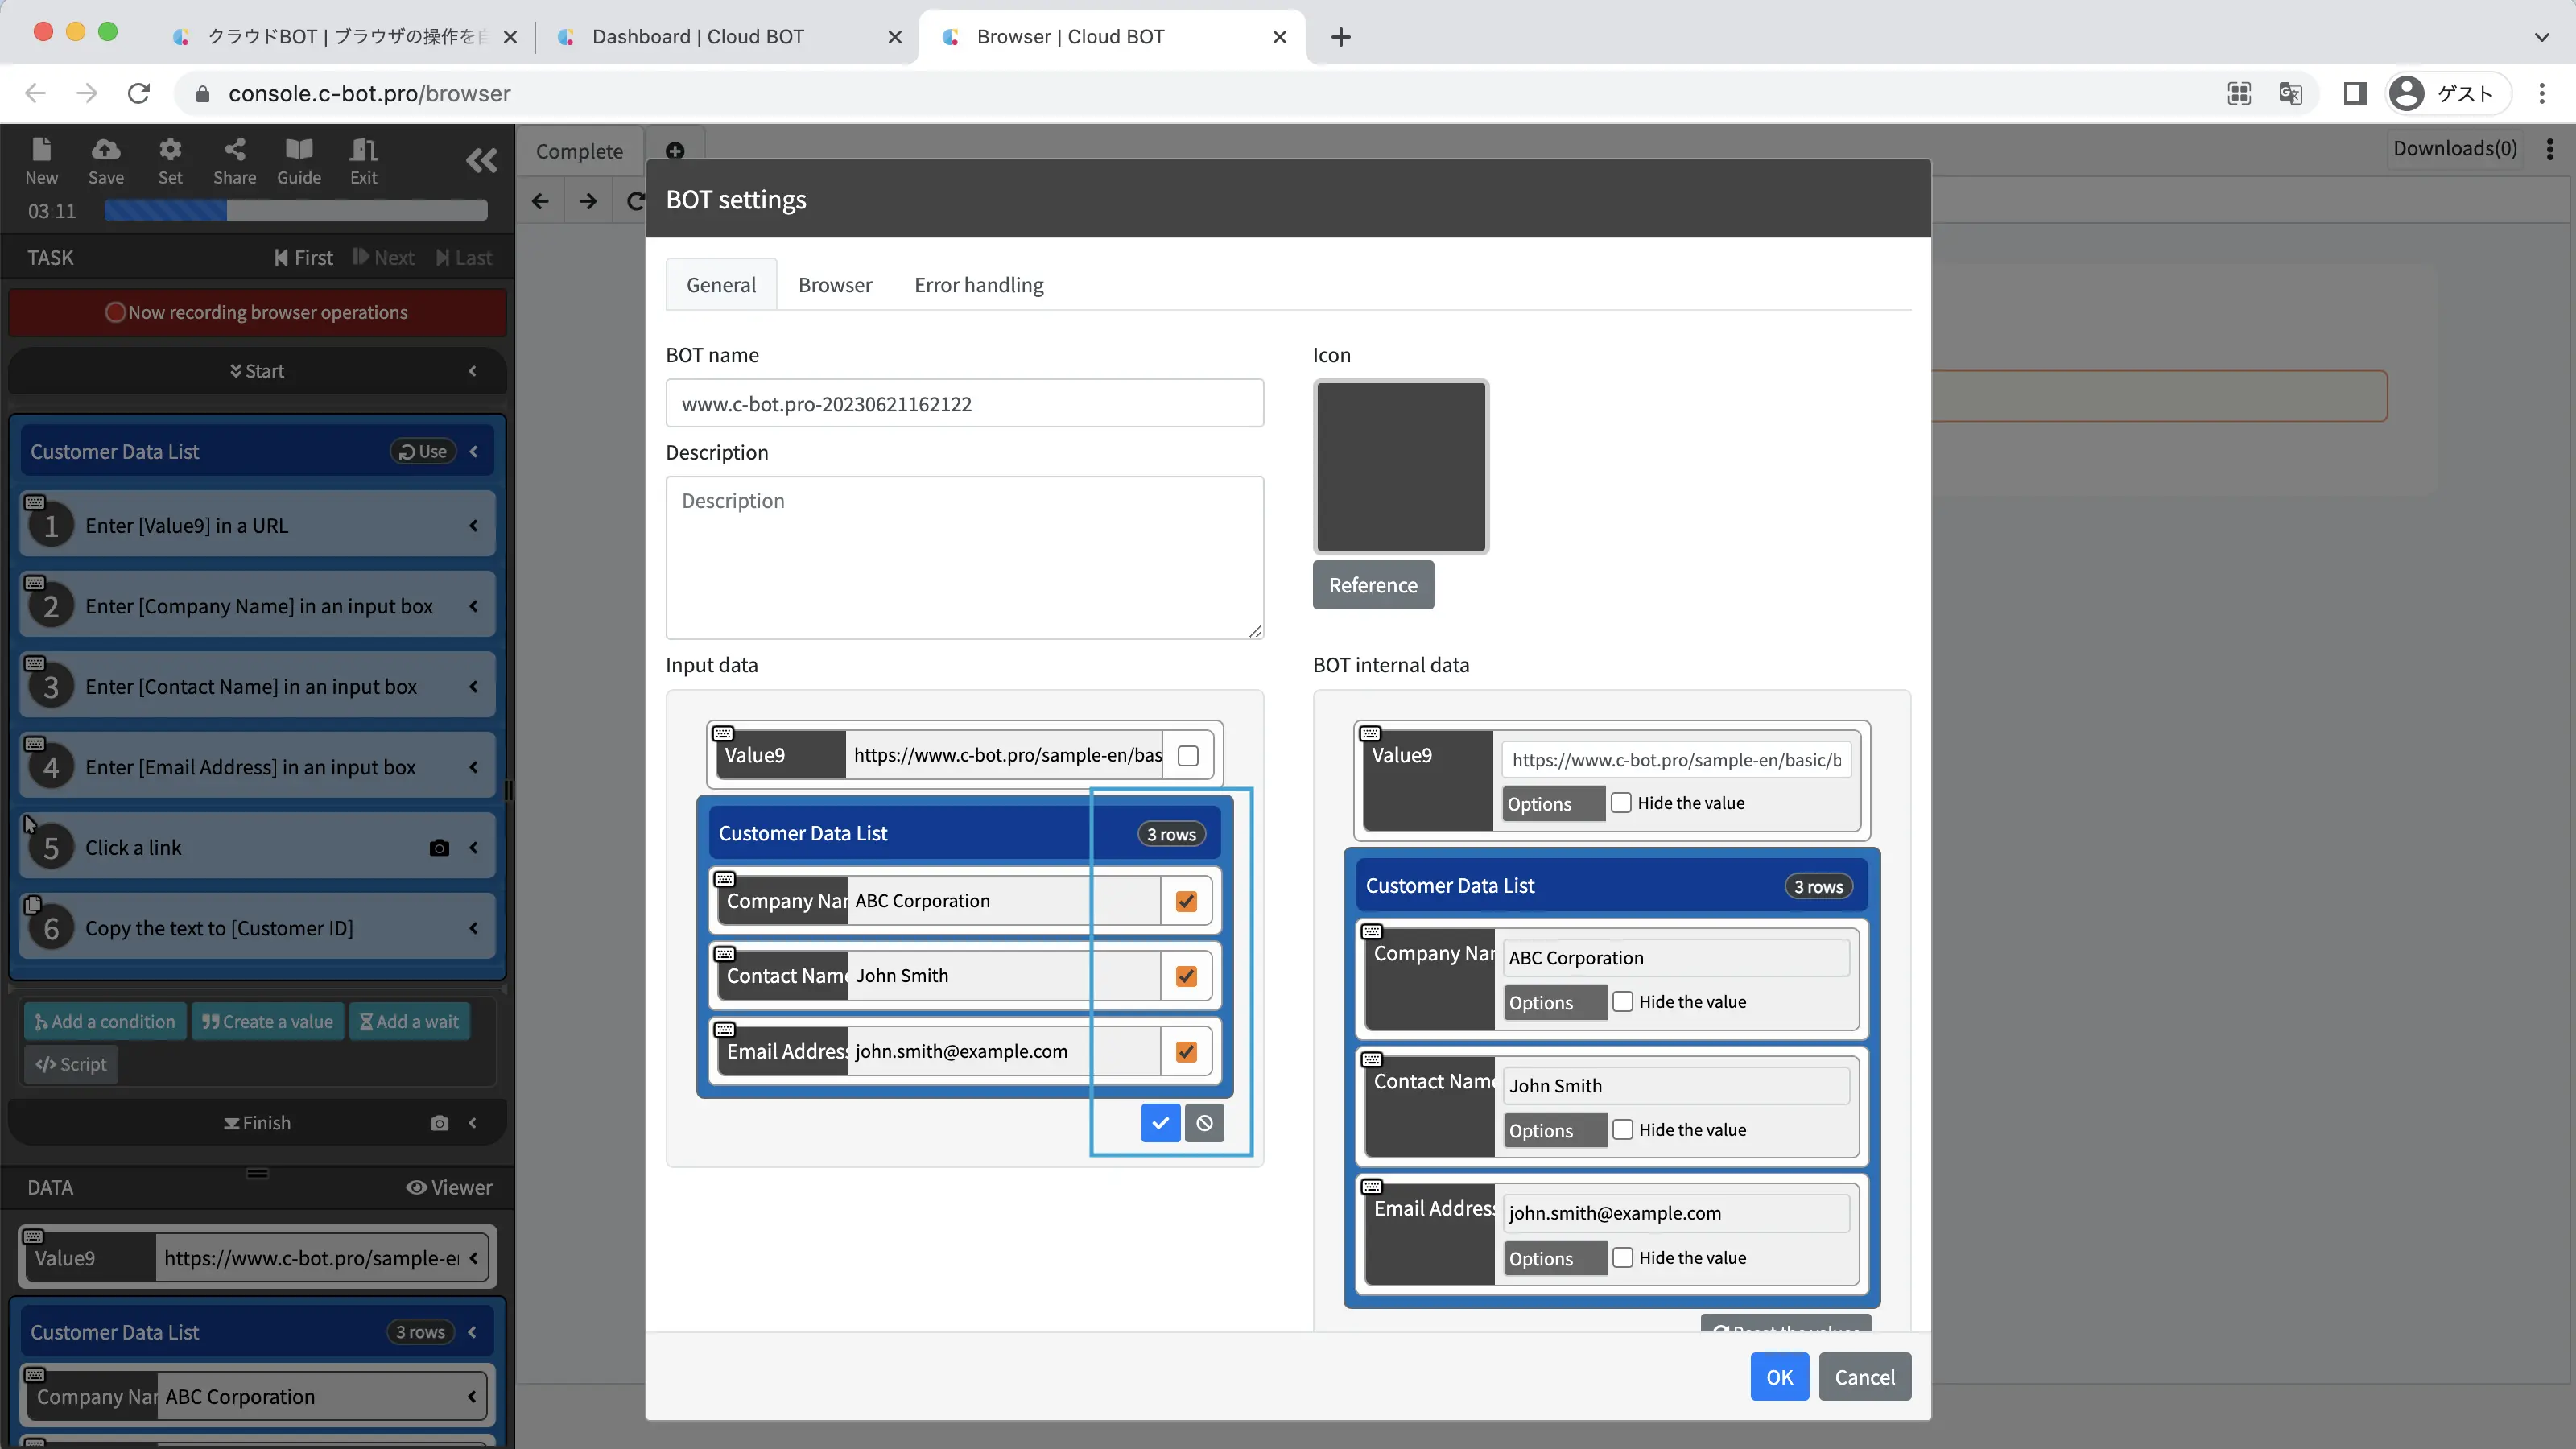
Set "Company Name", "Contact Name", and "Email address" as output data.
6. Save the BOT
Change the "BOT Name" to 2-4. Loop processing with group data.

Execute a BOT
1. Execute the created BOT
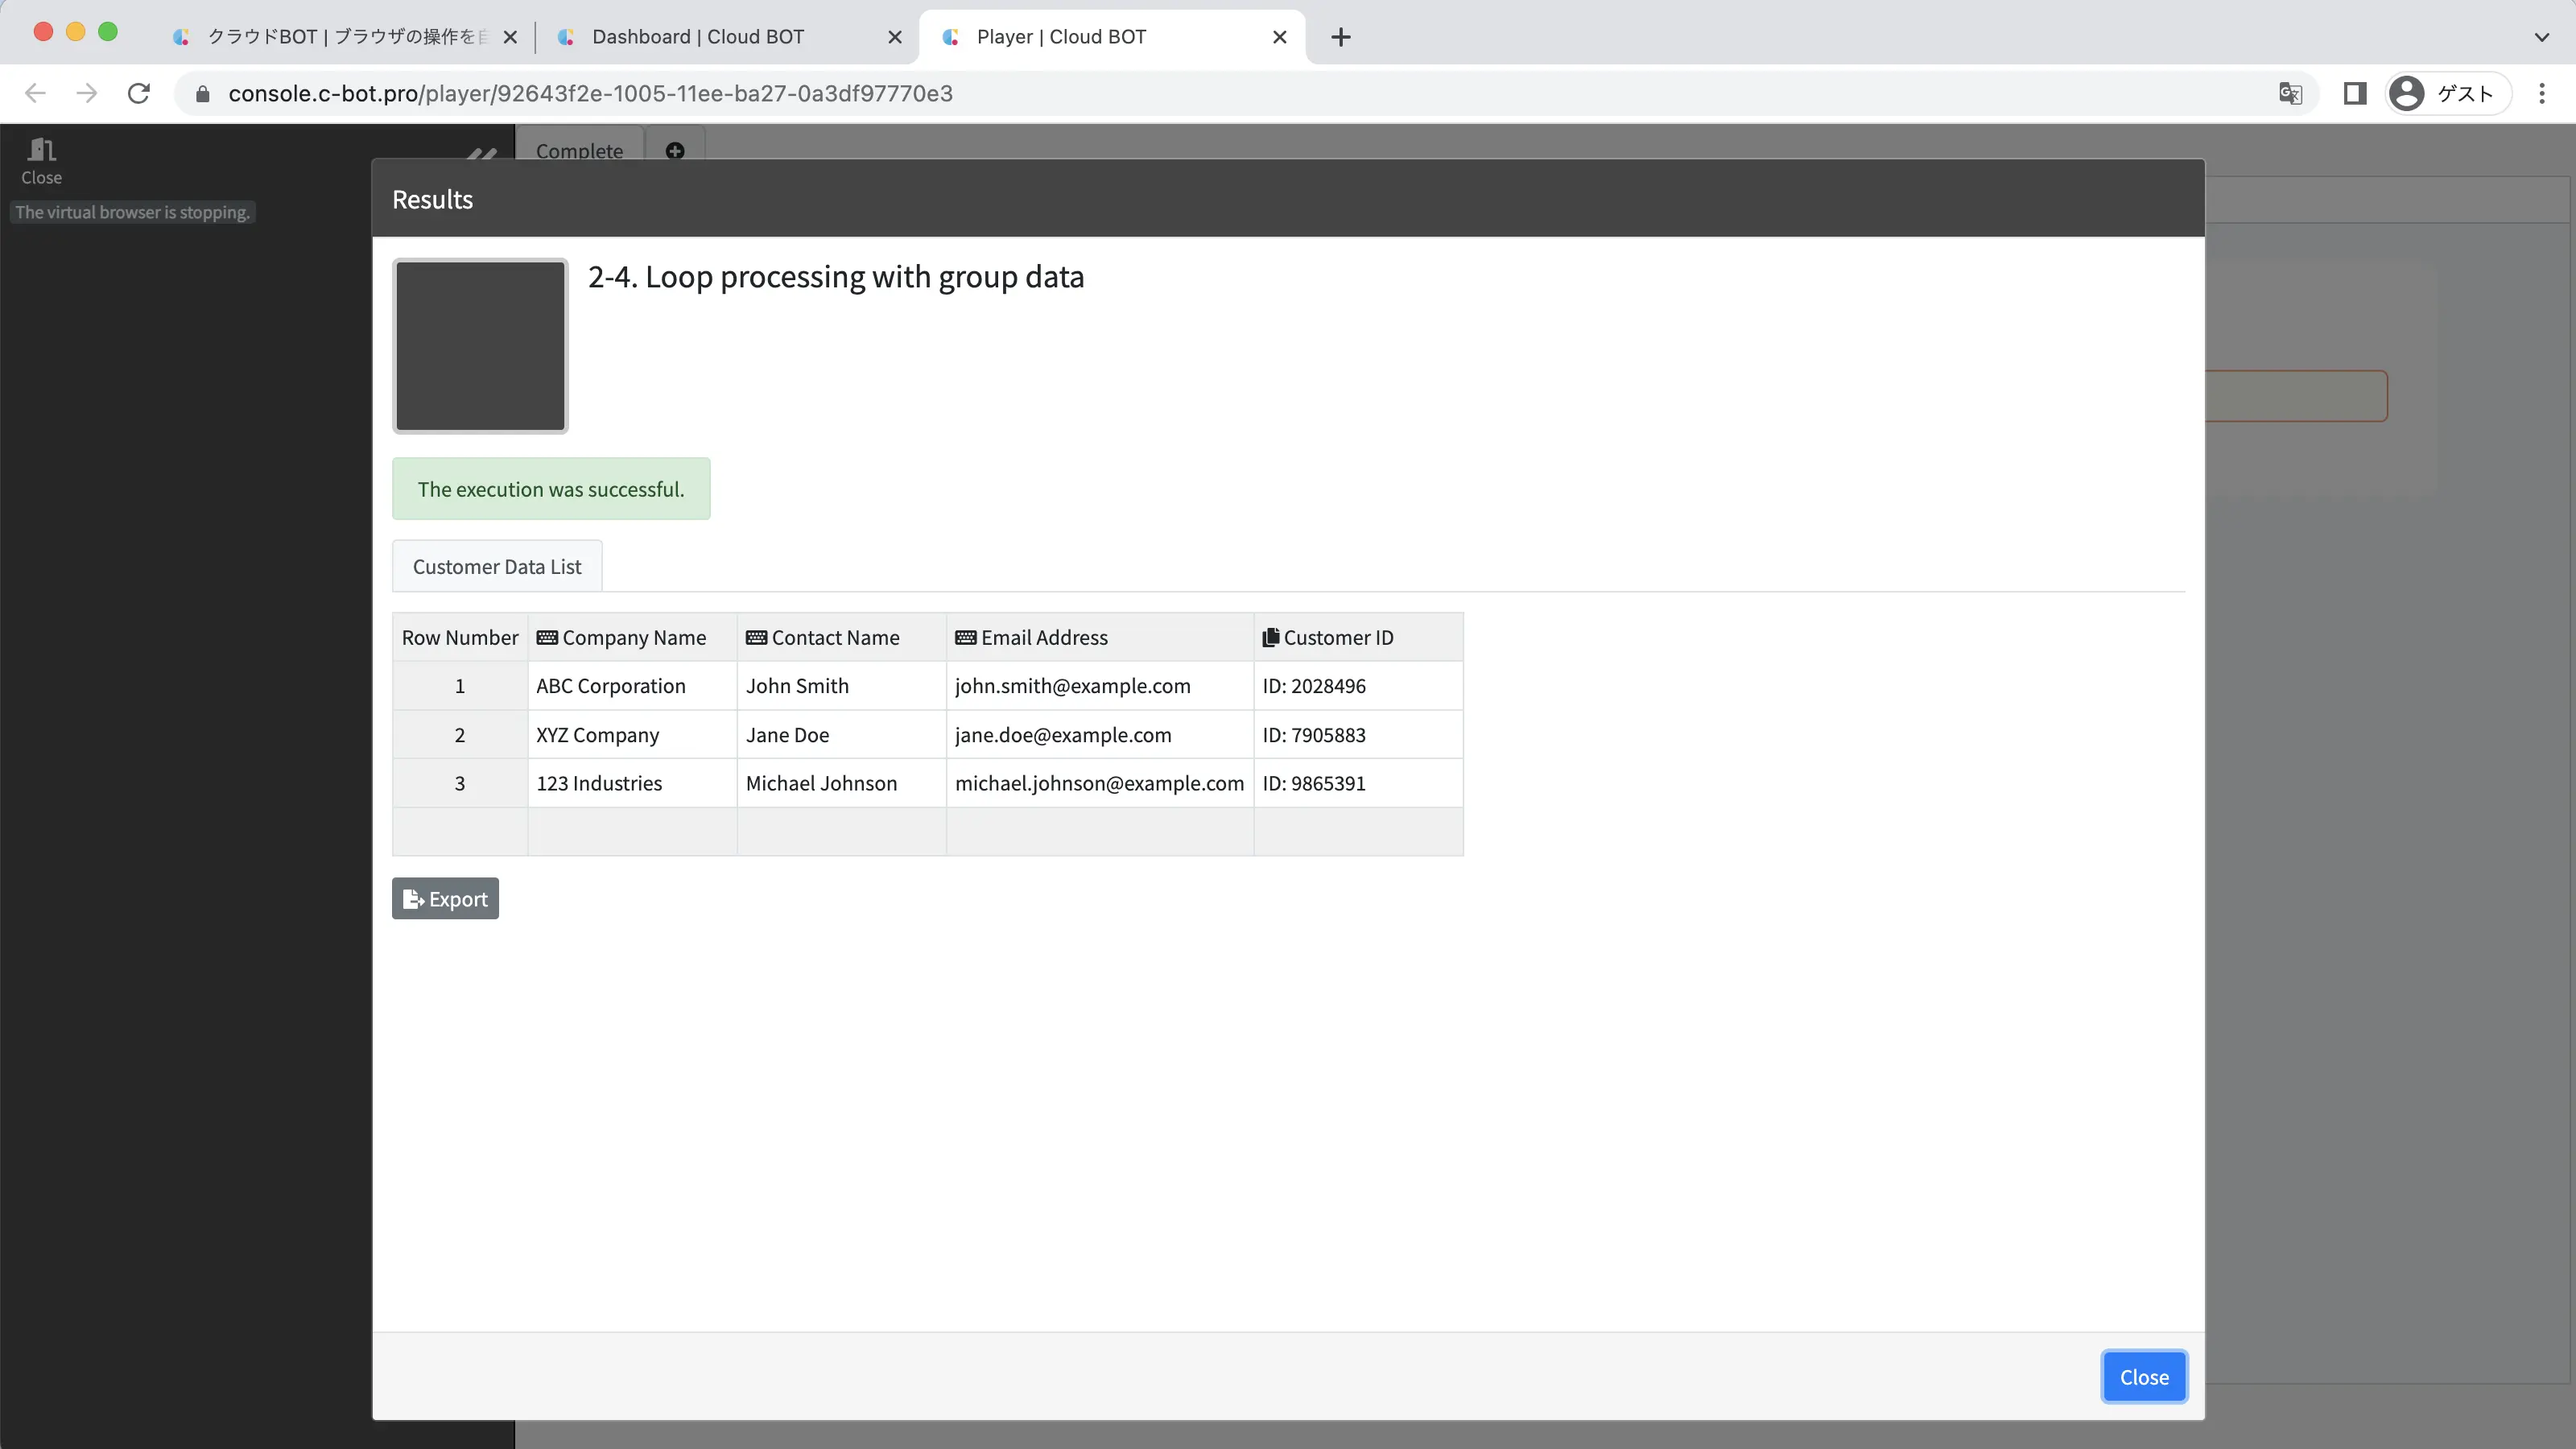
Select the created BOT and execute the BOT from the execution screen.

When the BOT execution is completed, the execution result will be displayed.
It is completed if "The execution was successful." and the acquired data is displayed.
This concludes the tutorial “2-4. Loop processing with group data”.
Go to the next tutorial >> 2-5. Loop processing with group data created from aweb page