1-5. Upload images and files to the web form
Sample pages for this tutorial

Create a BOT that uploads and submits any file to the form.
*For basic operations of Cloud BOT, please refer to Basics - Chapter 1-1. Acquiring data from web pages (including an explanation of basic operations).
Create a BOT
1. Prepare a file for upload
Download the following CSV file and save it in your PC.
(Click the icon to download.)

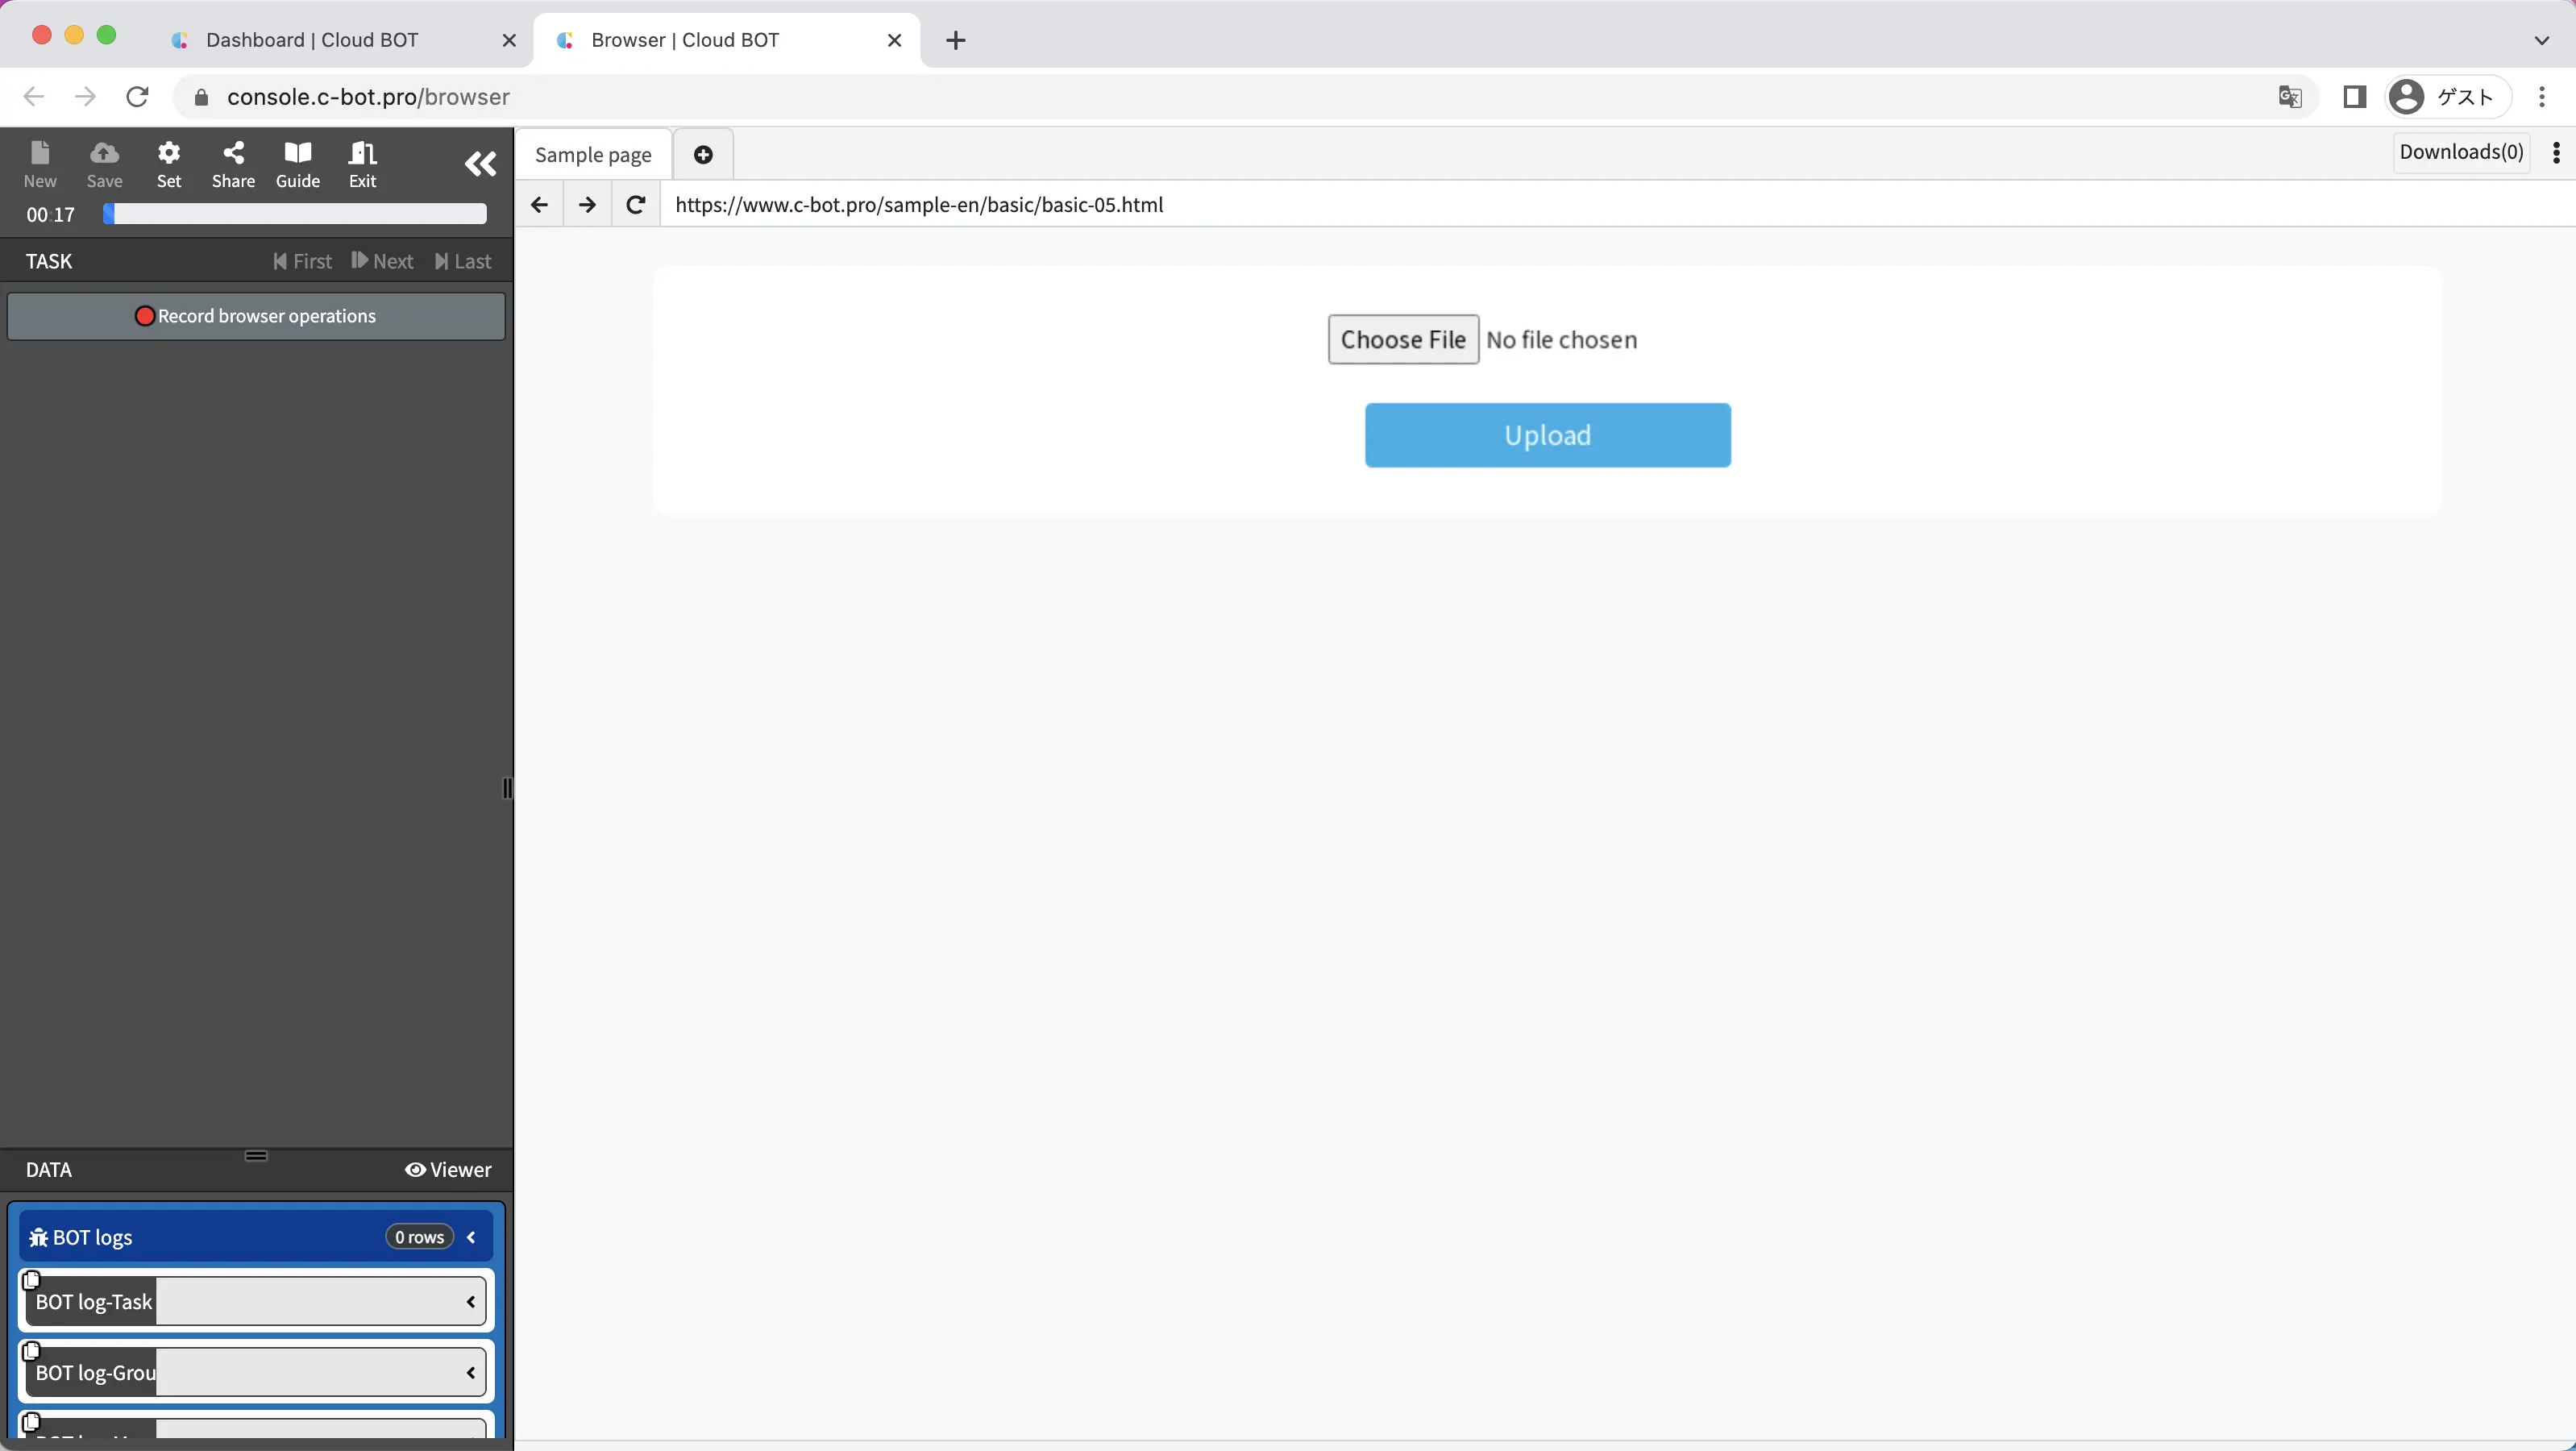
2. Open the BOT editor and access the sample page
Open the BOT editor from the "Create BOT" button,
Display the sample page https://www.c-bot.pro/sample-en/basic/basic-05.html.
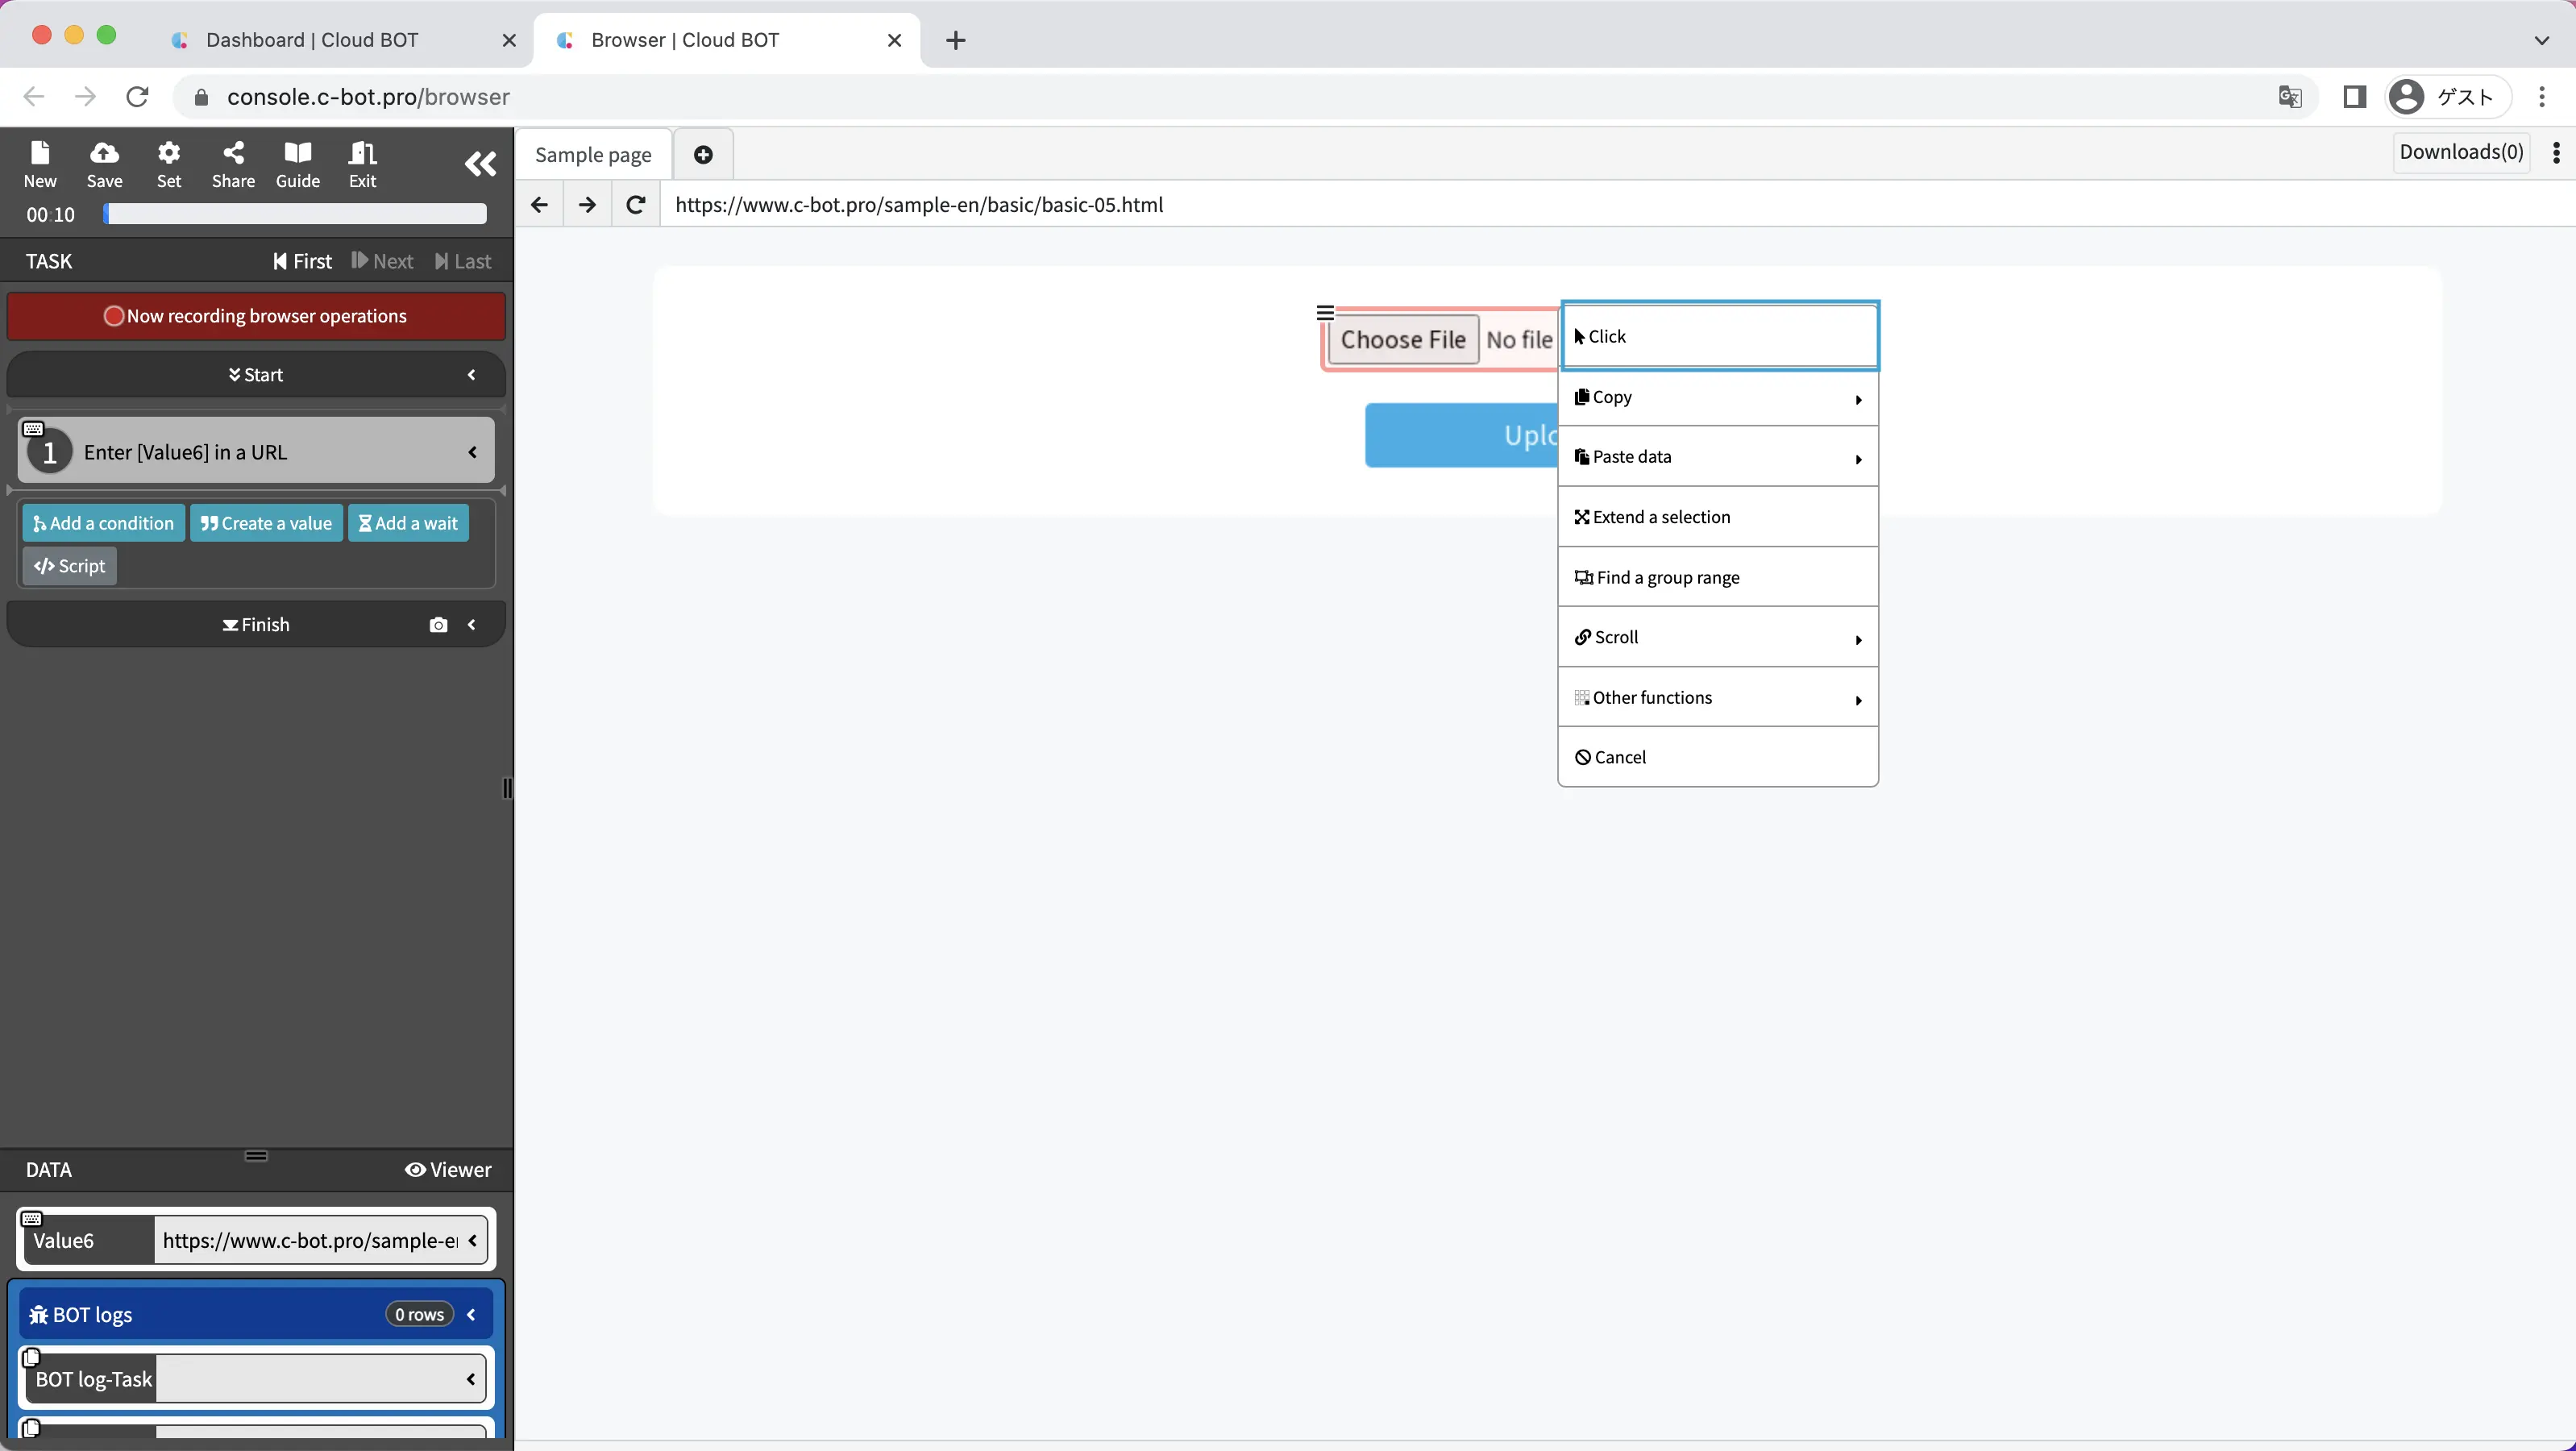
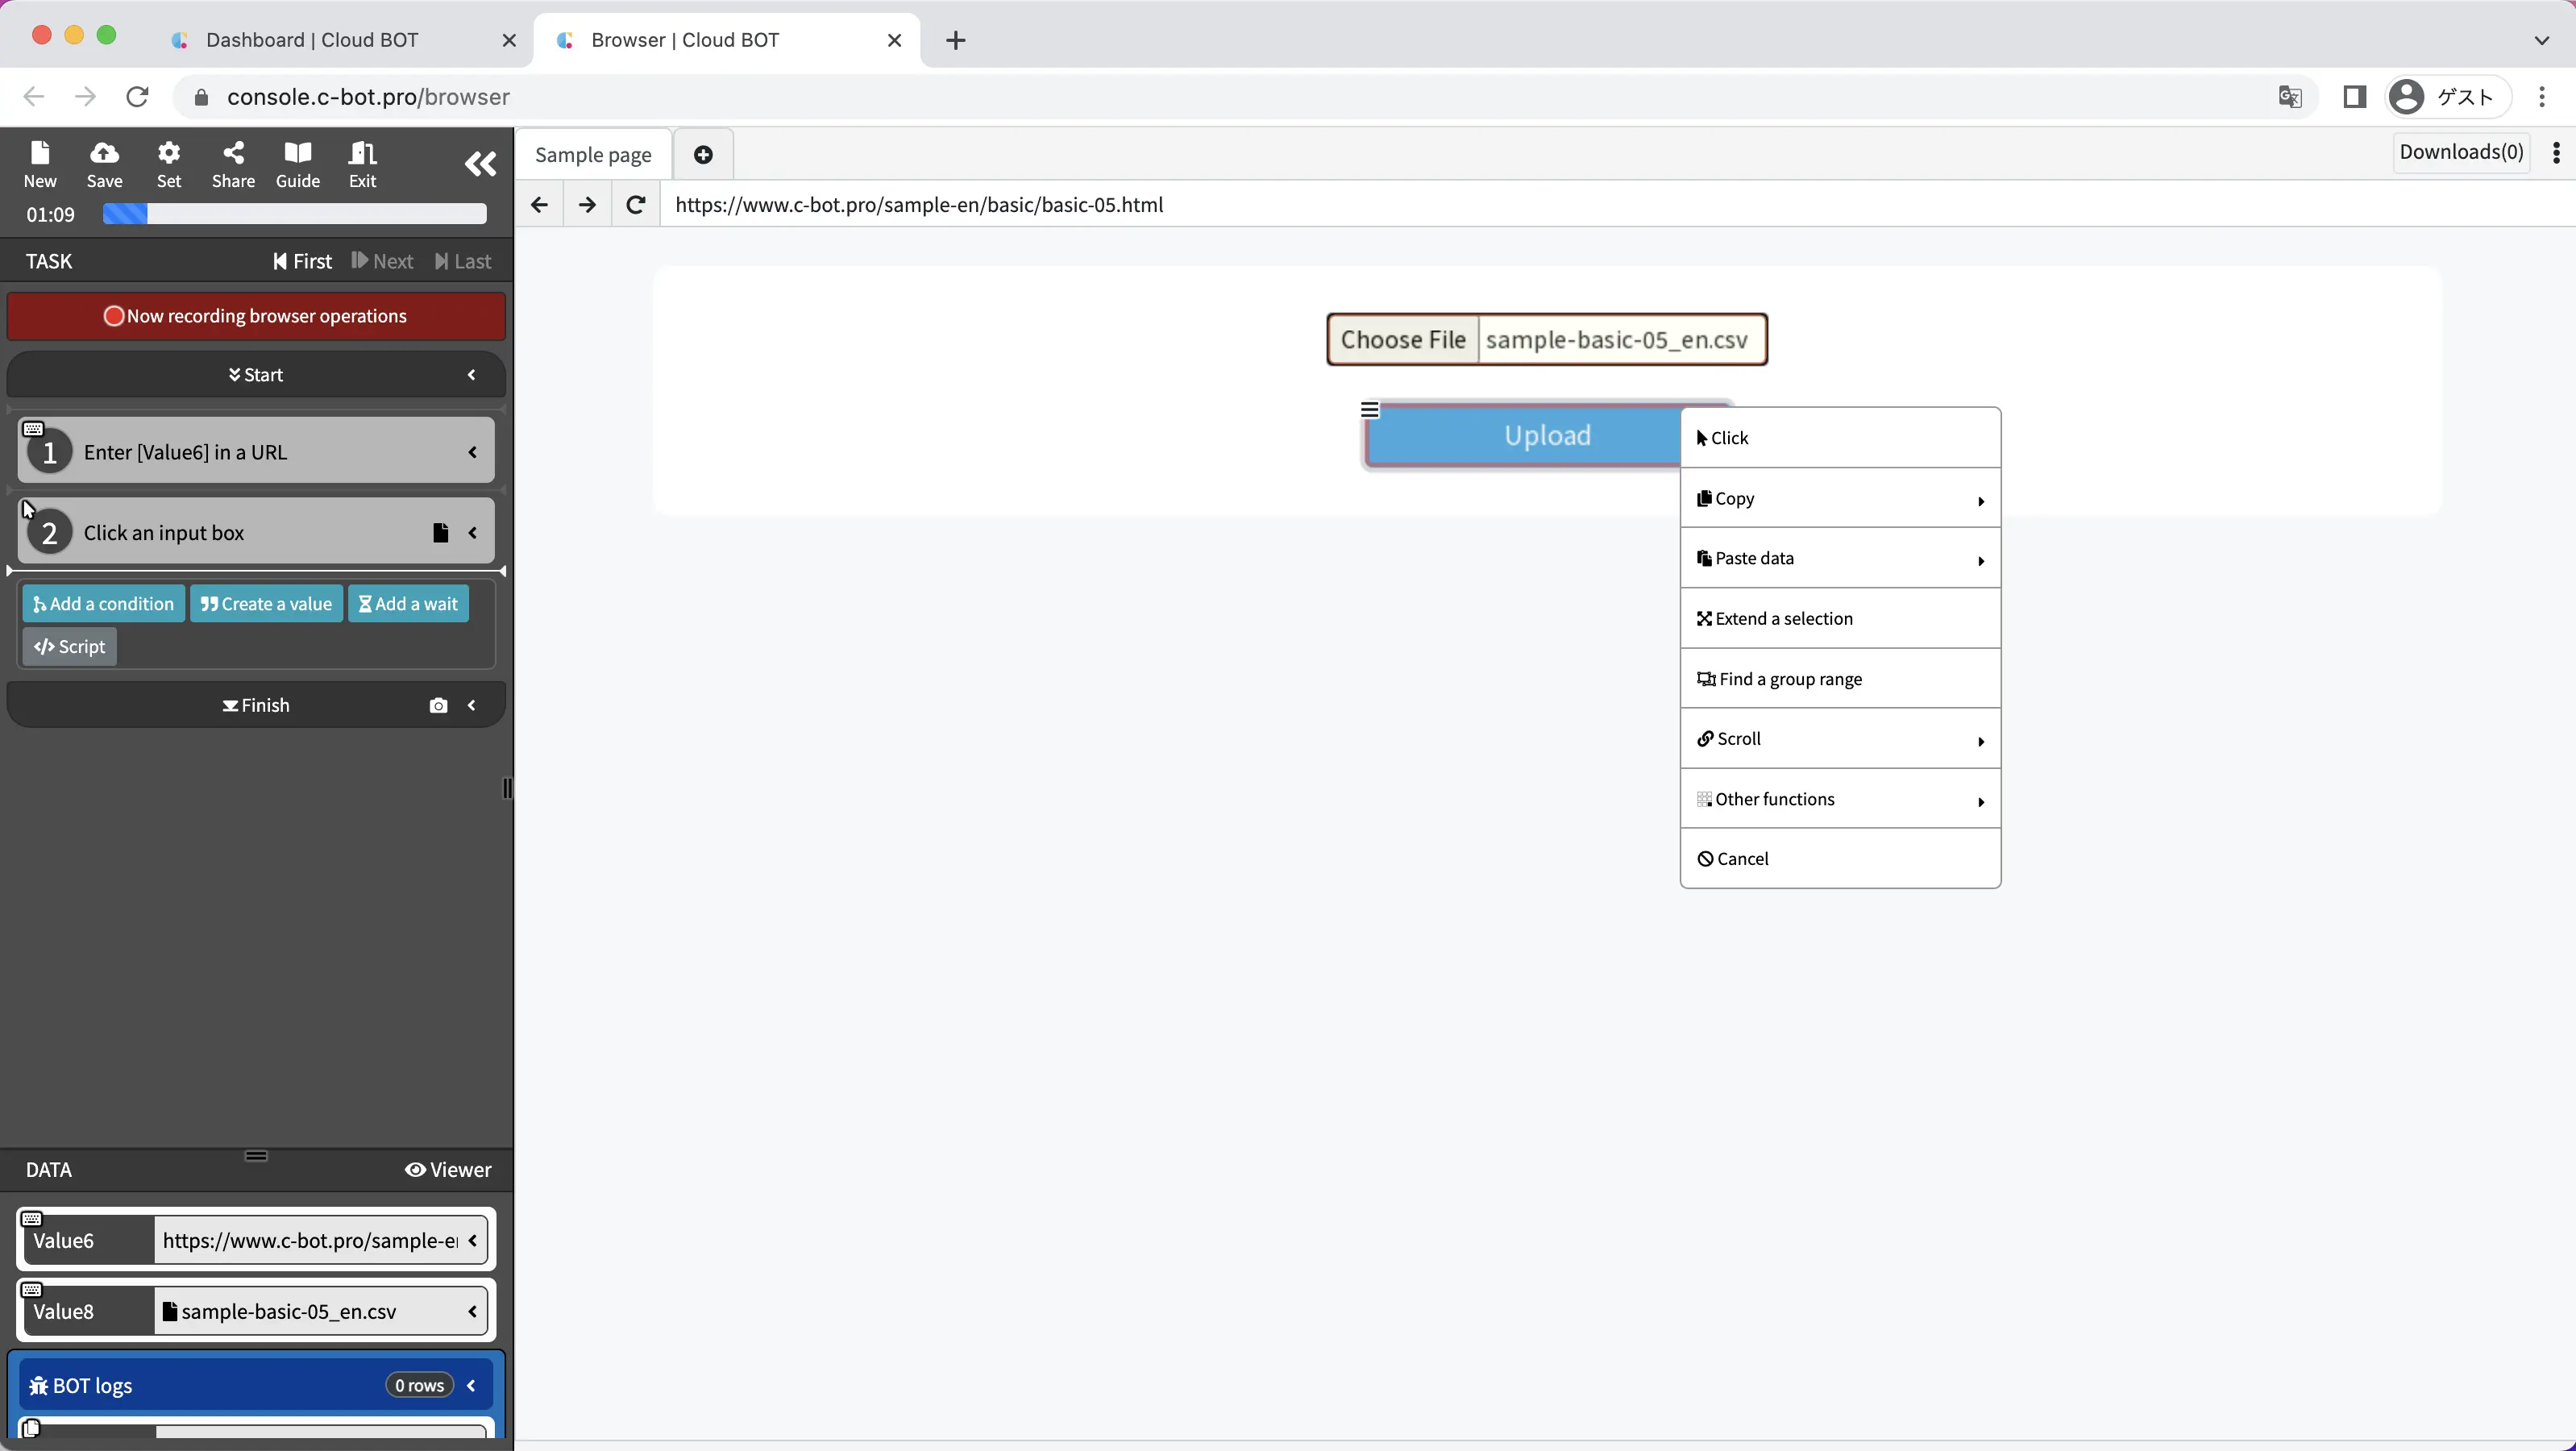
3. Record the operation to upload the file.
Click the "Record browser operations" button, and click the "Choose File" button.
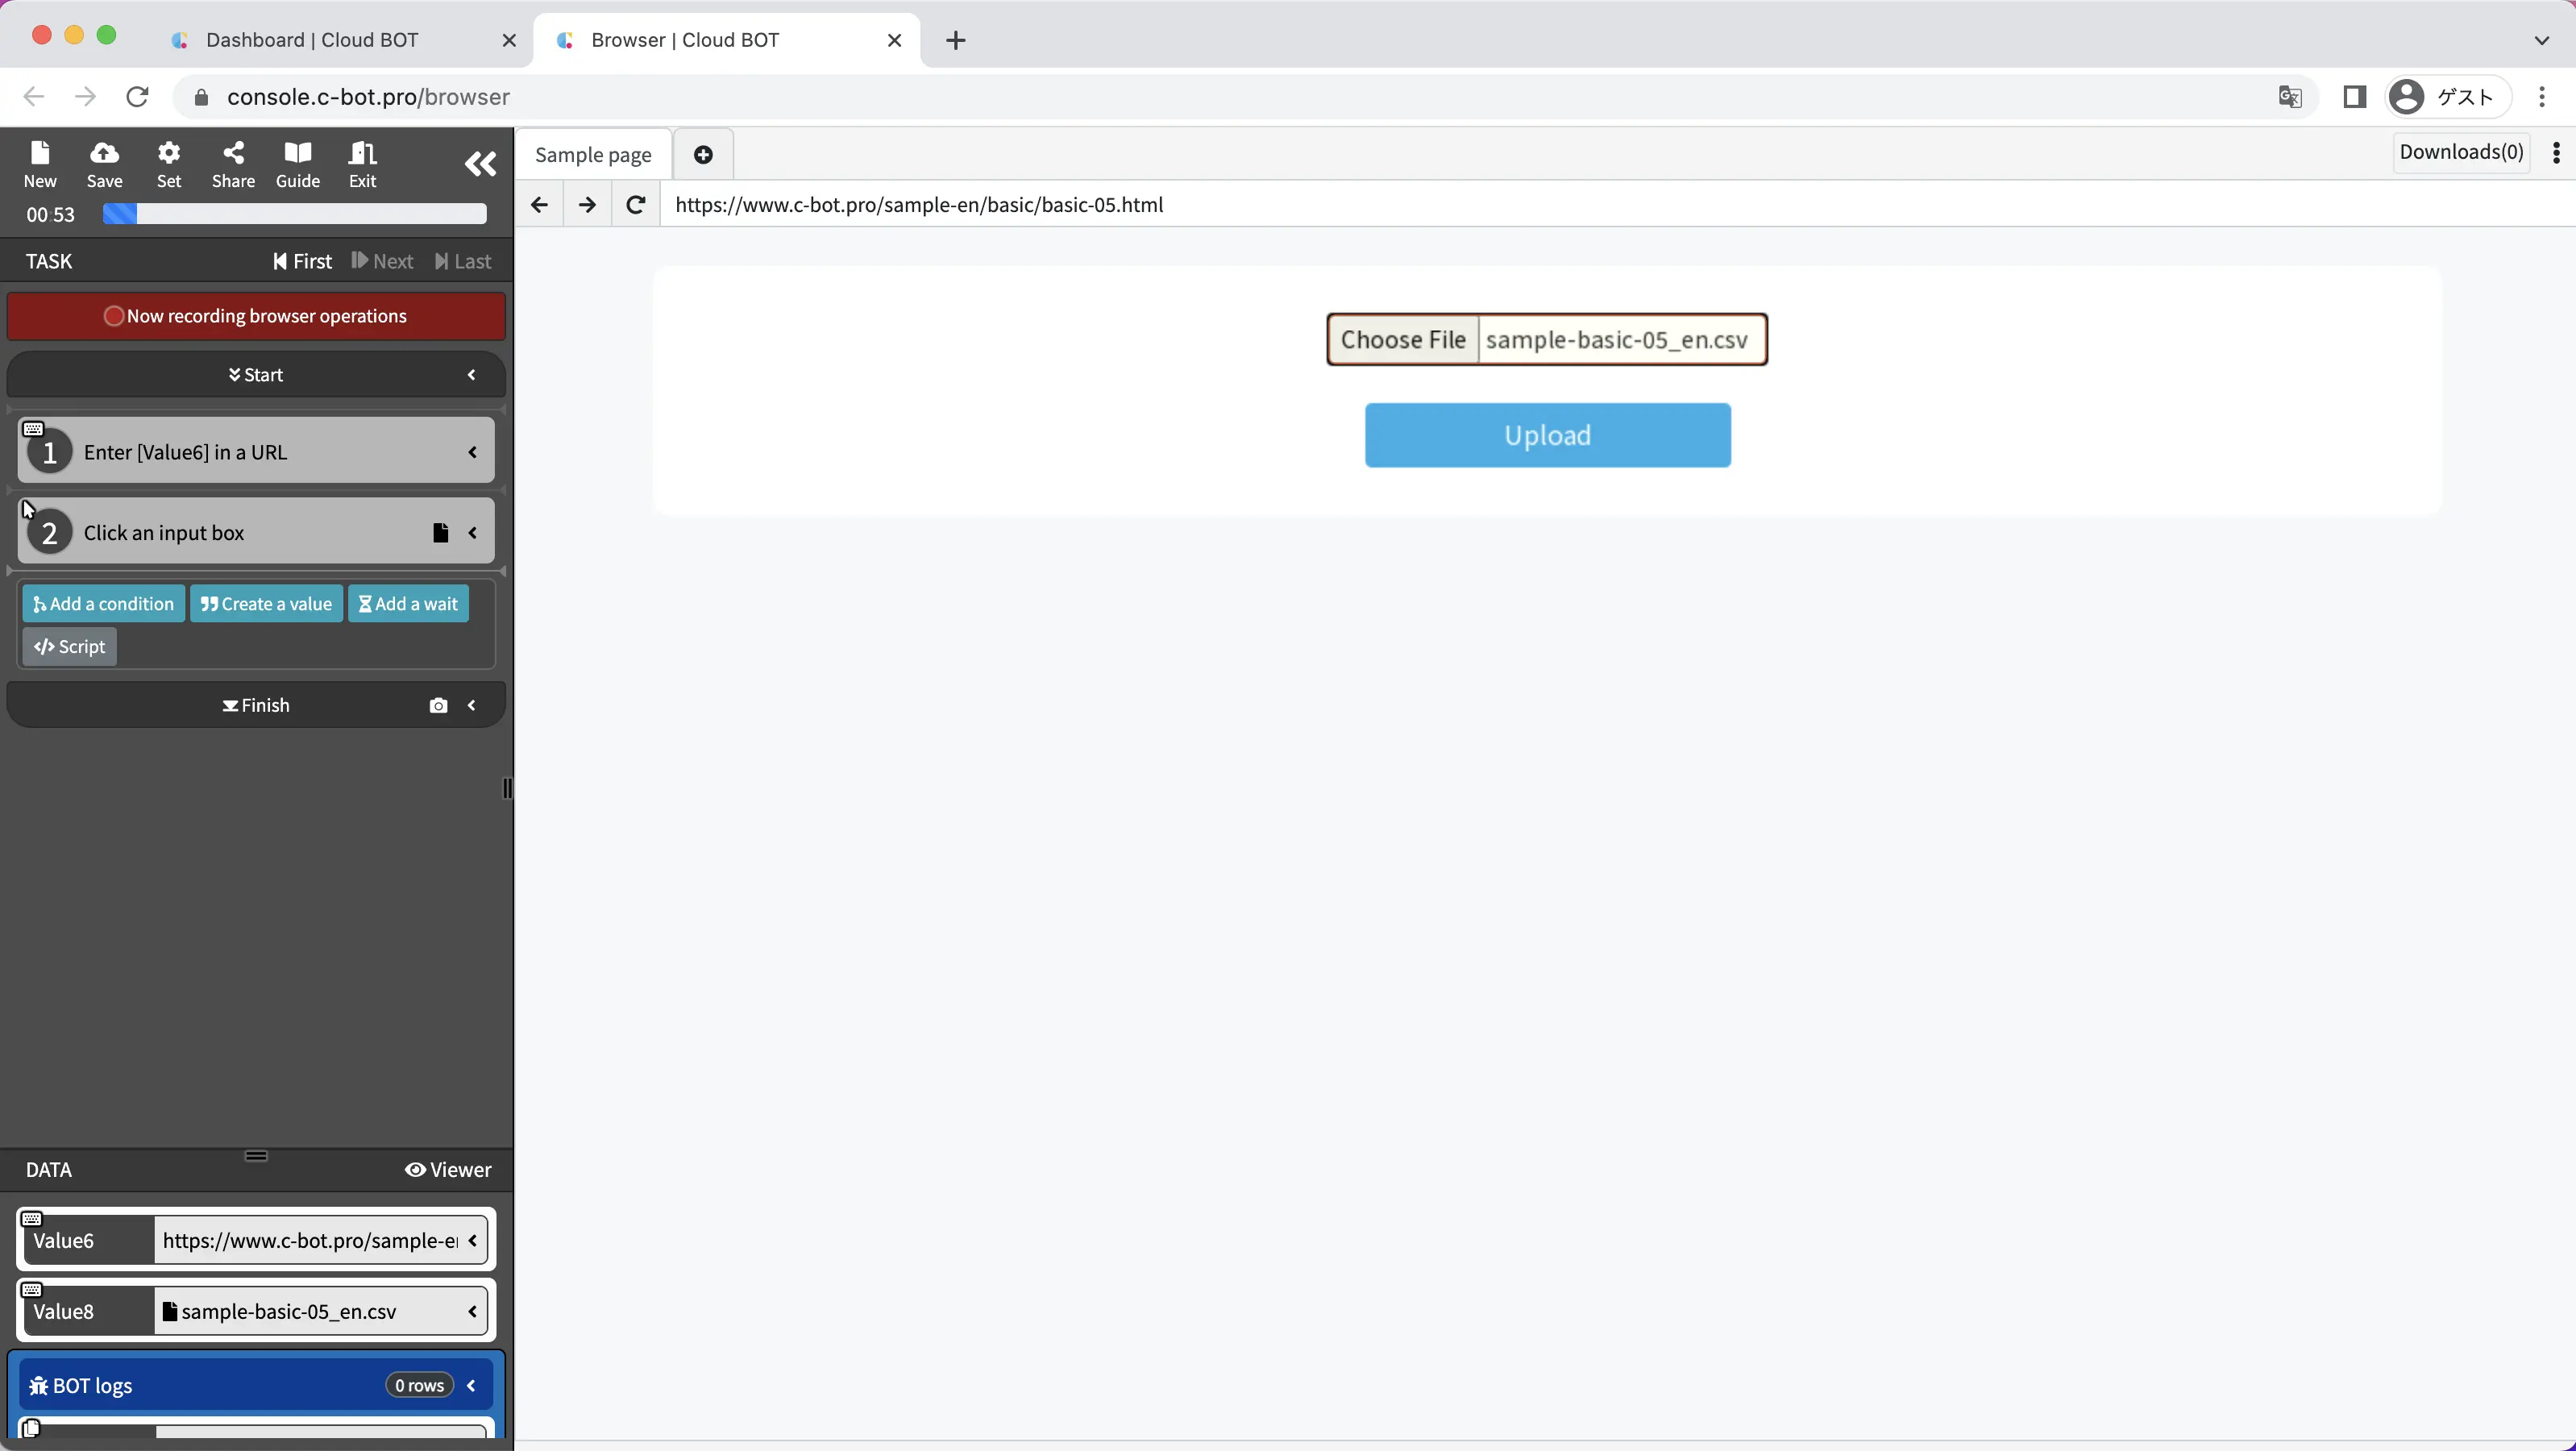
Click on the "Select File" button and upload the file downloaded in step 1 from your PC.
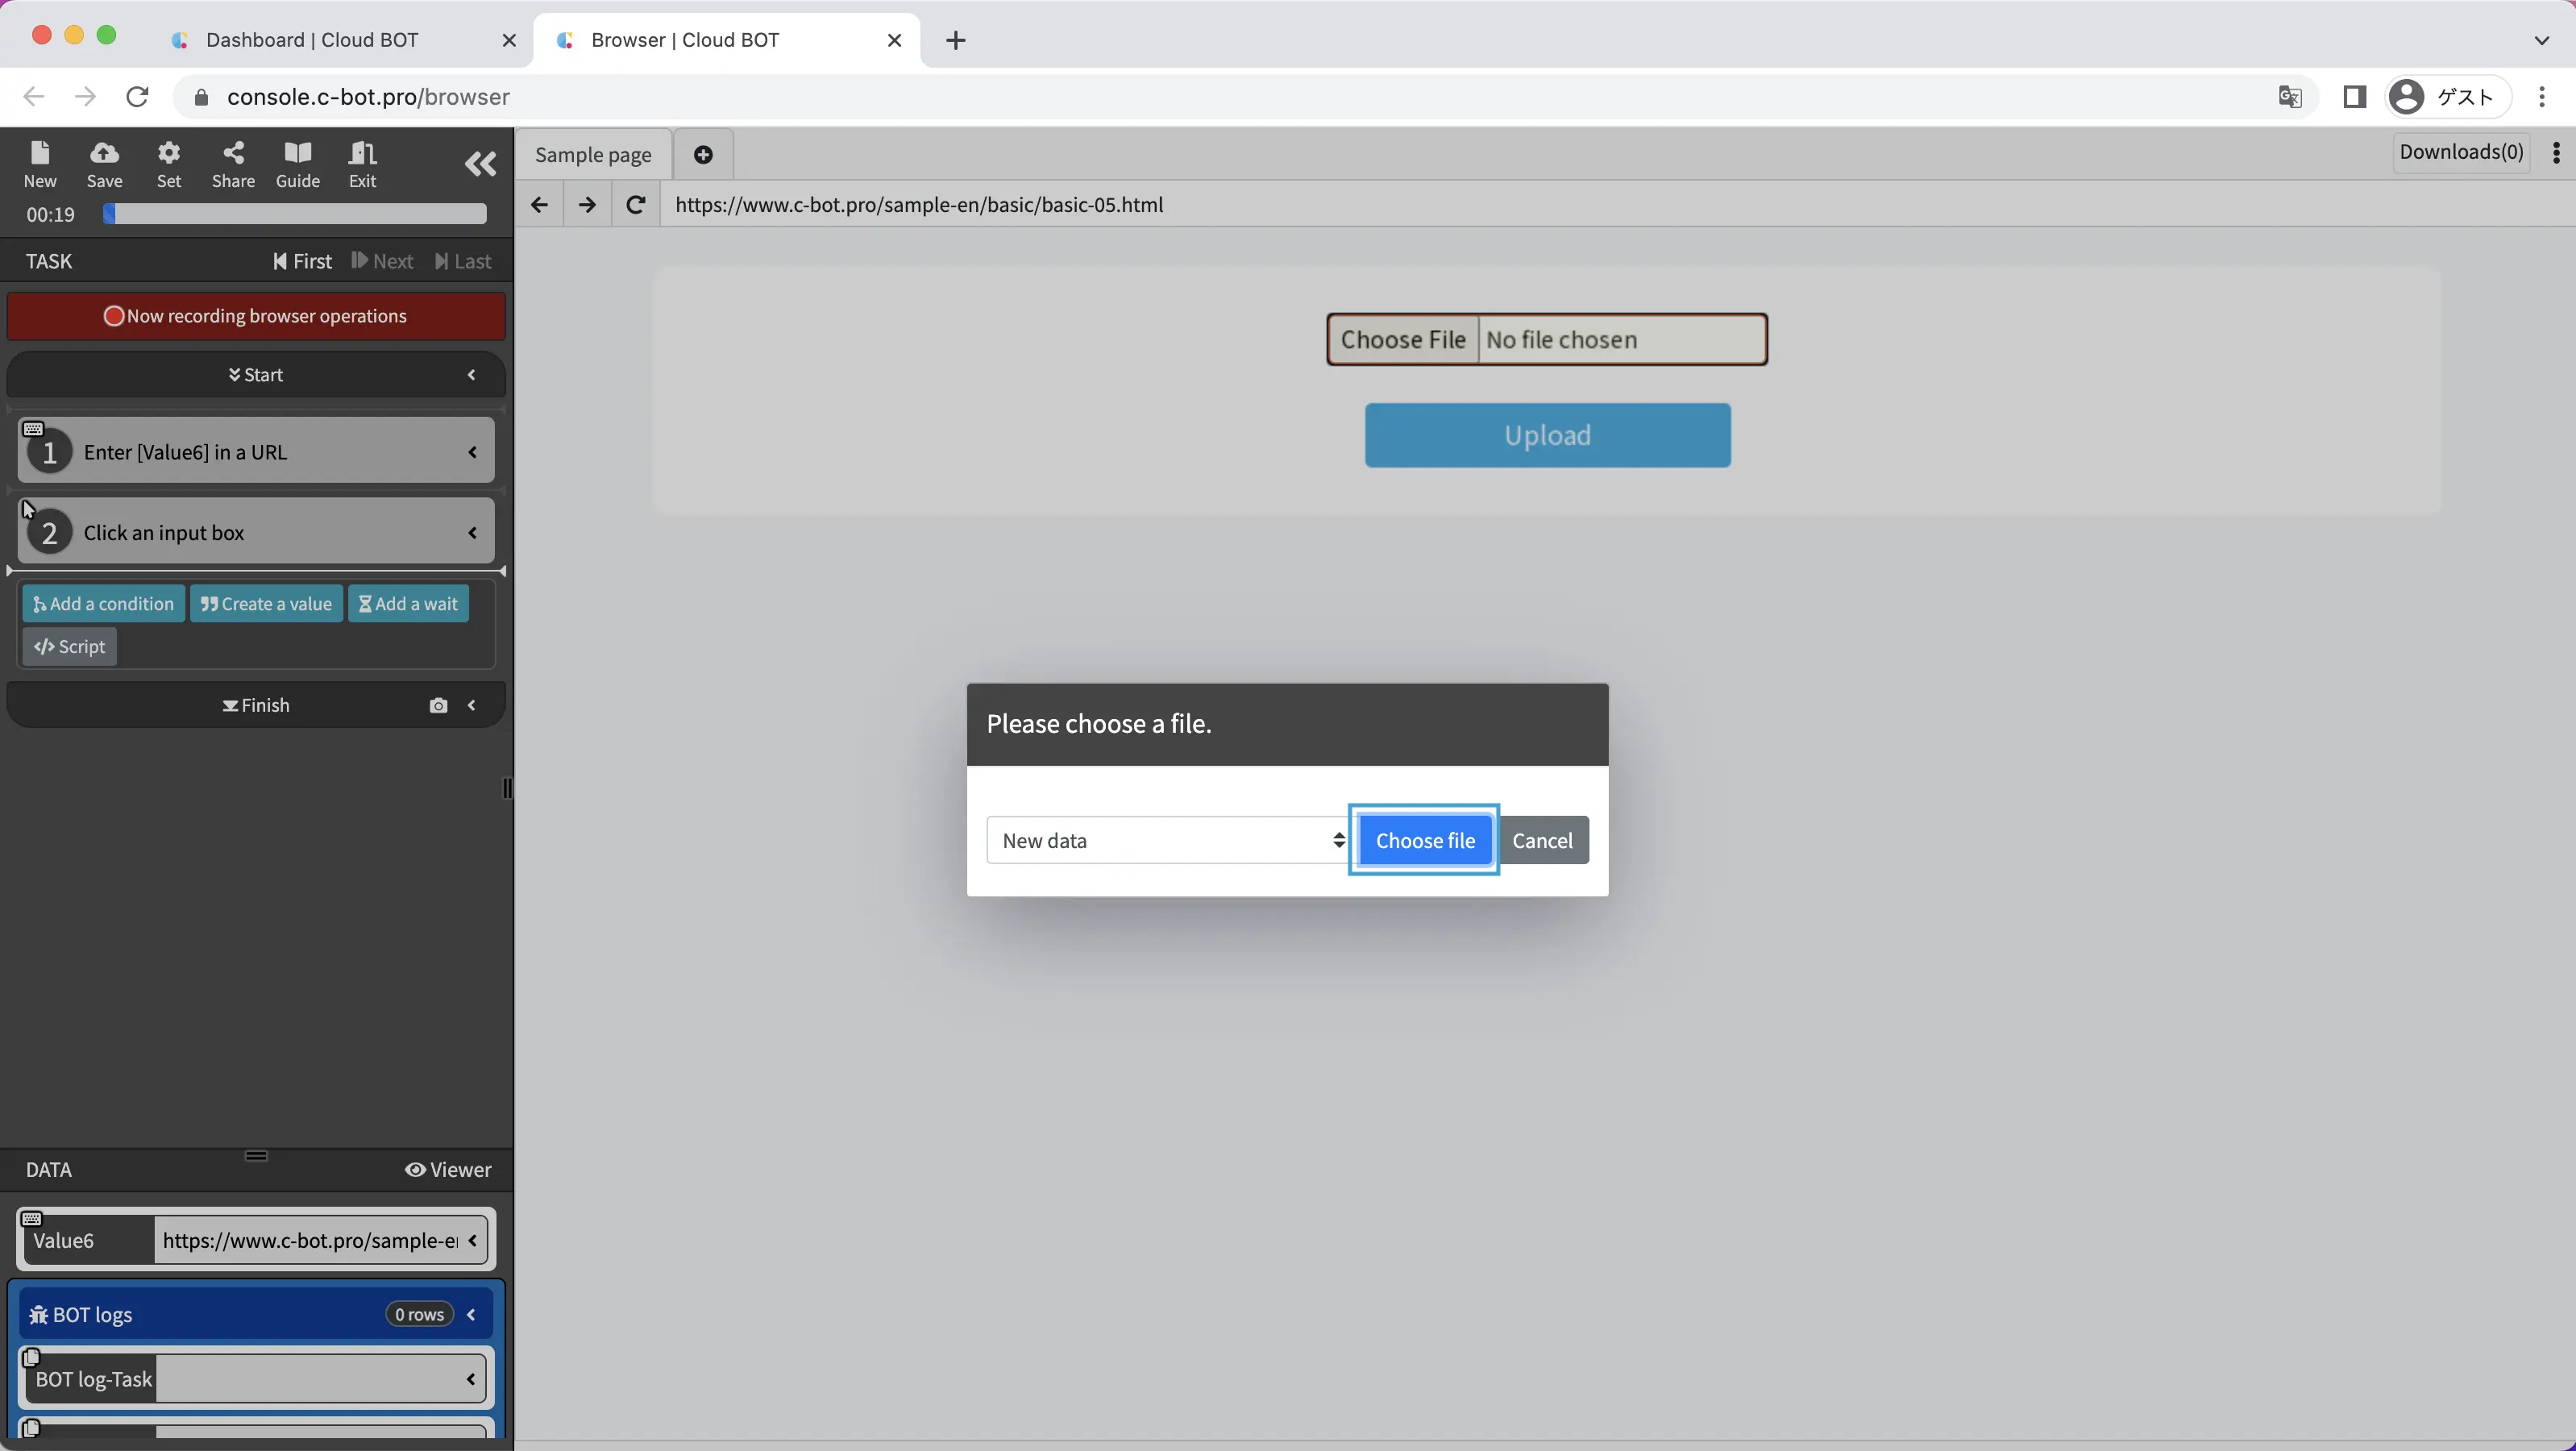
File referencing is completed and the uploaded file is registered as data for the BOT.
4. Record the operation of clicking a button
Record the operation of clicking the "Upload" button.
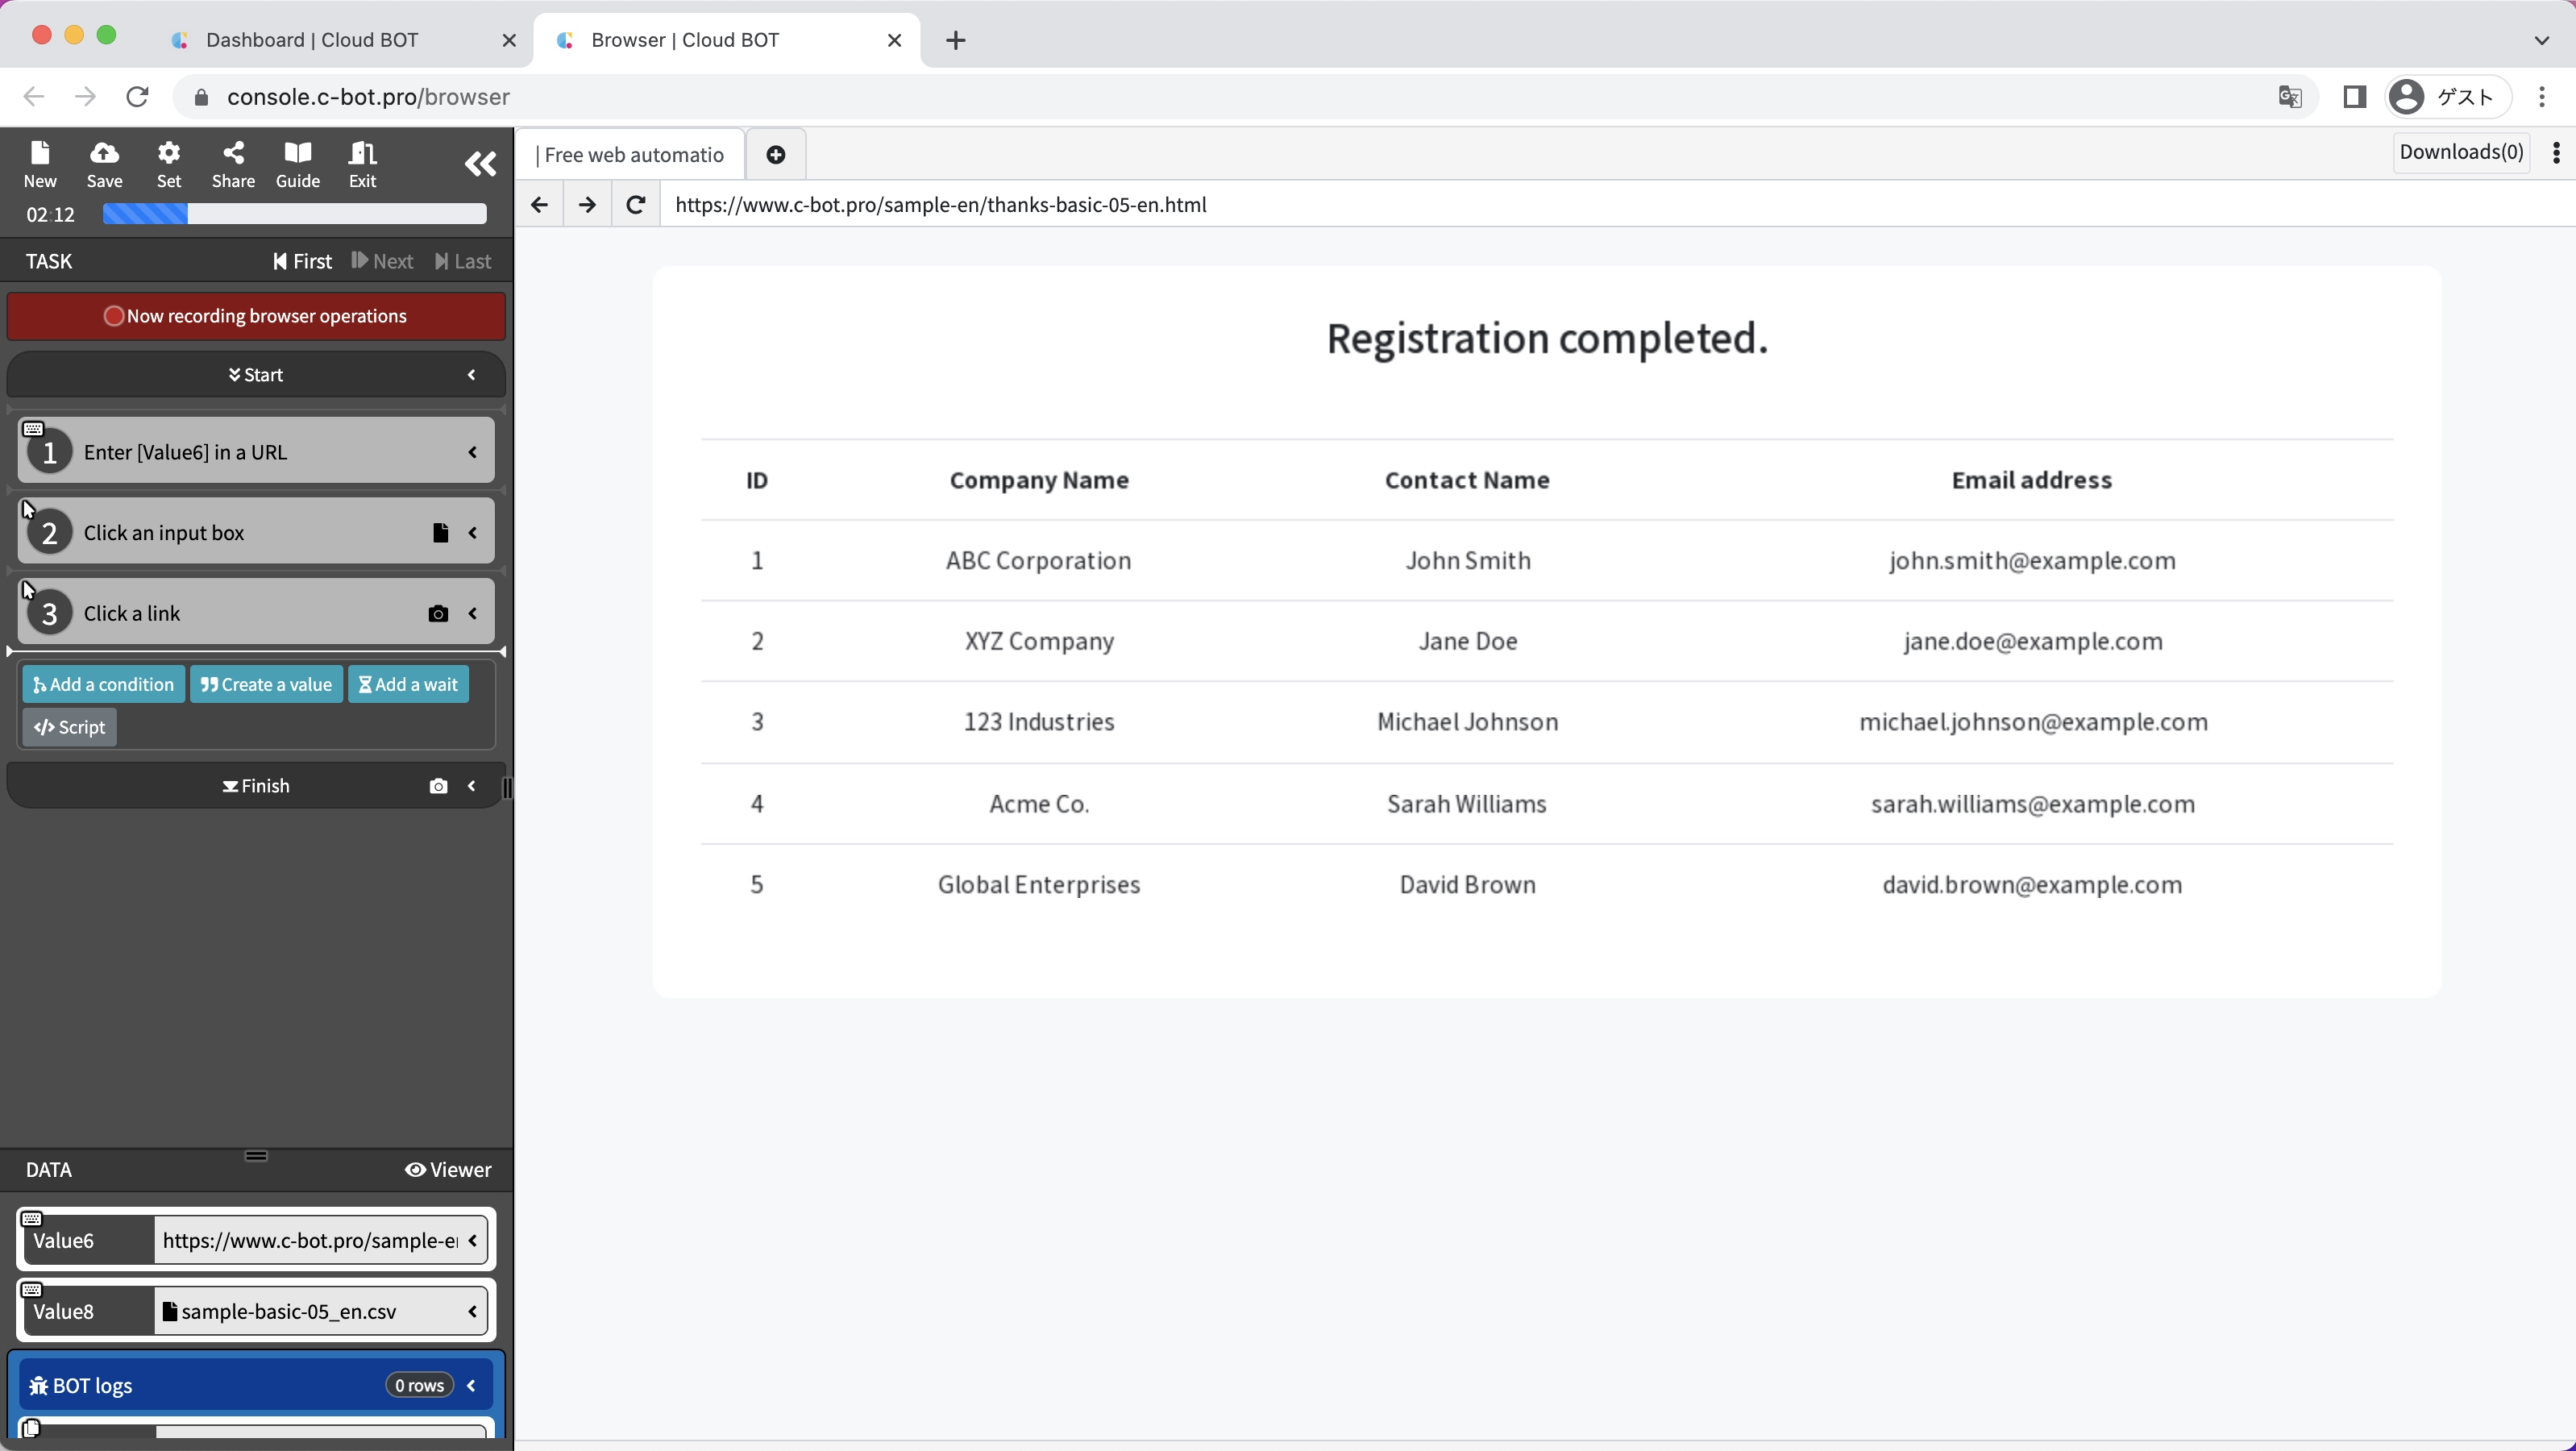
File upload is complete.
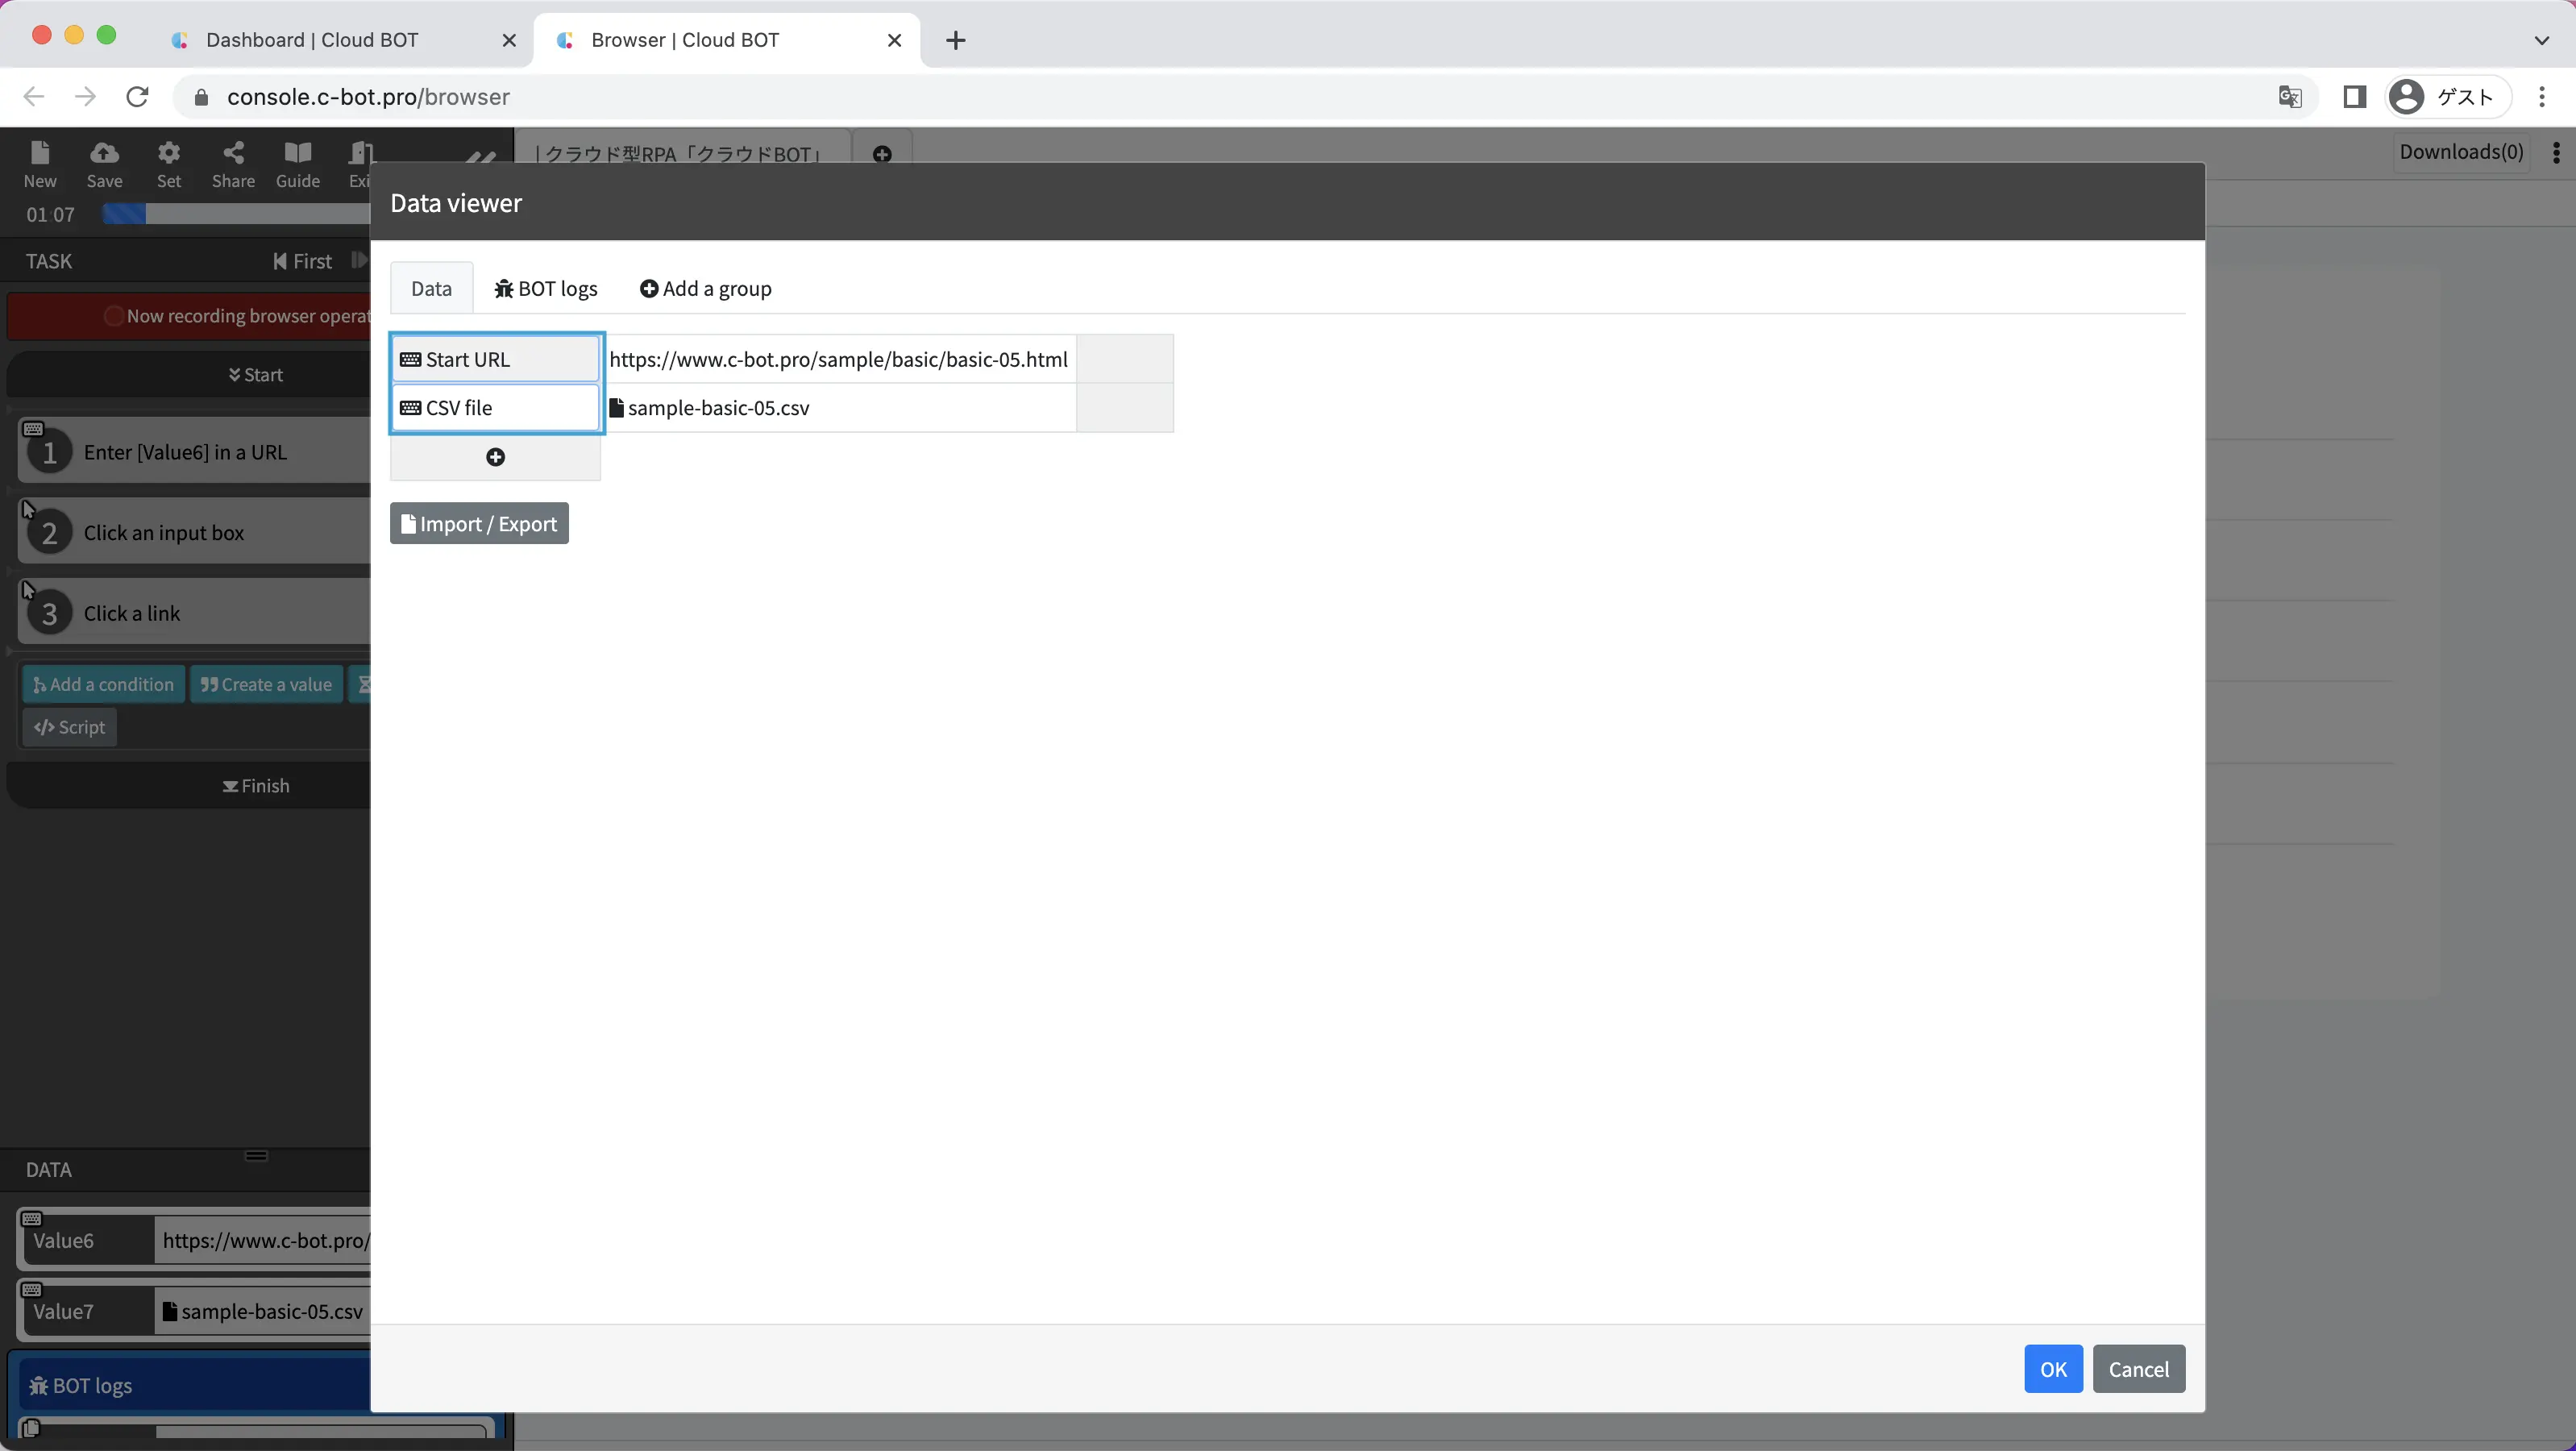
5. Change a data name
Change the data names as following.
"1st data" : Start URL
"2nd data" : CSV file
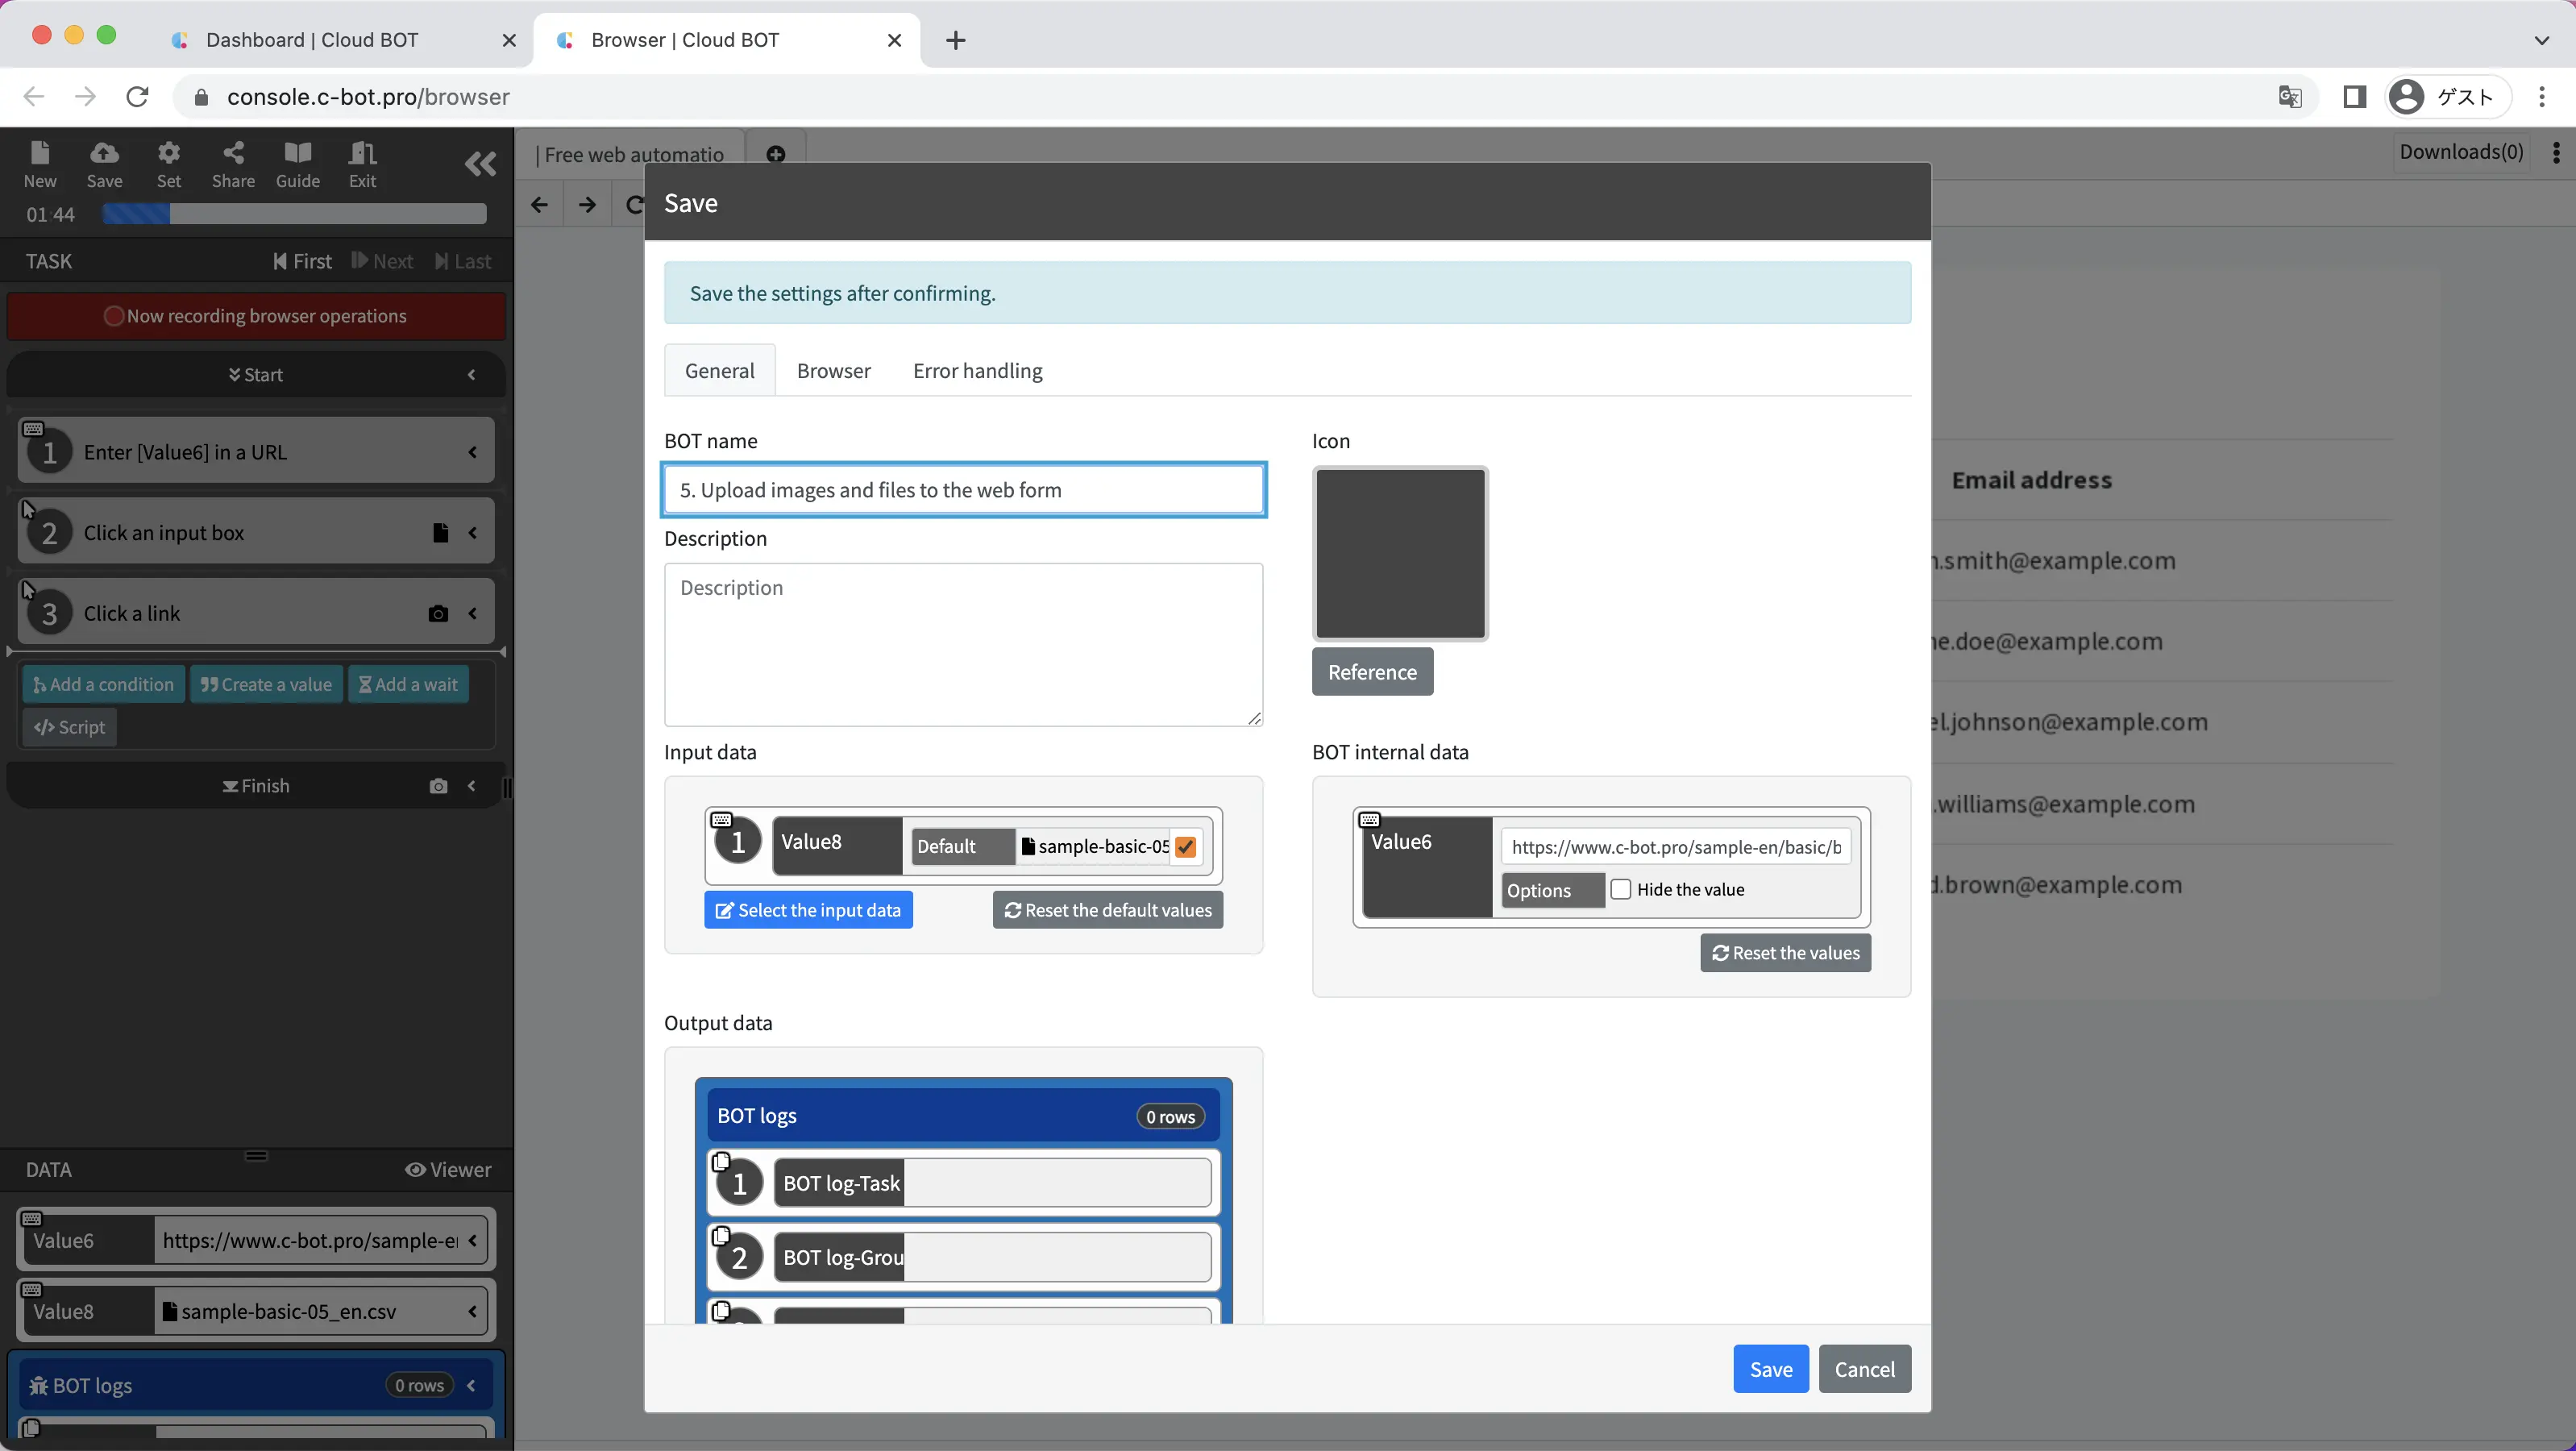
6. Save the BOT
Change the "BOT Name" to 1-5. Upload images and files to the web form.
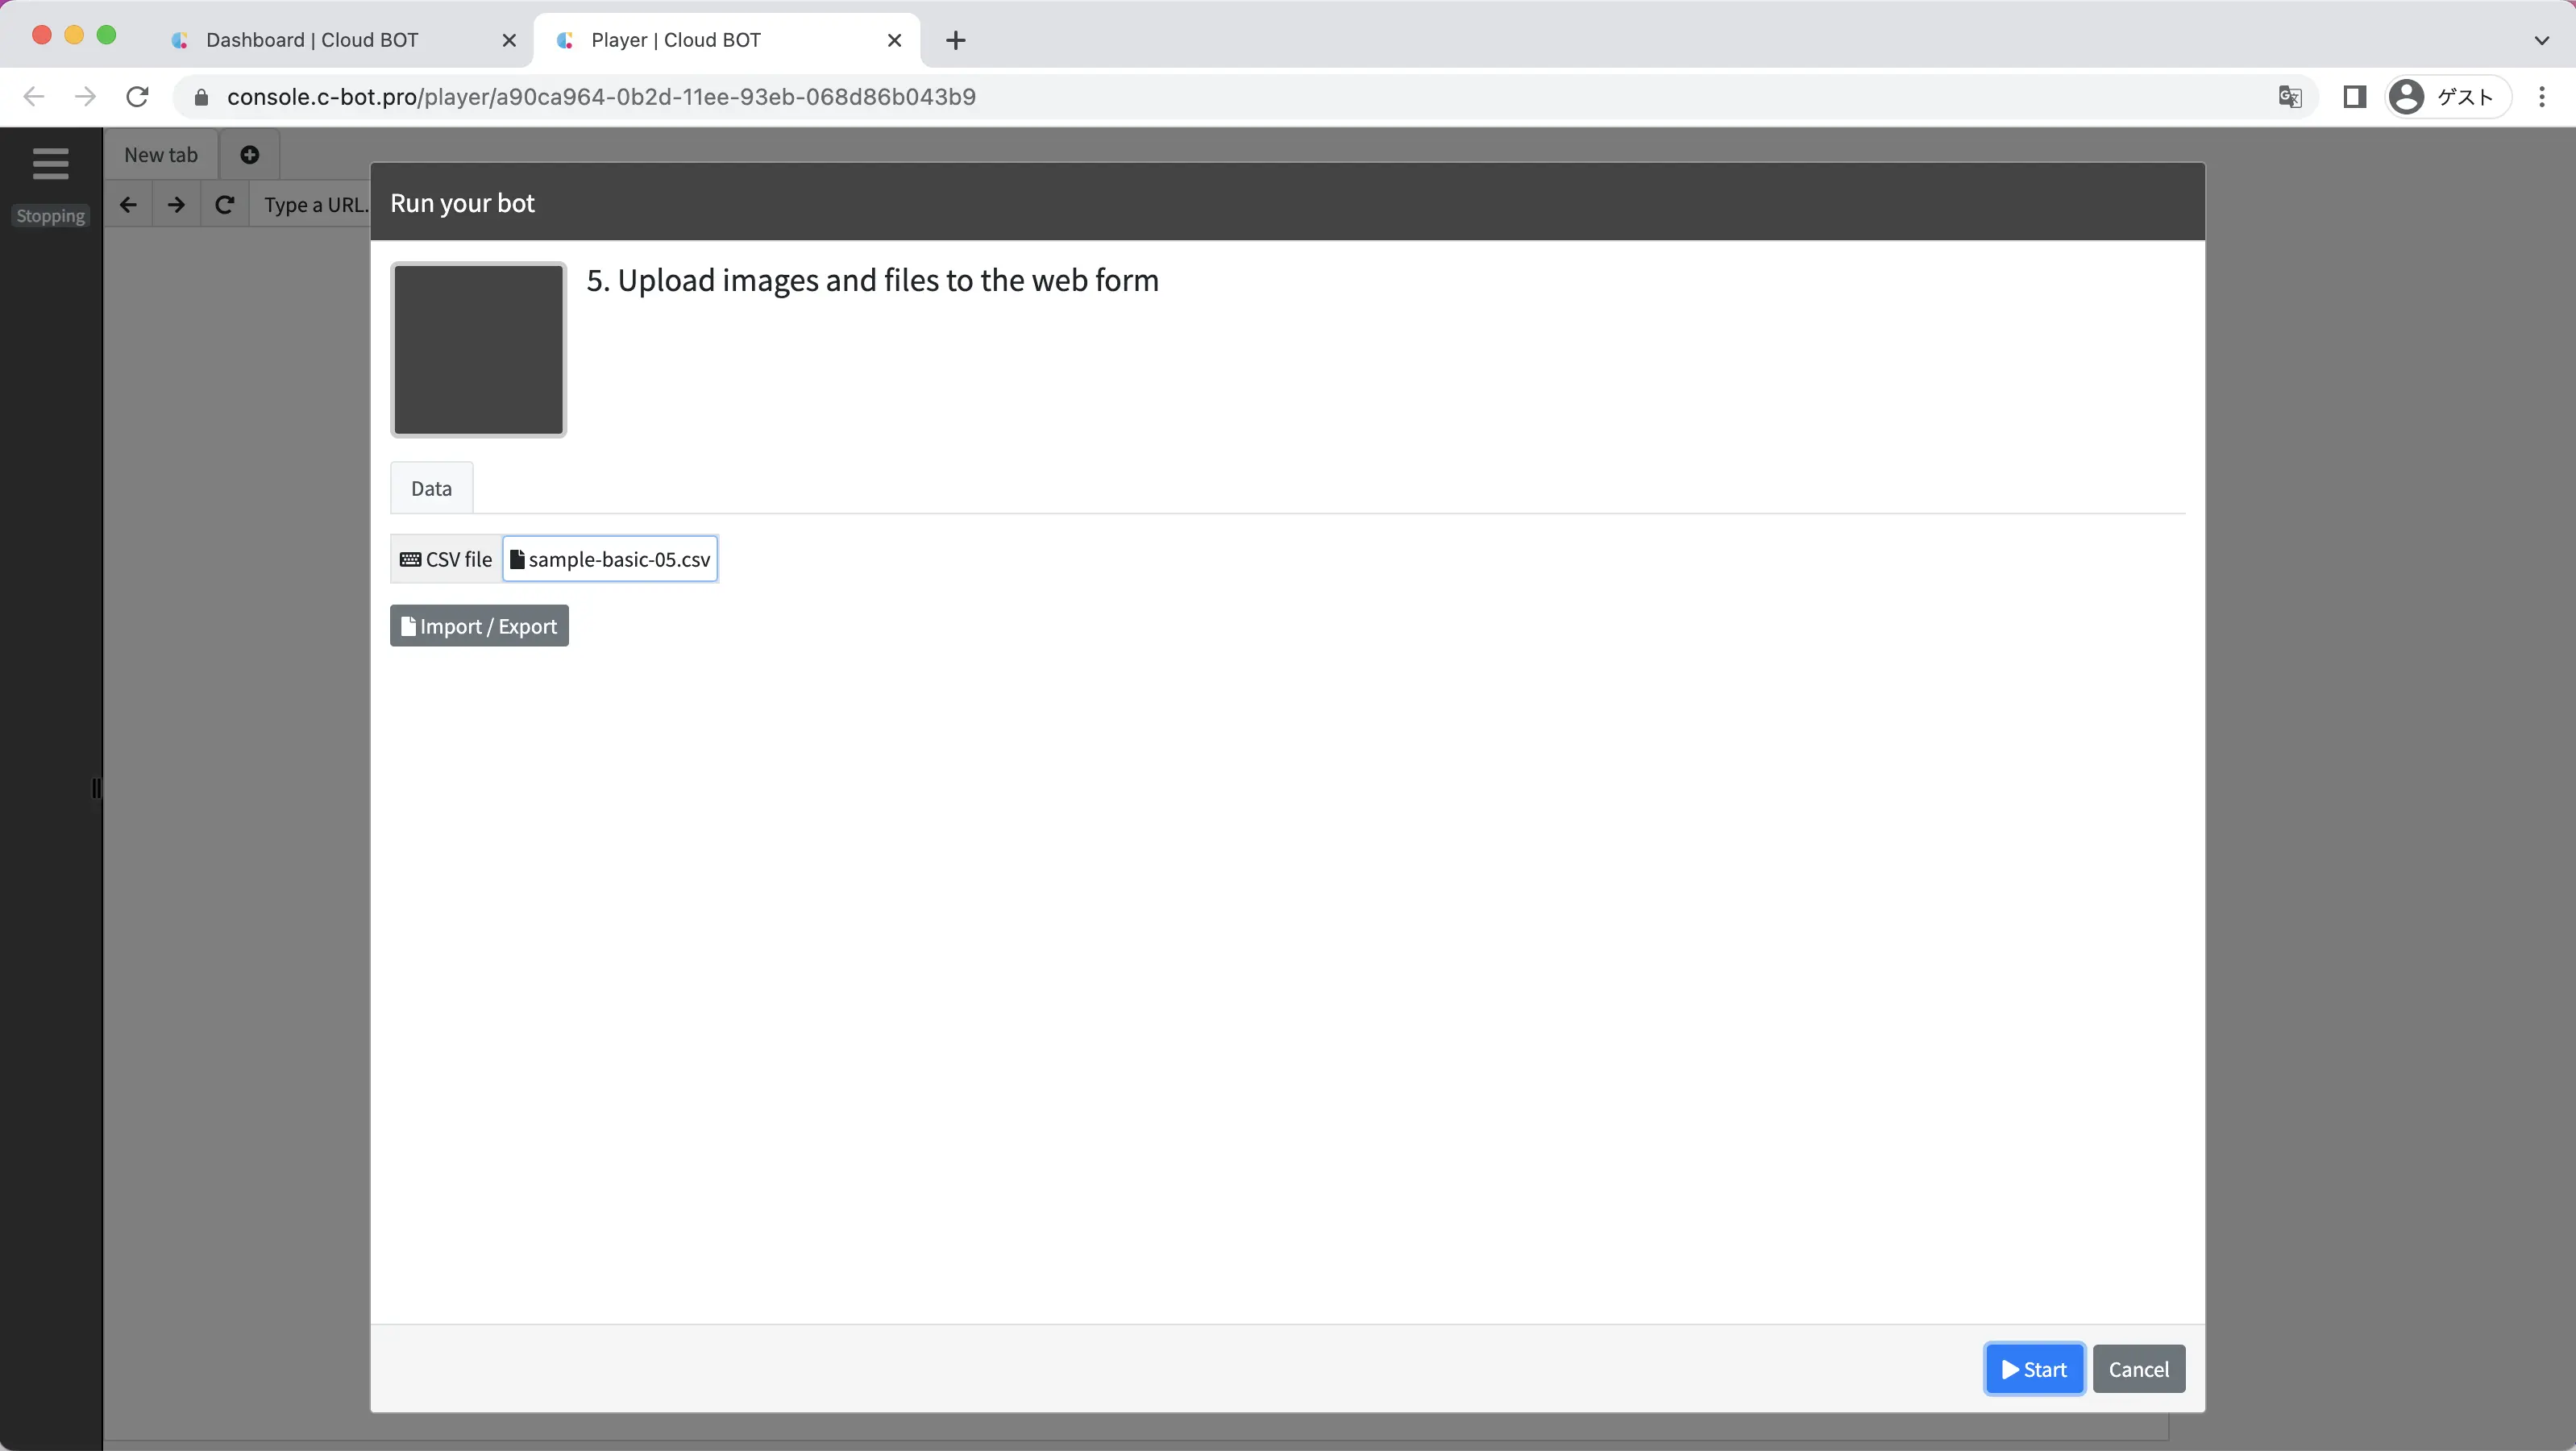
Execute a BOT
1. Execute the created BOT
Select the created BOT and execute the BOT from the execution screen.
On the execution screen, the file uploaded at the time of operation recording is specified by default.
By clicking on the file name, you can re-select another file from local and execute the BOT.
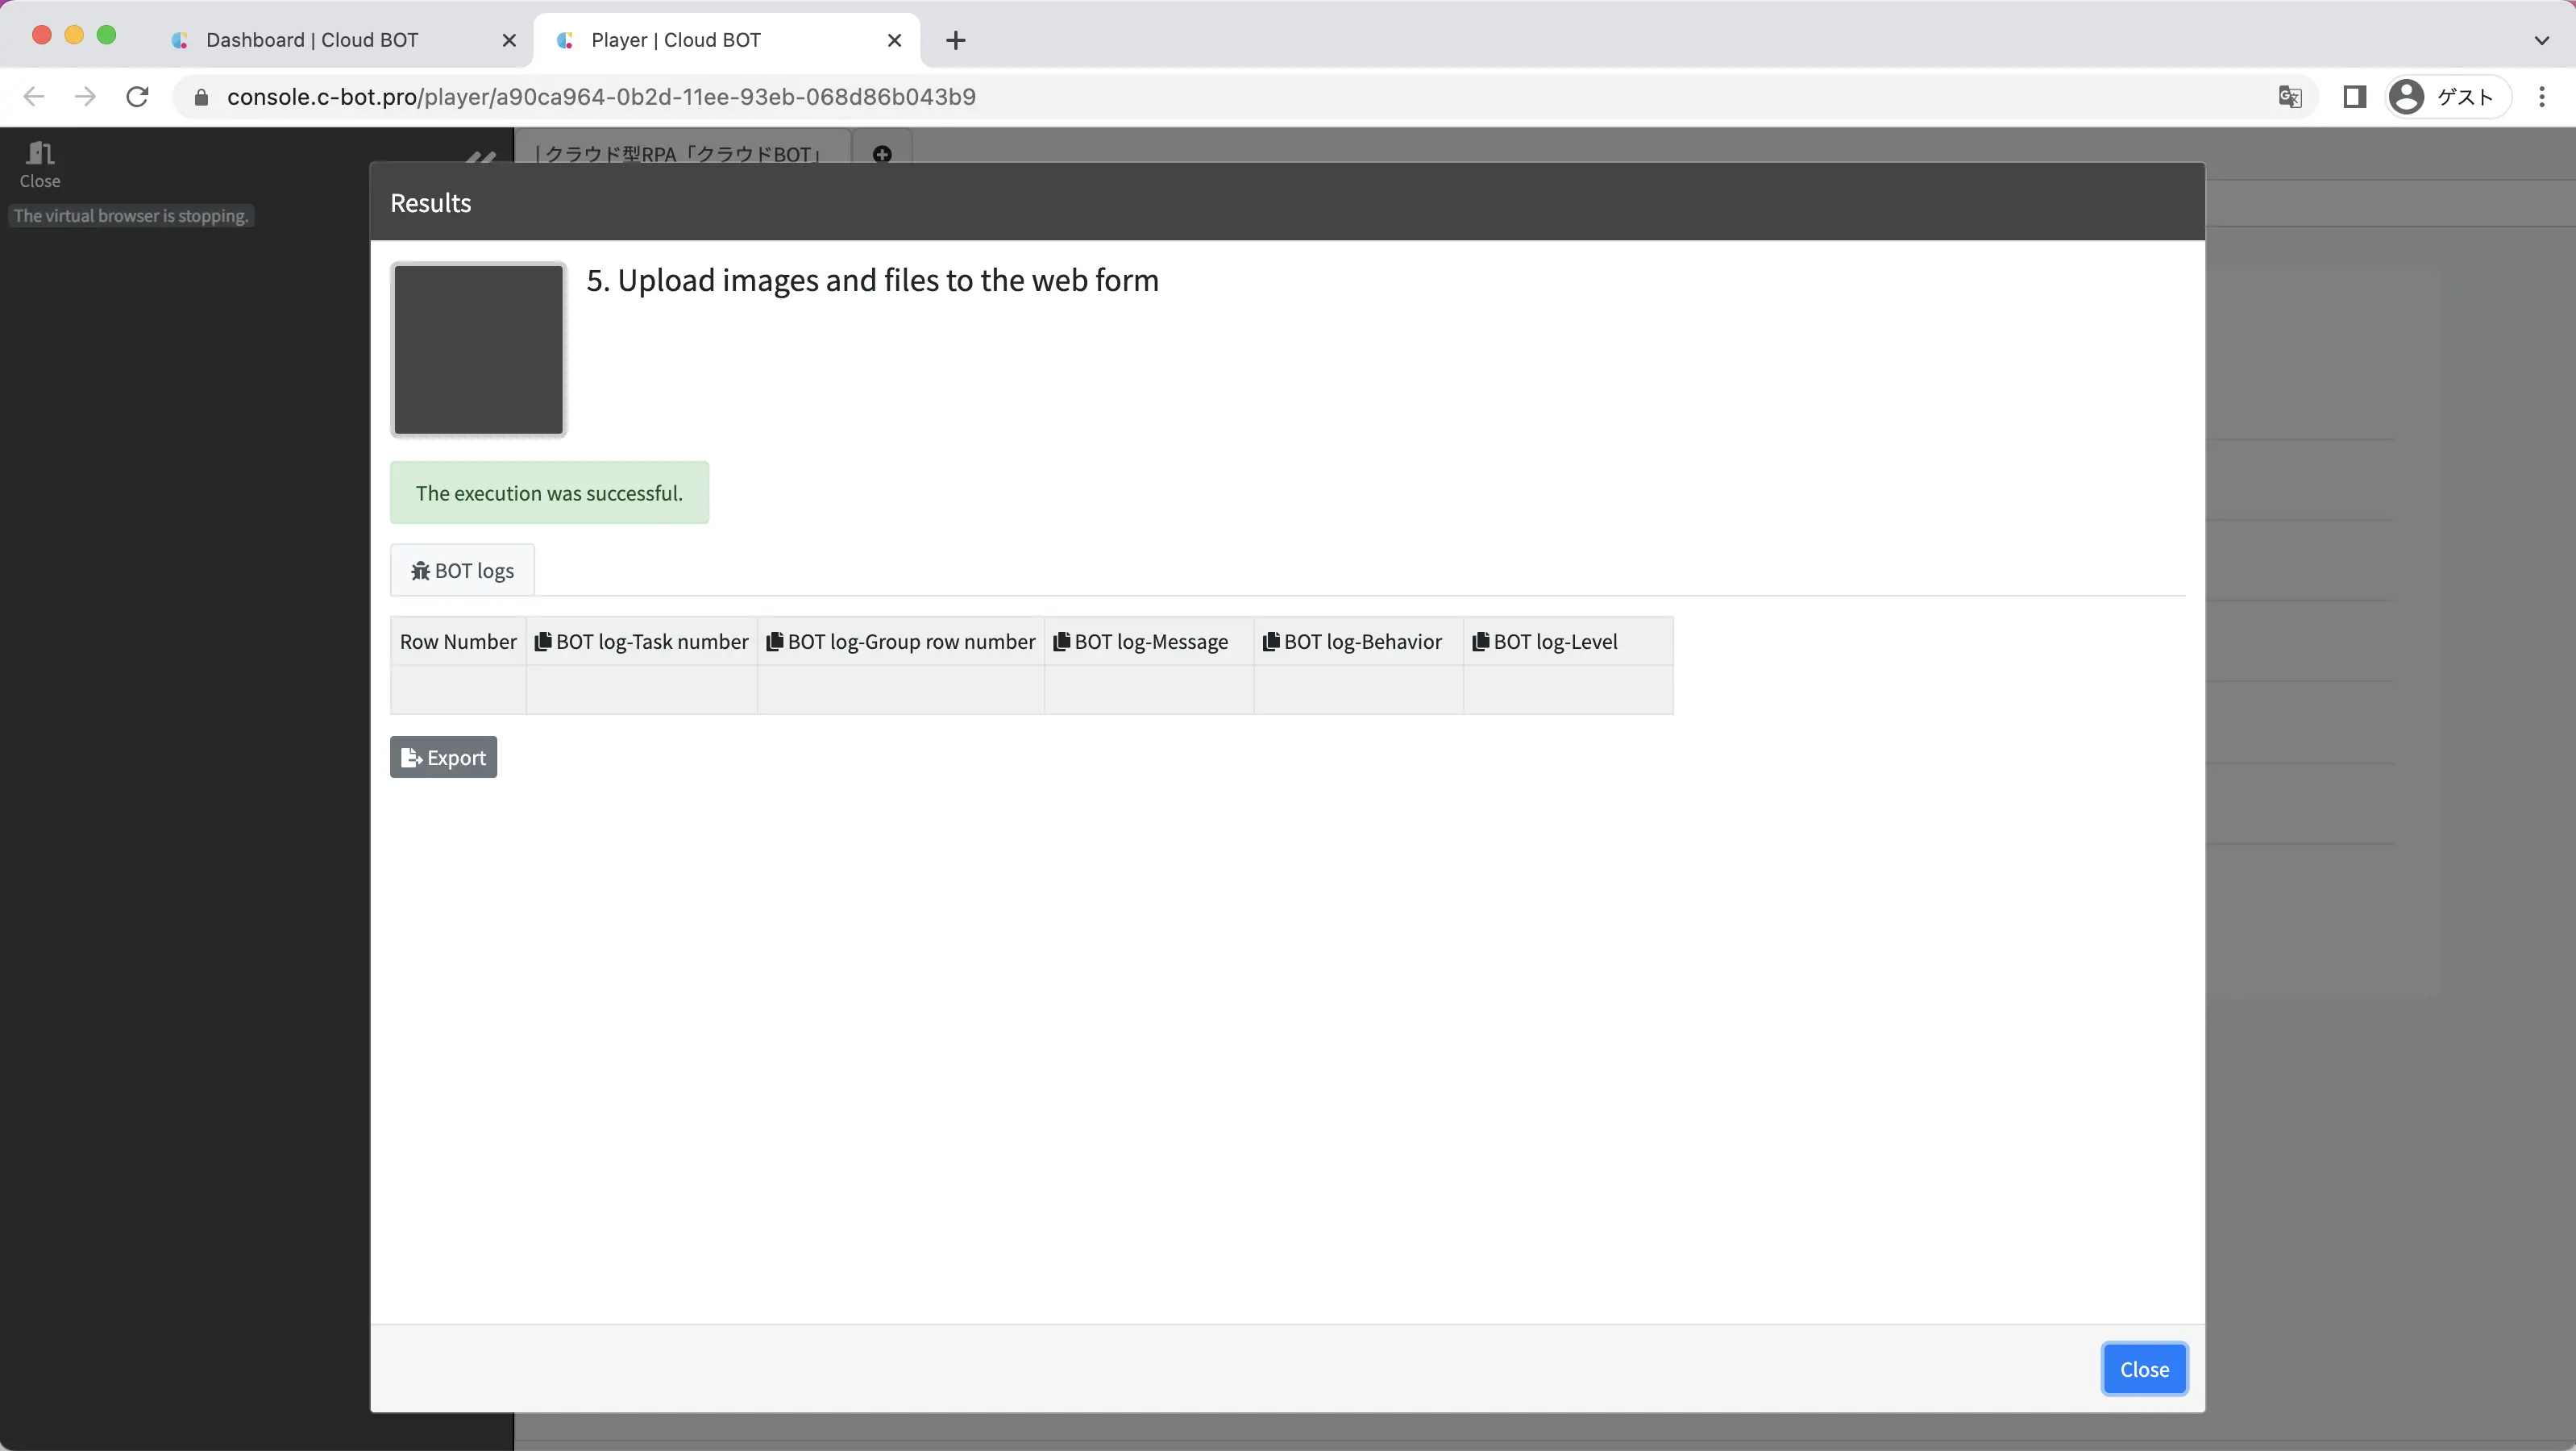
When the BOT execution is completed, the execution result will be displayed.
It is completed if "The execution was successful." and the acquired data is displayed.
This concludes the tutorial “1-5. Upload images and files to the web form”.
Go to the next tutorial >> 1-6. Upload files downloaded from a web page to another web page